Create an Azure Virtual Machine with Multiple NICs
Overview
Last week I was in a class where we needed the following Azure Virtual Machines configured:
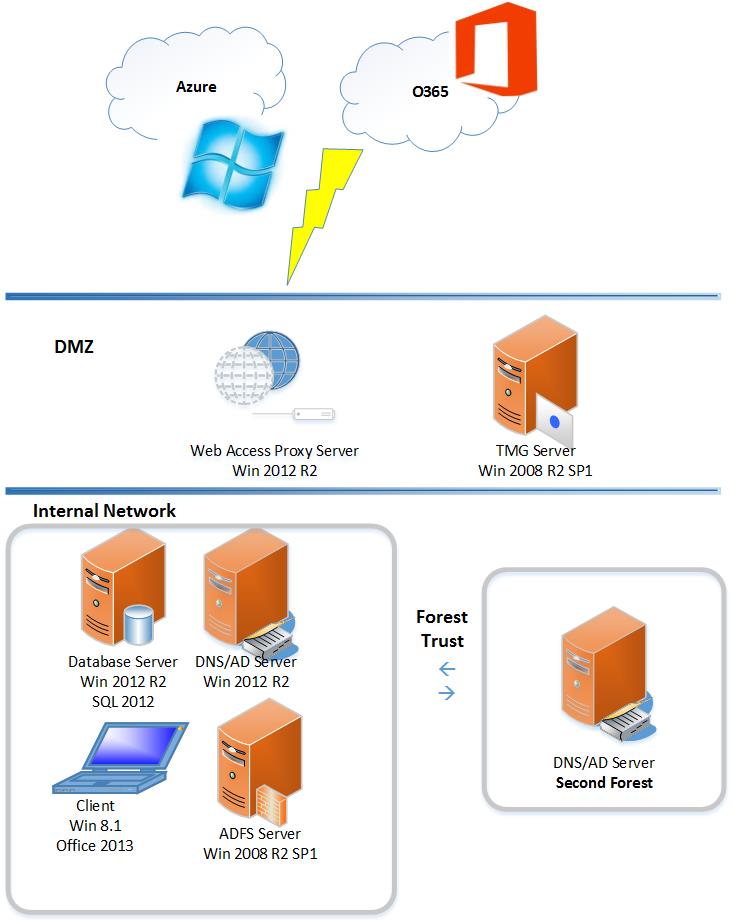
There were pre-requisites that needed to be done prior to the class that kept tripping me up. The main issue I had was getting the TMG server configured with 2 NICs. In Azure, you cannot create a VM with 2 NICs via the GUI – the VM has to be created using PowerShell.
Researching found a few posts on how to accomplish this but, once again, there were issues with the posts that didn’t work for me. These are the ones I started with:
https://www.petri.com/configure-multiple-nics-in-an-azure-virtual-machine.htm
https://msdn.microsoft.com/en-us/library/azure/dn848315.aspx
As a Microsoft employee, I am able to use the Visual Studio Ultimate with MSDN Azure subscription. Keep in mind I am NO expert in Azure but I hope this helps others who are just starting out. Also, while all of this could be done via PowerShell, I decided to use both the Azure GUI and PowerShell so one gets experience with both.
Set up the environment in Azure
Configure Networks
- Launch Azure (https://manage.windowsazure.com) and log in with your account
- On the left side, scroll down and select Networks
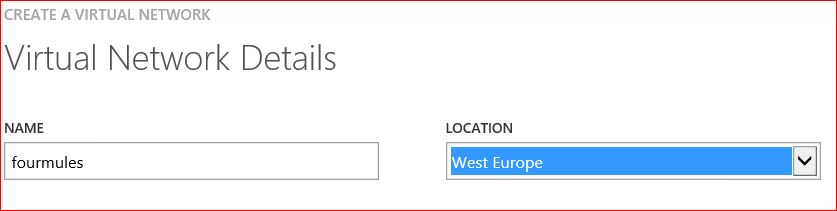
- Create a virtual network choose the network name and the location closest to you
- Since I don’t have a DNS server created yet, click Next on the DNS Servers and VPN Connectivity tab.
- On the Virtual Network Address Spaces select the Address Space, modify the settings as required. Add a subnet and configure it as well. The following screenshot shows how I configured mine.
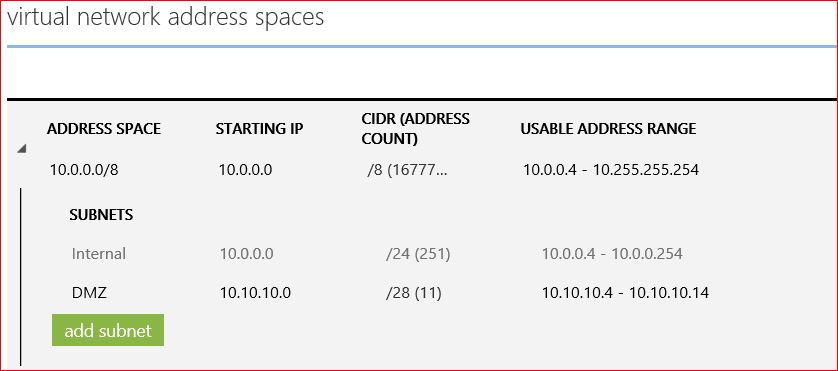
- Note the names of the subnet and the IP addresses as you will need these later
Configure Storage Account
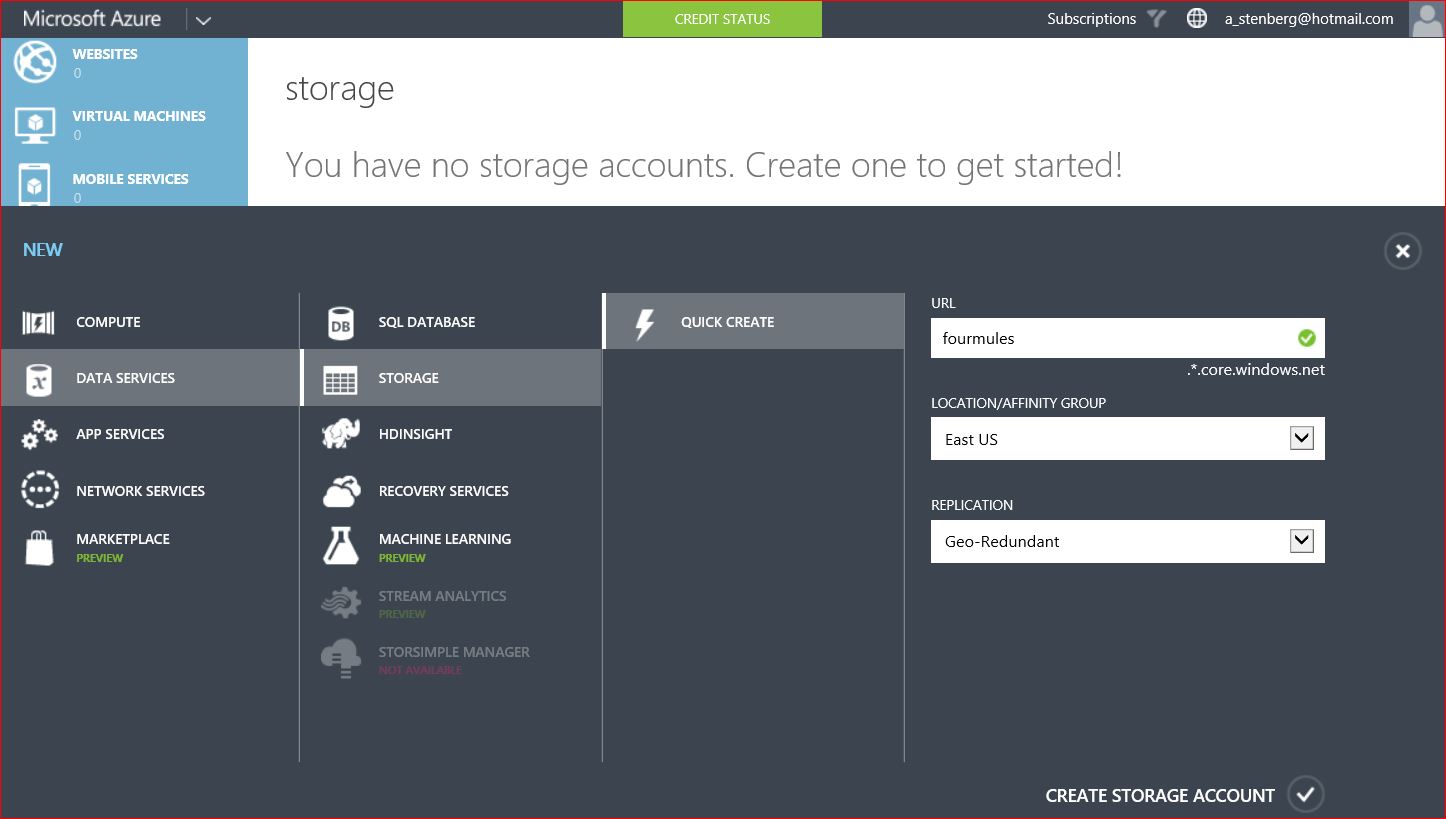
- In Azure, on the left side scroll to Storage and Create a Storage Account
- Type a name for the URL, select the Location/Affinity Group, and Replication
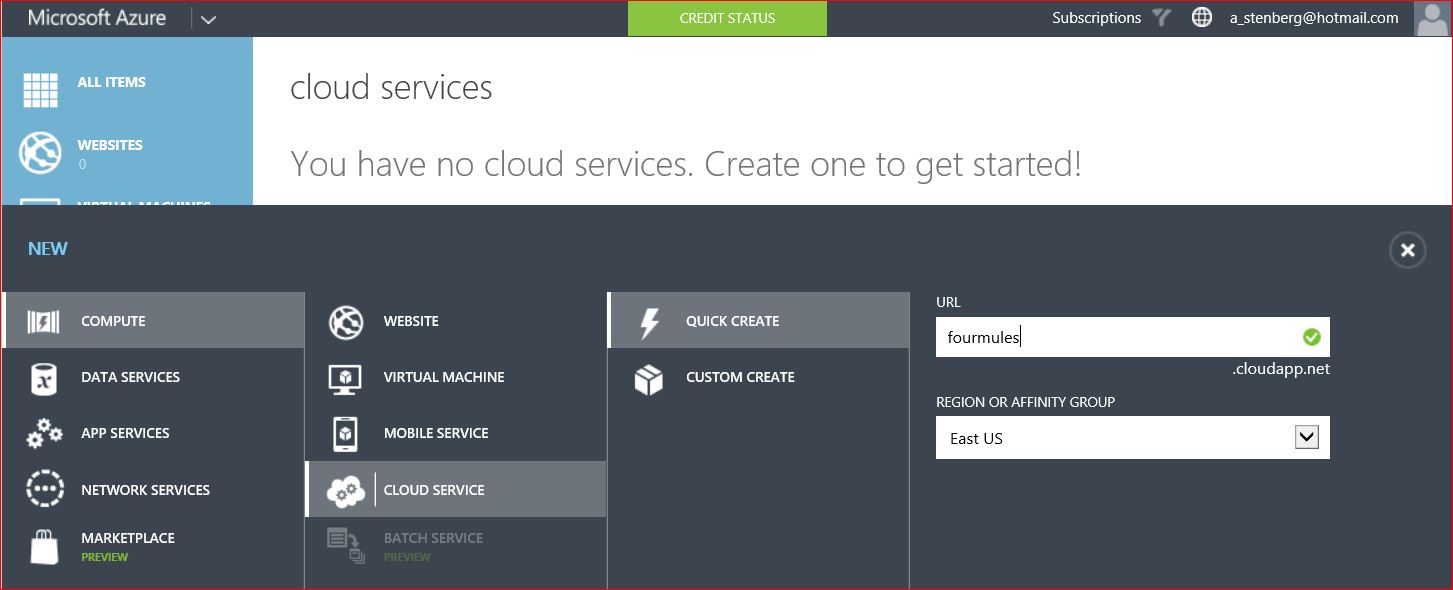
Create a Cloud Service
- In Azure, on the left side, select Cloud Services to create a cloud service
- Using Quick Create, type a name for your cloud app URL
IMPORTANT: Ensure ALL jobs in Azure have completed before going forward.
Install & Configure Azure PowerShell
- Install the Azure PowerShell cmdlets by running the Microsoft Web Platform Installer located at https://go.microsoft.com/fwlink/p/?linkid=320376&clcid=0x409 and follow the prompts to install.
- For more information about step 1, please refer to https://azure.microsoft.com/en-us/documentation/articles/install-configure-powershell/
- Open Azure PowerShell as Administrator
- Run the cmdlet, Get-AzureSubscription, locate the SubscriptionName and verify the property IsCurrent is set to True
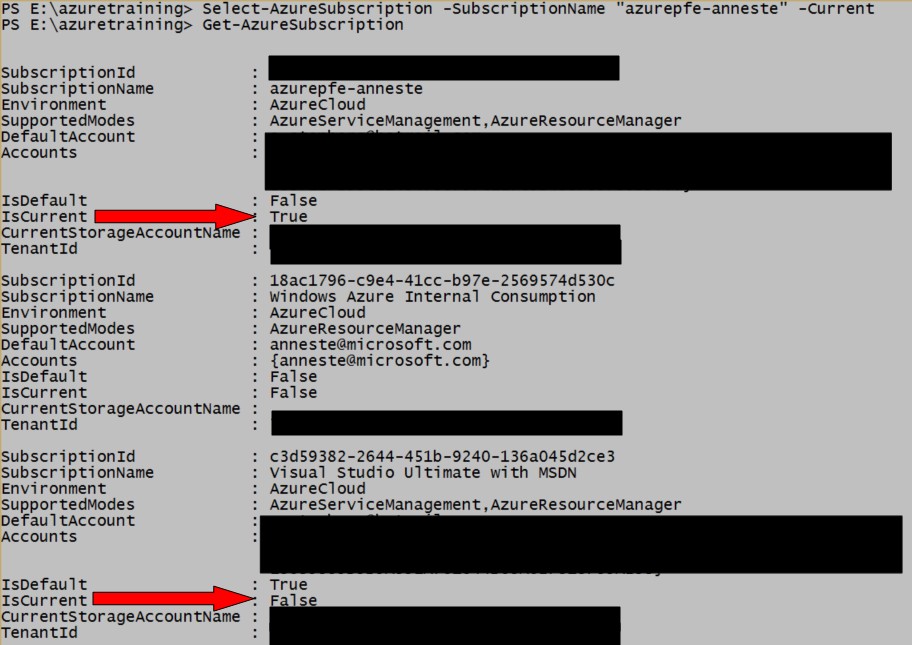
- If the subscription you want to use is not set to true, the run the following command to set the subscription you want to use to be the current subscription. In this example I am changing the current subscription FROM "Visual Studio Ultimate with MSDN" TO "azurepfe-anneste"
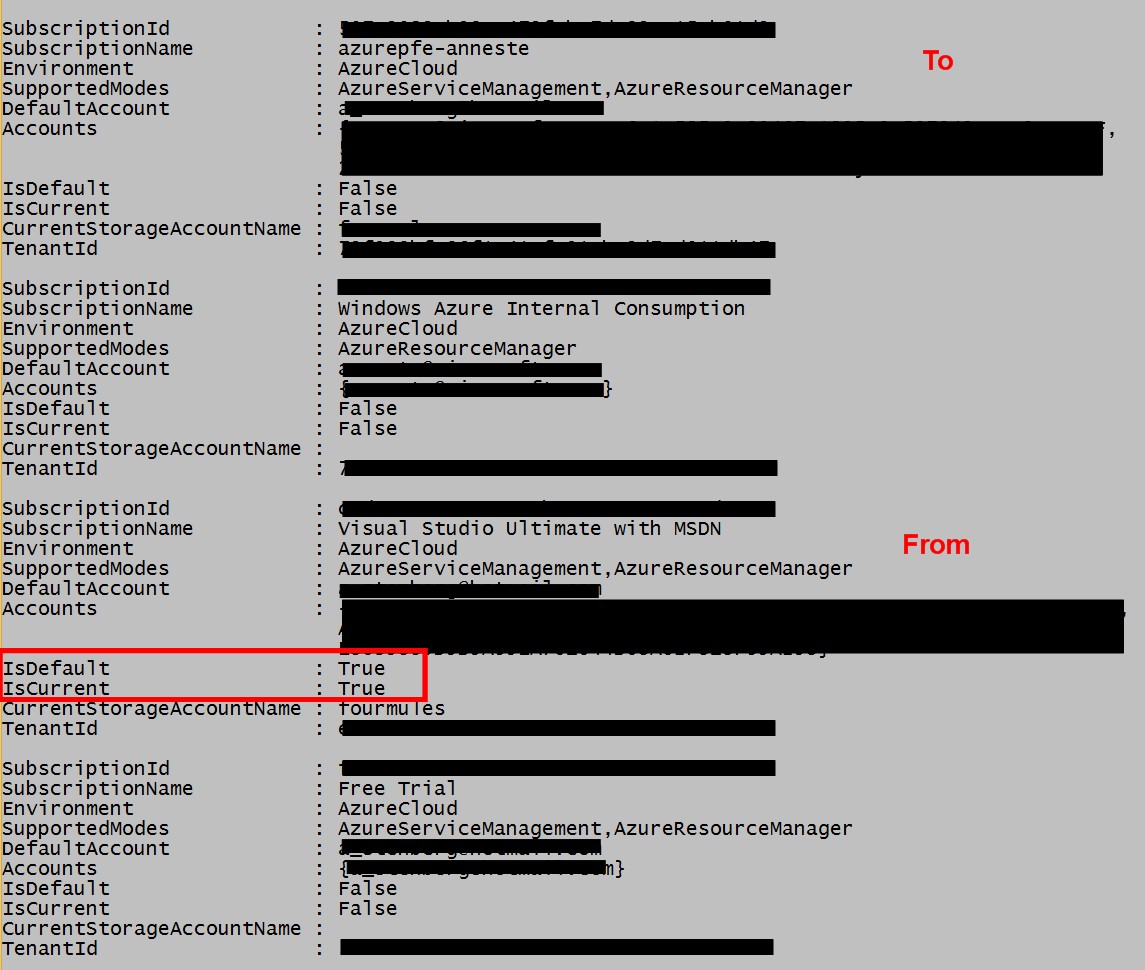
- Select-AzureSubscription -SubscriptionName "azurepfe-anneste" -Current
- At the cmd prompt type Get-AzurePublishSettingsFile
- Keep this window open
- You will be redirected to the MicrosoftOnline web page to log in with your account
- Select the correct subscription if you have more than one and click submit
- NOTE: I was asked to log in again
- Once logged in, the file will be available to save via the pop-up window
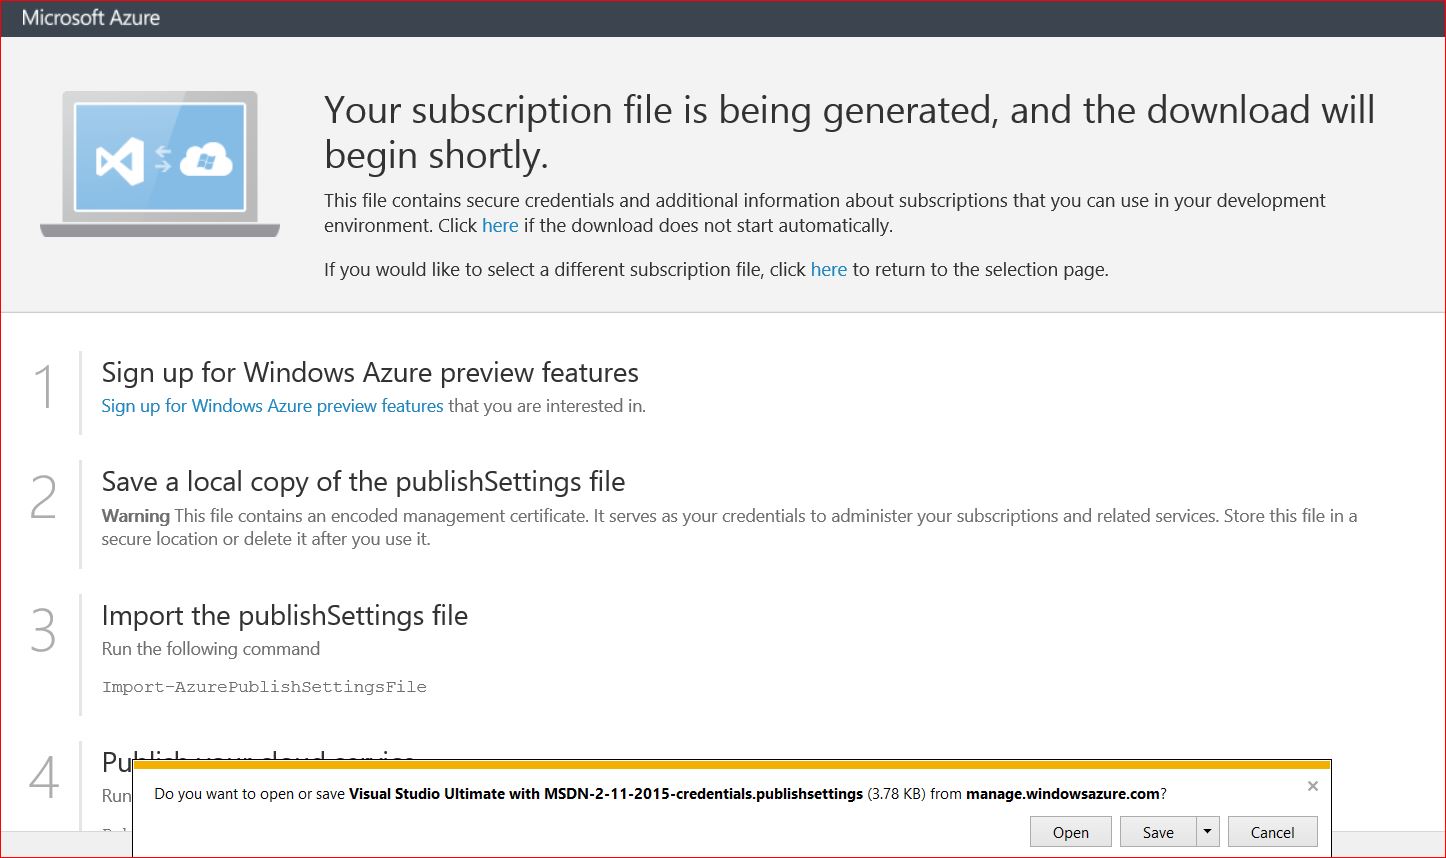
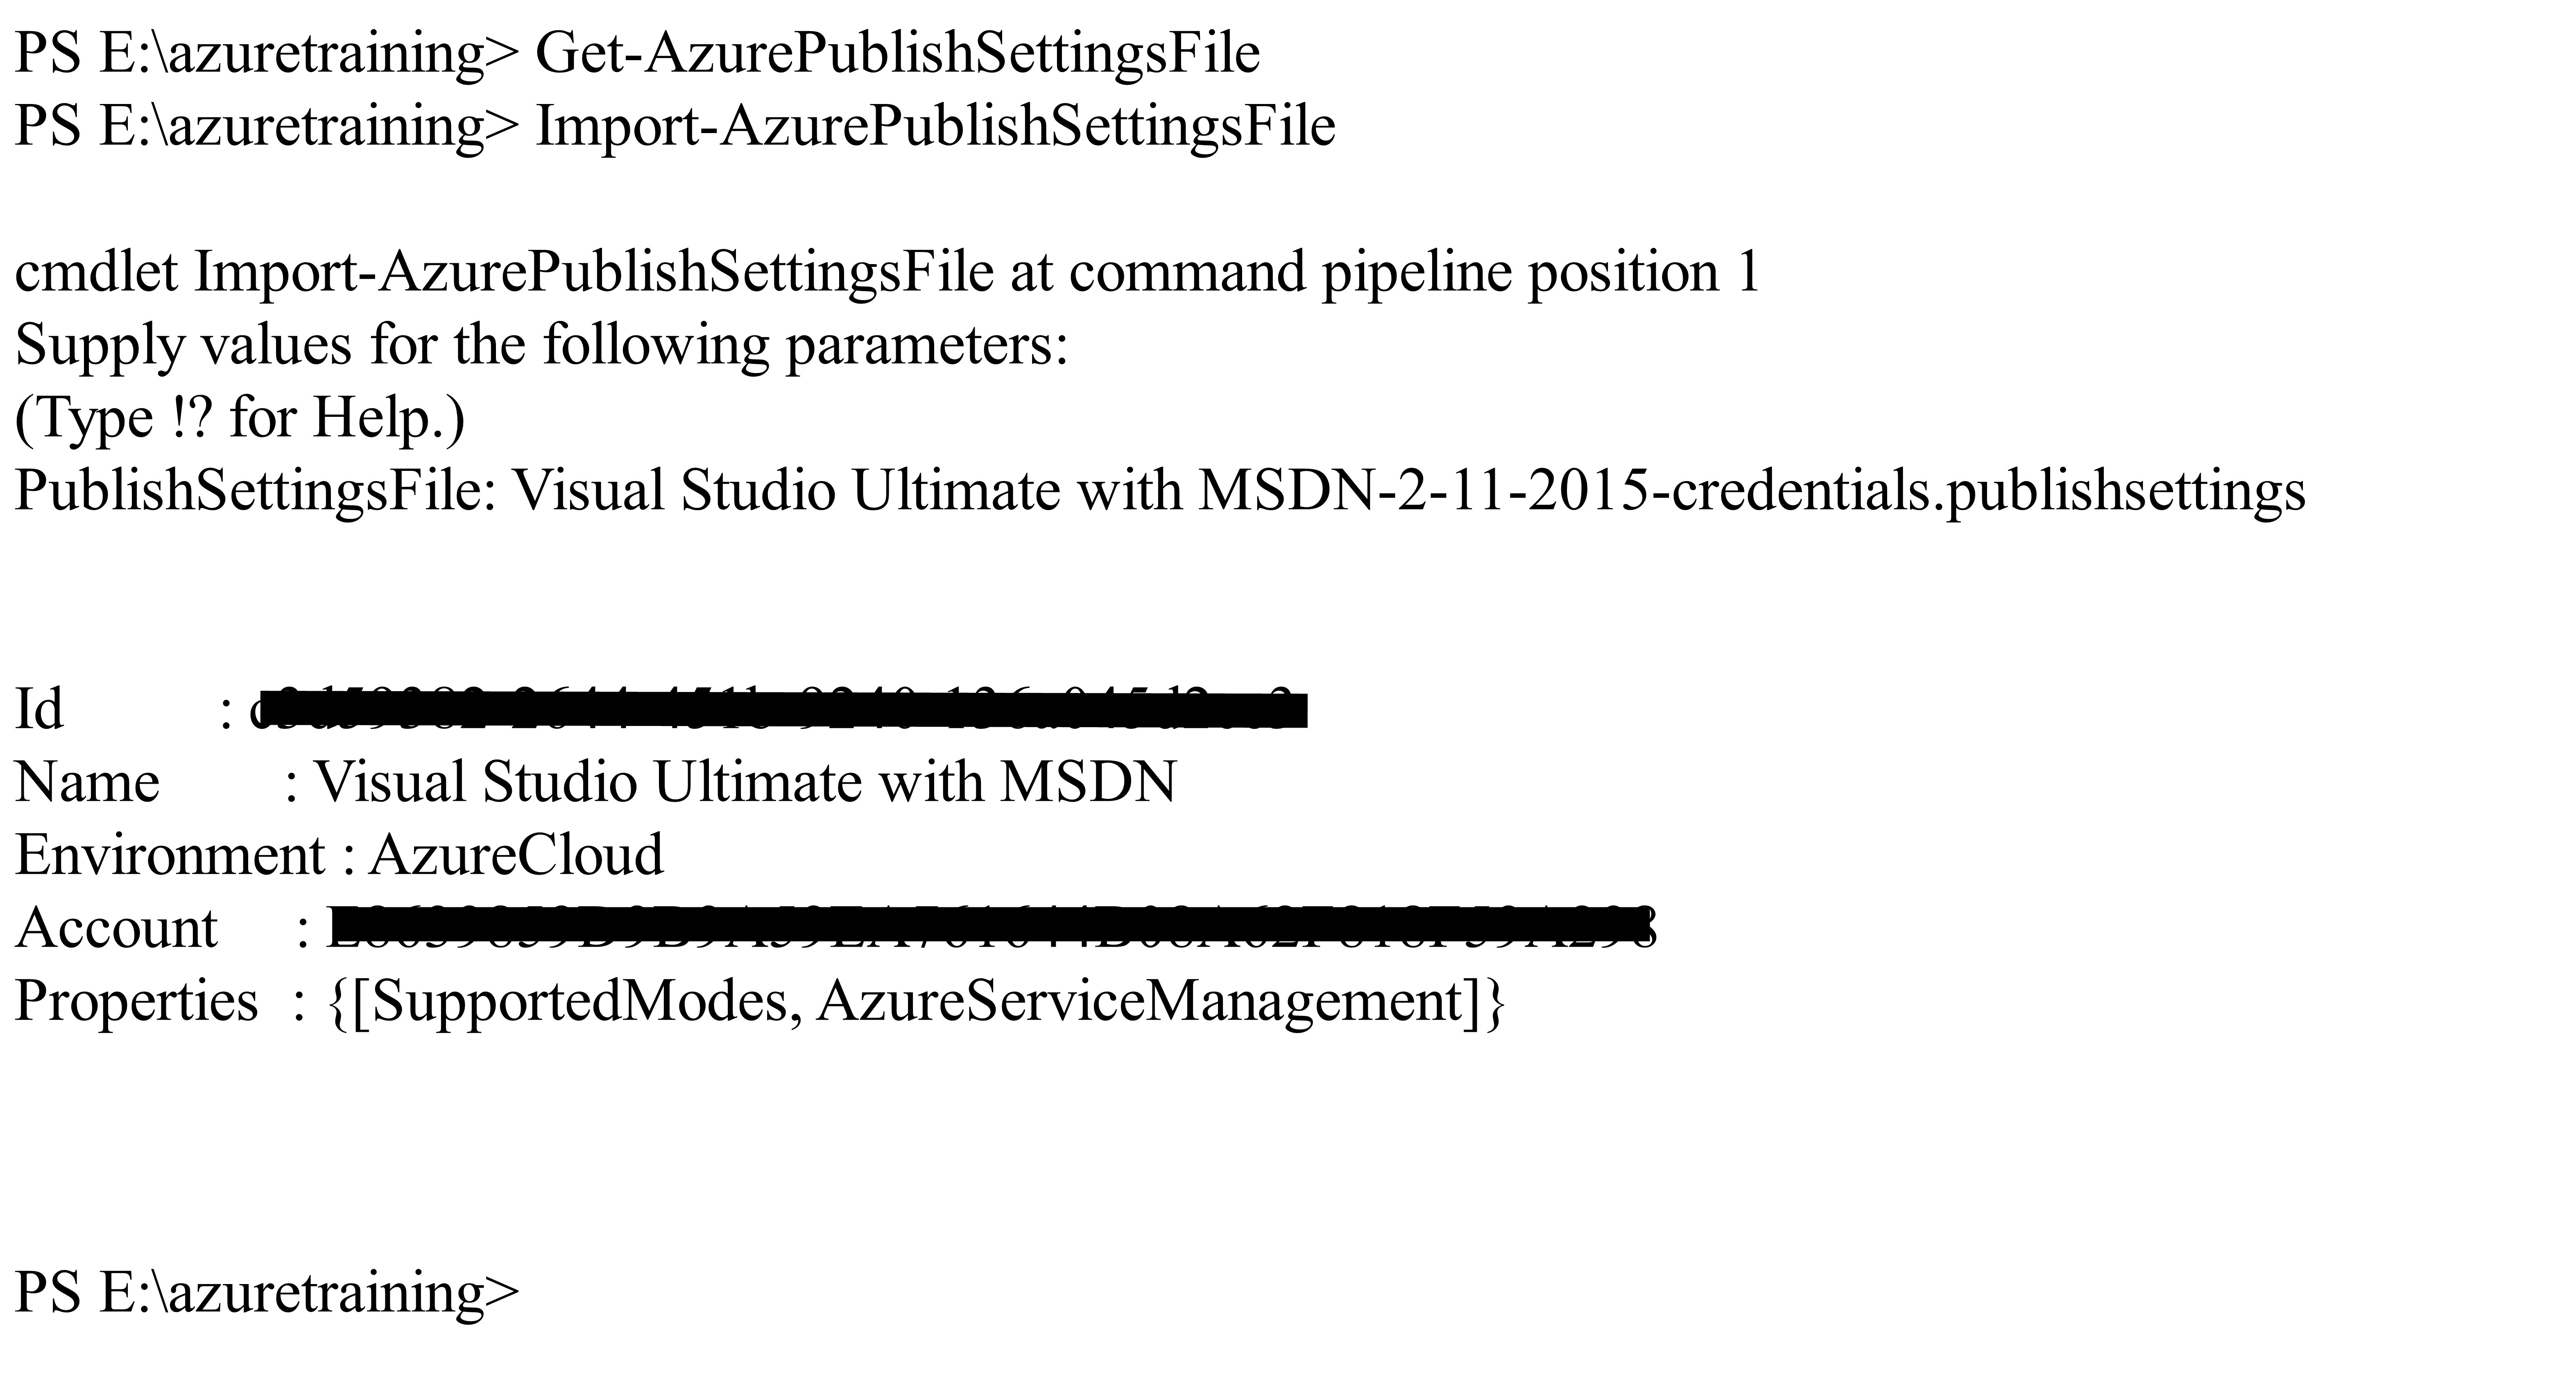
- From within Azure PowerShell, type Import-AzurePublishSettingsFile –PublishSettingsFile and provide the location of the downloaded file
- EXAMPLE: Import-AzurePublishSettingsFile –PublishSettingsFile d:\downloads\Visual Studio Ultimate with MSDN-2-11-2015-credentials.publishsettings
Create the Virtual Machine
- Open Azure PowerShell as Administrator
- The script will prompt you for the following items in the order listed:
- $vmName - this is the name of the VM you are creating
- $username - enter your username
- $password - enter your password
- How many NICs do you want in this VM? You enter either 2 or 4
- Entering 2 will create a Large VM and entering a 4 will create an Extra Large VM
- $subNet - this is the name of the subnet
- You will be asked for the subnet name up to 4 times depending on how many NICs you chose
- $IPAddress - this is the IP address of the associated subnet
- You will be asked for the IP address up to 4 times depending on how many NICs you chose
- Go to the location of CreateMultipleNICVM.ps1 and type .\CreateMultipleNICVM.ps1 and press enter
- Enter the information needed and you'll be given a chance to review your entries after they have been entered
- If successful, you'll see the following progress.


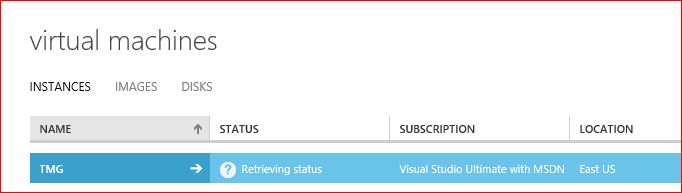


- In Azure, on the Virtual Machines tab, click connect at the bottom of the screen
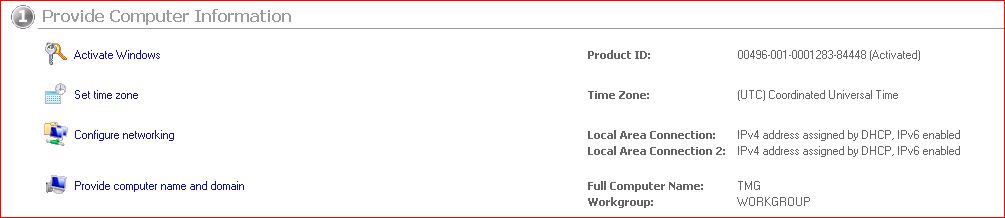
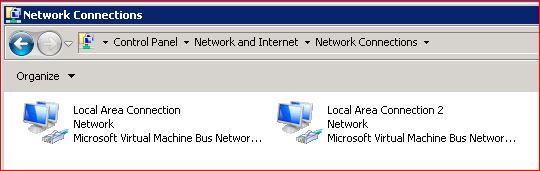
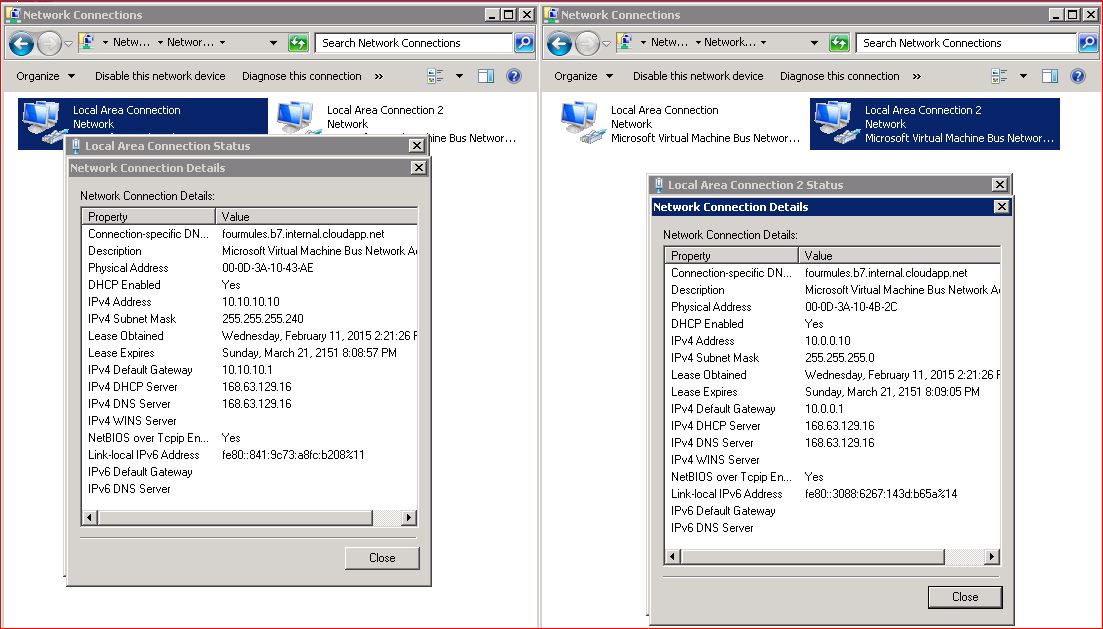
- After you log into the VM, the Initial Configuration Tasks screen opens. You will see that there are two Local Area Connections
I hope this helps others just starting out!
Notes
- To get a list of all available VMs, in Azure PowerShell type the following that will save the list in txt format in the location you choose.
- Example: Get-AzureVMImage | Select -Property ImageName, OS, Label, publishedDate | Export c:\downloads\AzureVMs.csv
- It is important that all of the configuration settings in Azure have completed prior to running the script; otherwise the script will fail.
- Ensure that your subnets are configured correctly for the IPs you want; otherwise the script may fail. An example of this is when I first created my DMZ subnet, I only had 3 IP addresses available and when I used 10.10.10.10 the script failed because the last digit was beyond the scope of available IPs.
- If the script fails to run, you may need to run Set-ExecutionPolicy -RemoteSigned in PowerShell
Thanks
Special thanks goes out to my colleague Bill Grauer who helped me tremendously on this script!