Lab Ops part 3 – Storage in Windows Server 2012R2
In this post I want to show what I plan to do with storage in Windows Server 2012R2 at the various events I get asked to present at. If you have been to any of our IT Camps you will have seen Simon and I show off deduplication and storage spaces in Windows Server and now I want to add tiered storage into the mix - and I have a cunning plan. This is to declare some of my storage as hard disk and other parts as SSD.
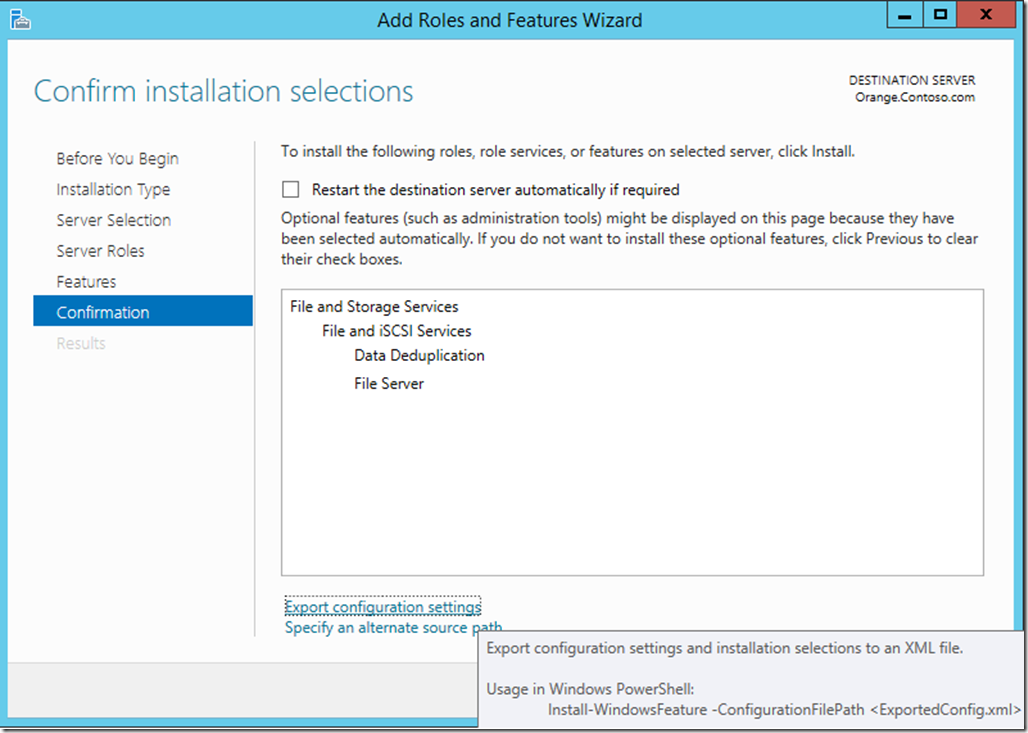
Before I get to that I need to create a File Server v. To do that I have adapted the setup script from Marcus I have posted previously to create this vm. All I needed to do after the VM was created was to add in the fileserver roles and role features I needed. The easiest way to do that is use the UI to add in the necessary features and then save them off to an xml file..
as the screentip above shows I can then consume this xml file to add in the features to my fileserver vm everytime I create it
Install-WindowsFeature -Vhd $VHDPath -ConfigurationFilePath "E:\scripts\file server 1 add features.xml" -ComputerName "Orange"
where the –computername setting is my physical host as I am mounting the VHD off line to add the features before it starts
Now I can use this vm to show tiered storage and there are two parts to this:
- Create some virtual disks and set them up to emulate the performance of the two different types of disk. In Server 2012R2 there are advanced properties of virtual hard disks for Quality of Service (QoS), which are exposed in Hyper-V Manager, Virtual Machine Manager and of course PowerShell..
#note the MaximumIOPs settings
for ($i = 1; $i -le 3; $i++)
{$VHDPath = $labfilespath + "\" + $VMName + "\" +"SCSI" + $i +".vhdx"
New-VHD -Dynamic -Path $VHDPath -SizeBytes 1tb
Add-VMHardDiskDrive -VMName $VMName -Path $VHDPath -ControllerType SCSI -ControllerLocation $i -MaximumIOPS 100
}
for ($i = 4; $i -le 5; $i++)
{$VHDPath = $labfilespath + "\" + $VMName + "\" +"SCSI" + $i +".vhdx"
New-VHD -Dynamic -Path $VHDPath -SizeBytes 50gb
Add-VMHardDiskDrive -VMName $VMName -Path $VHDPath -ControllerType SCSI -ControllerLocation $i -MaximumIOPS 10000
}
To identify which disk is which in the VM for my demo – remember I want to use the UI to show this being setup as PowerShell scripts aren’t great for explaining stuff. To this I tried to tag my disks as HDD or SSD now they are inside the VM. using
Set-PhysicalDisk –MediaType1
- where media type can be SSD or HDD. My plan was to base this on the size of the disks (My notional hard disks are 1Tb above as opposed to just 50Gb for the SSD. However you can’t use this command until you have created a storage pool so I will keep this code for later run it interactively
To stress my tiered storage and to show off deduplication in Windows Server 2012R2 I plan to use this storage as the repository for my VDI vms. In order to that I have to do the following things beforehand:
1. Use the storage to create the pool. From Server Manager
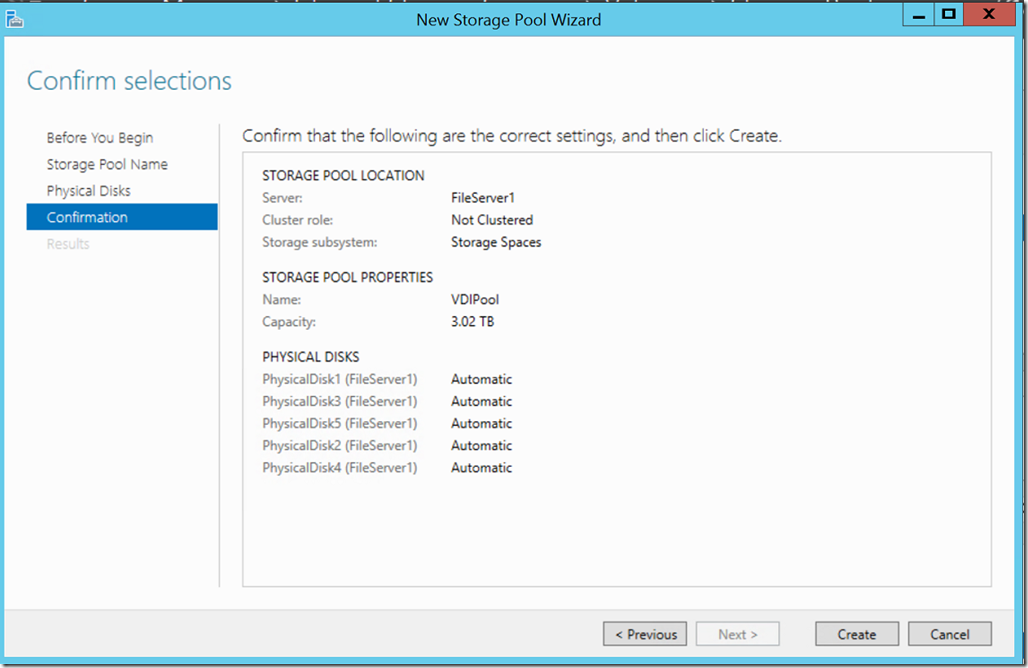
by right clicking on the primordial row in storage spaces, giving my poll a name and selecting all those blank scsi disks I created..
and clicking create (Note I have left all the disks set to automatic for simplicity)
2. Tag the disks as SSD/HDD in order to tier the storage
I just use the PowerShell above to do this based on size of the disks..
#note to get size of disks use (physicaldisk).size
Get-PhysicalDisk | where size -eq 1098706321408 | Set-PhysicalDisk -MediaType HDD
Get-PhysicalDisk | where size -eq 52881784832 | Set-PhysicalDisk -MediaType SSD
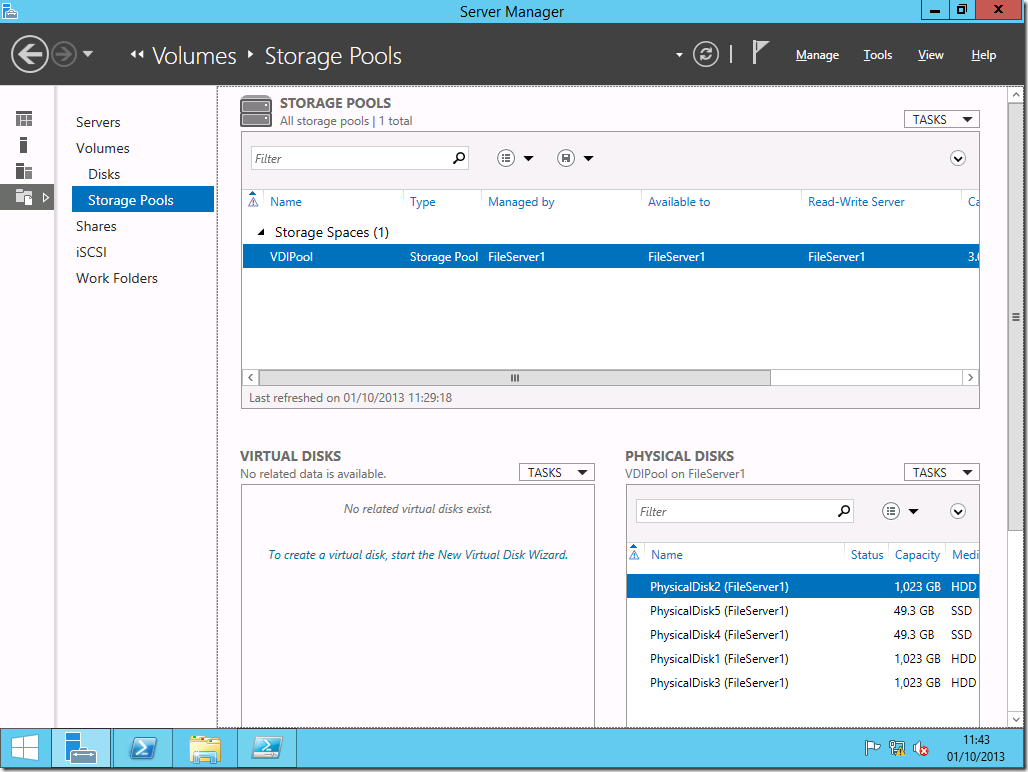
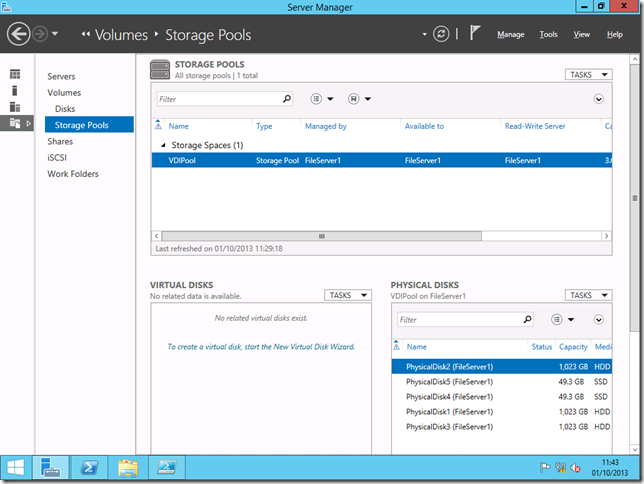
Checking back in server manager I can see the media type has been set and you can now see my VDI Pool..
3. Create a virtual disk over the storage pool.
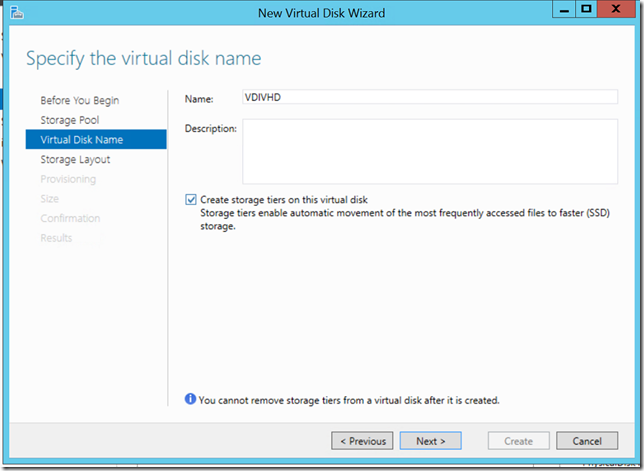
Storage spaces are actually virtual hard disks and so from the screen above I select New Virtual Hard Disk from the tasks in Virtual Disks pane and select the storage pool I have just created. I then get the option to use the new tiered storage feature in Windows Server 2012R2..
I’ll select simple in the next screen to stripe my data across the disks in the pool. In the next screen the option to thin provision the storage is greyed out because I have selected tiered storage, which isn’t a problem for my lab as this pool is built on disks which are in fact virtual disks themselves but be aware of this in production. Just to be clear you can either create a storage space (VHD) that is thin provisioned beyond what you have available now OR you can commit to a fixed size and use tiered storage.
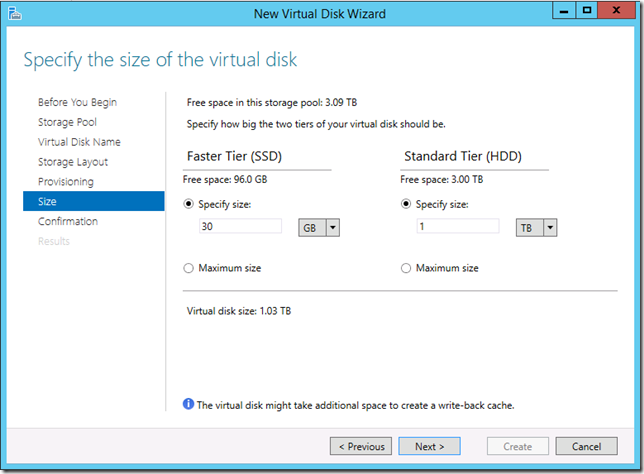
Now I get another new (for R2) screen to set the size of my VHD based on how much of the pool I want to use. I am going to use 30gb of SSD and 1Tb of HDD.
I am then get asked to format the VHD and mount it. I mount it as drive V and give I the name VDIStorage. In the final step I can enable deduplication..
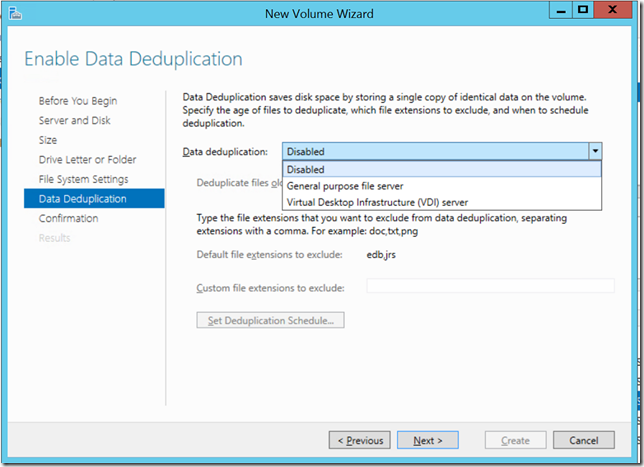 Note I have the option to use deduplication for VDI in Windows Server 2012R2 so I will go for that. The wizard will then guide me through formatting and mounting this VHD so it can now be used as a storage space
Now I am ready to configure VDI . But what if I wanted to do all of that in PowerShell? Well I am going to leave that for next time as this is already a pretty long post.
In the meantime if you have an MSDN subscription then you can get the rtm version of Windows Server 2012R2 and follow along. If not I am sure there’ll be an evaluation copy coming it in a few weeks to coincide with the general availability of R2, and in the mean time check out the Windows Server 2012R2 jumpstart module on MVA.
1Keith Meyer one of my counterparts has more on all of this in this excellent post.
