End-to-End Bare-Metal Provisioning with SCVMM 2012 SP1 / R2 - Customising the server's reference image with MDT 2013
In my last post, I detailed how to create a reference image using the Microsoft Deployment Toolkit (MDT). This reference image can then be converted with the excellent WIM2VHD tool for consumption by SCVMM. One of the comments I got back as a result of that post was whether you should enable Hyper-V or Failover Clustering as part of the reference image. In this post, I discuss the pros and cons of doing so and how to go about accomplishing this.
First, let's get the easy part out of the way: you should not enable Hyper-V as part of your reference image. Doing so will get you in an unsupported nested virtualisation scenario.
When I create a reference image for my customers, I am mindful of the fact someone has to maintain that reference image. I am also fully aware that individual may not have the time to continuously update that image or create several reference images for the different server roles his / her team manages. As such, here is a simple guideline I recommend when choosing what goes into a reference image for all your servers (whether these servers will host Hyper-V roles or other roles): Determine what roles, features and applications are common to ALL your servers and only include these elements in your reference image. Now, if you read this last statement carefully, you will realise I am recommending a very lightweight reference image. This is indeed the case. There are pros and cons to this approach.
Pros
- Lightweight image - smaller image size
- Easier to maintain - updating the image would usually mean running the task sequence to get its updates from a WSUS server as I described in my last post.
Cons
- Increased number of deployment images or templates - you essentially would need to a template or image for each type of server you want to deploy. In the case of Hyper-V hosts, that's not an issue if you are using SCVMM because in fact the simple image we created in the last post is the lean and mean Hyper-V server image we want to see in production environment to provide maximum stability and uptime. In the case of other types of server roles, you would want to have a deployment template (or MDT deployment task sequence) per server role. I will not discuss this approach since it's not relevant to Hyper-V / VMM bare-metal deployment.
- Increased deployment time - when you do not include all the components or applications needed for a given server in the reference image, then you will need another mechanism to provide these at deployment time or post deployment. For instance, if you do not include the System Center Operations Manager agent as part of your reference image, then you will need to push it to the server (and ensure it gets pushed quickly) post deployment.
With that in mind, I recommend the following components to be part of every reference image:
- Server OS (ok that one is obvious)
- Latest updates from MS Update or a corporate WSUS server
- SCOM Agent
- Backup agent
Some customers will include an anti-malware agent as well. I question the value of an anti-malware agent on a stripped-down Hyper-V host installed with the Server Core option. But many organisations do not have a choice in this matter, as this is typically something they have to do to address some sort of governance.
Now that this is out of the way, let me show you how to add Failover Clustering and / or hotfixes to your image.
Adding Roles and / or Features to the reference image
MDT makes it incredibly easy to add a built-in Windows Server role or feature to your image. To add the Failover Clustering feature, we will edit the Task Sequence we created in the last post.
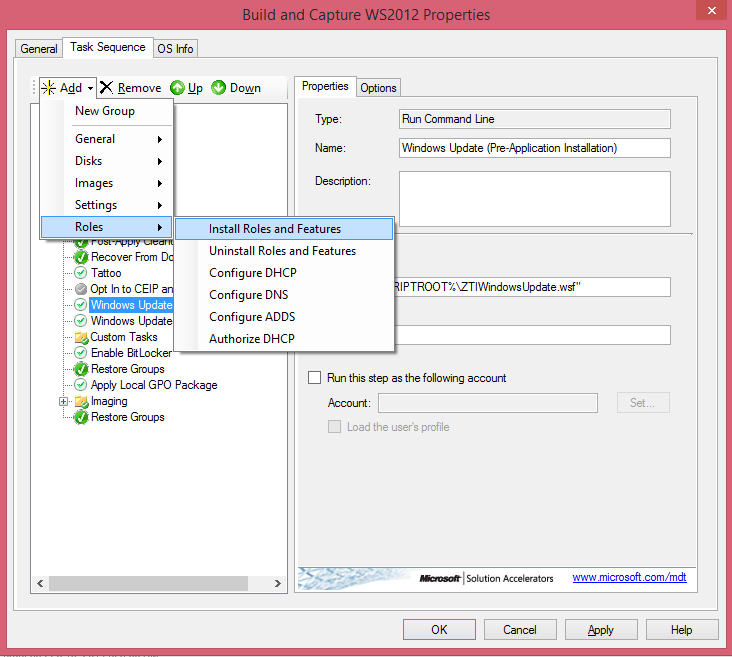
Open up the properties window for the task sequence and navigate to the Task Sequence tab. From there, scroll down to the Windows Update (Pre-Application Installation) step. With that step highlighted, click the Add button and select Roles then select Install Roles and Features. This will another step to the task sequence.
Next, from the Properties tab, select the OS for which you want to enable a feature. In my case, this is Windows Server 2012 R2 Core from the Select the operating system for which roles are to be installed dropdown list.

Seem familiar? I told you this was going to be easy :) This is the list of roles / features available on Windows Server 2012 R2 Core. Here, the MDT Deployment Workbench allows you to select whichever role / feature to enable. In our case, we are interested in the Failover Clustering feature. Go ahead and select that. Notice that since I am installing the Server Core version of the OS, I won't install any management tools for Failover Clustering.
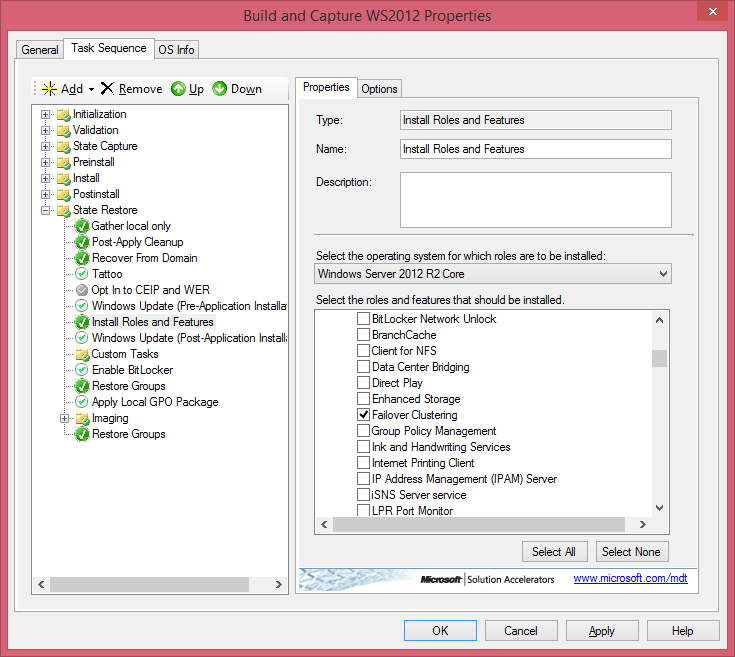
That's it! Click OK when done. Make sure the Install Roles and Features step is between the two Windows Update steps. This ensures all Failover Clustering updates are includes are part of the "post" update process.
Adding Hotfixes to the reference image.
Next, the hotfixes, I recommend you have a look at this KB support article and determine which Hotfixes are needed in your Windows Server 2012 R2 WFC environment and which ones you'd like to apply as part of your reference image. Again, this assumes your reference image is one which will be used for hosts participating in a Windows Failover Clustering (WFC) cluster.
From KB2920151, I am going to show you how to include the hotfix associated with KB2966407 installed as part of the reference image we created in the last post.
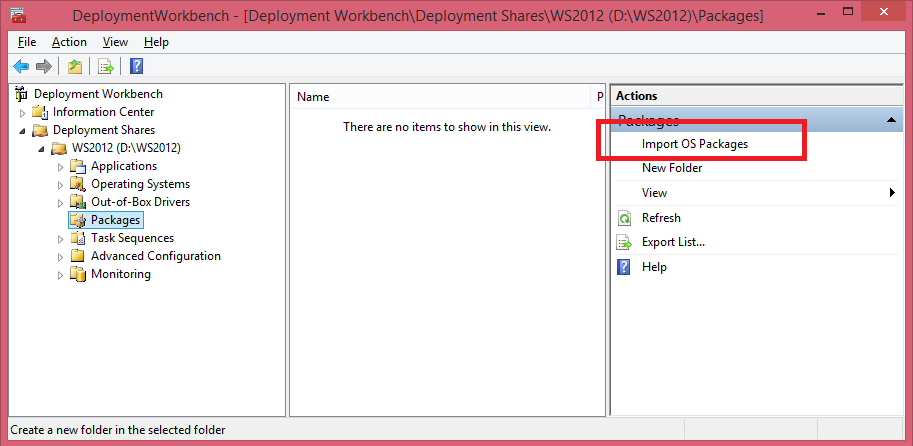
First, download the hotfix and extract it. This should provide you with an .msu file. Next, open up the MDT Deployment Workbench. With the deployment share expanded, highlight Packages and click the Import OS Packages from the Actions pane.
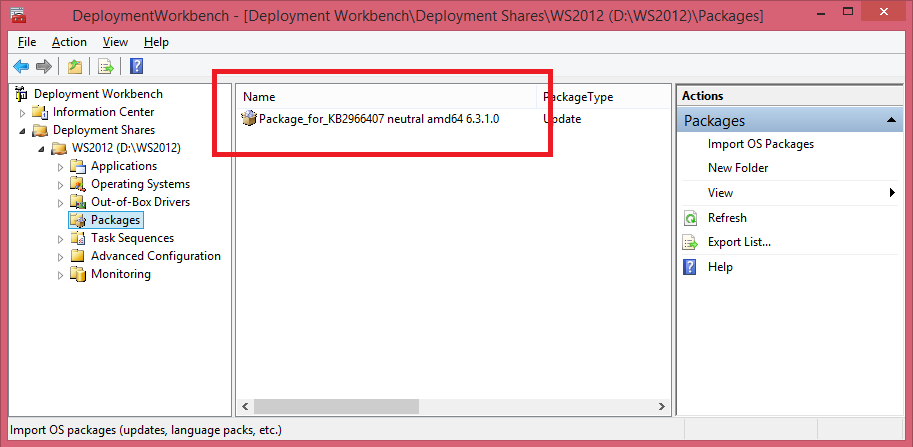
From the Import Package Wizard, specify the folder containing the .msu file or files you downloaded for all the hotfixes needed. Follow the wizard and accept all defaults. Once finished, you should see the hotfix appearing in the Name pane.
Next, just update the Deployment Share to rebuild the .ISO file and restart the build and capture process as you did in the last post. Your VM will now include all the updates from MS Update / WSUS as well as the hotfixes you explicitly add as MDT packages.
Hope you found this helpful. Please leave me your feedback as I use this to determine which articles I write about next.