End-to-End Bare-Metal Provisioning with SCVMM 2012 SP1 / R2 - Part 6 - Building a reference image with MDT 2013
Here is long overdue part 6 in this series! In the last post, I discussed why MDT makes for a great tool to use for your Hyper-V bare-metal server builds. In this post, I discuss how to actually build this image. As a reference, here's a list of the posts in this series. This post combines elements of all the previous posts:
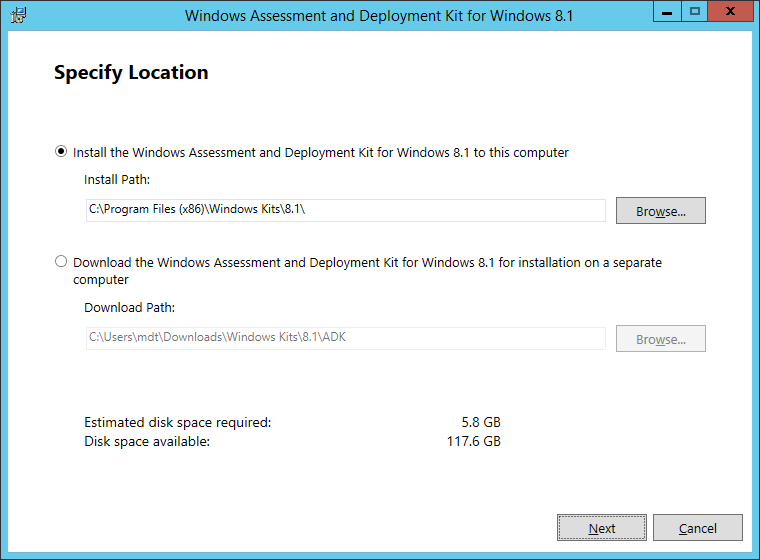
Installing ADK 8.1
The download link to the ADK I referenced above will download a lightweight download tool called adksetup. Once you have downloaded the tool, run adksetup with an account that has local Administrator privileges on the computer / server where you will install ADK / MDT. The first screen will prompt you on whether you want to simply download the entire ADK toolkit (~ 3 GB download) or install the components you need. Since I do not need all ADK components, I will simply choose the installation path shown here.
The next two screen will prompt for Customer Experience Improvement Program (CEIP) settings and license agreements. Review these and select the desired settings, then click Next to continue.
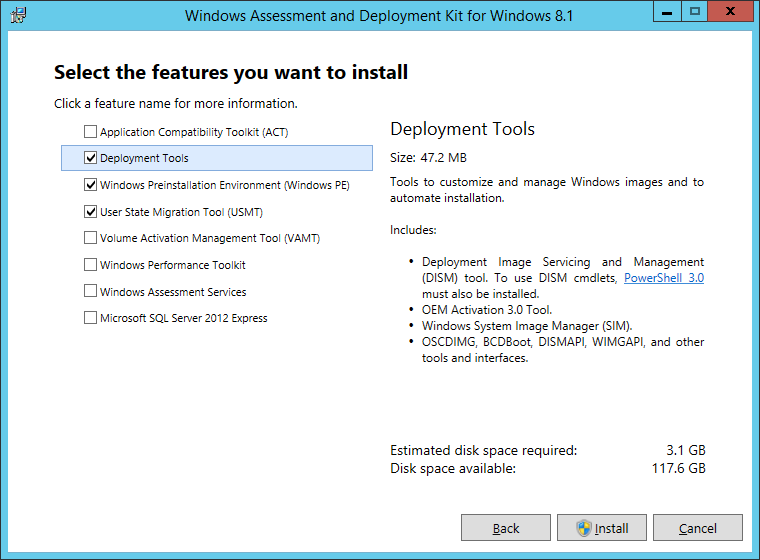
For our purposes, we only need the components chosen here. Click Install to continue.
That's it! With the ADK 8.1 installed on your system, MDT will be able to leverage it. Let's install MDT 2013 next.
Installing MDT 2013
MDT is a simple download and installation. In fact, I recommend you simply accept the default installation parameters. Once MDT 2013 has been installed, launch the Deployment Workbench. In the next section, we detail how to build a reference image suitable for bare-metal deployment of Hyper-V hosts using MDT 2013.
Step 1 - Creating a Windows Server 2012 R2 Deployment Share
Follow these steps to build an image. I show you the steps needed to build a reference image containing Windows Server 2012 R2 Server Core, including all updates obtained from the WSUS server I showed you how to setup in part 4 of this series. The image would also include the failover clustering feature. You may want to consider adding the .NET 3.5 feature as well if you are installing any tools on your Hyper-V host that require it. An example of a tools I've come across which require it include backup agent software for Hyper-V. We are installing Server Core as this is the recommended installation and default installation for Windows Server 2012 and higher. A reminder to keep you Hyper-V host image as lean as possible. Even once the host is deployed, the installation should to be very lean to minimize any downtime associated with having to update applications on your Hyper-V hosts. In fact, about the only tools I recommend to my customers to install are backup agents if you environment requires it and monitoring agents such as the System Center Operations Manager agent software.
Let's start.
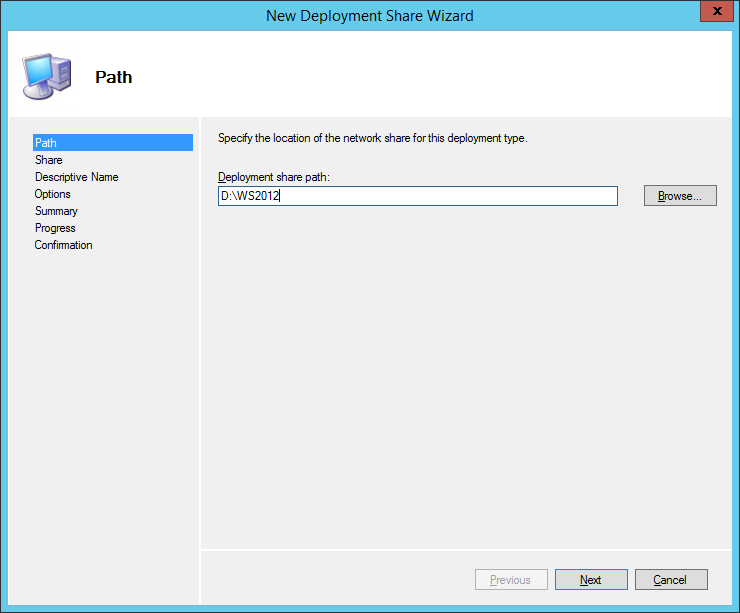
Open the Deployment Workbench. From the Actions pane, select New Deployment Share.

From the Path window, enter a path where you will save the Deployment Share such as D:\WS2012. This path can be a local path or a UNC path. Also note that MDT supports DFS-R shares. To configure MDT with DFS-R, you can find the details in MDT's online help by searching for "Configuring Distributed File System Replication".
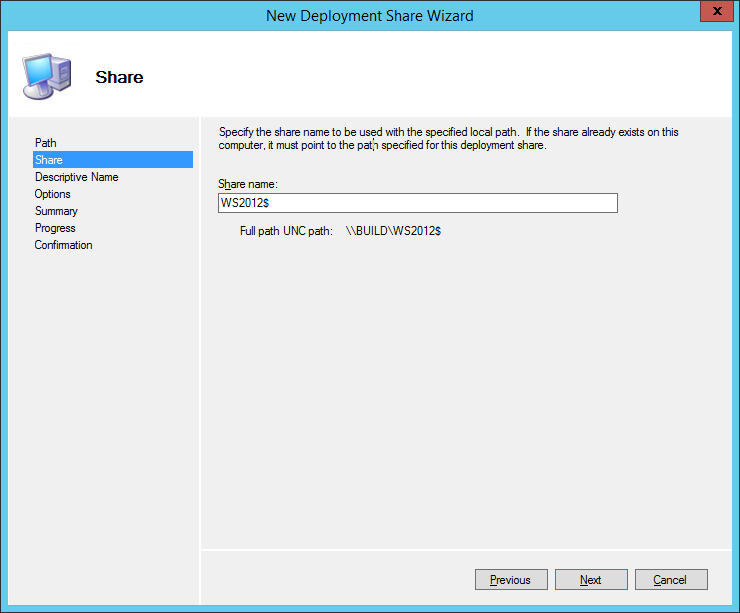
From the Share window, enter a share name and click Next. For the share name, MDT defaults to a hidden share (a share ending with the $ sign). This is optional. I highly recommend you keep the share name very short. Otherwise, you will come across an issue at deployment time with errors about reaching the max characters in the deployment share path.
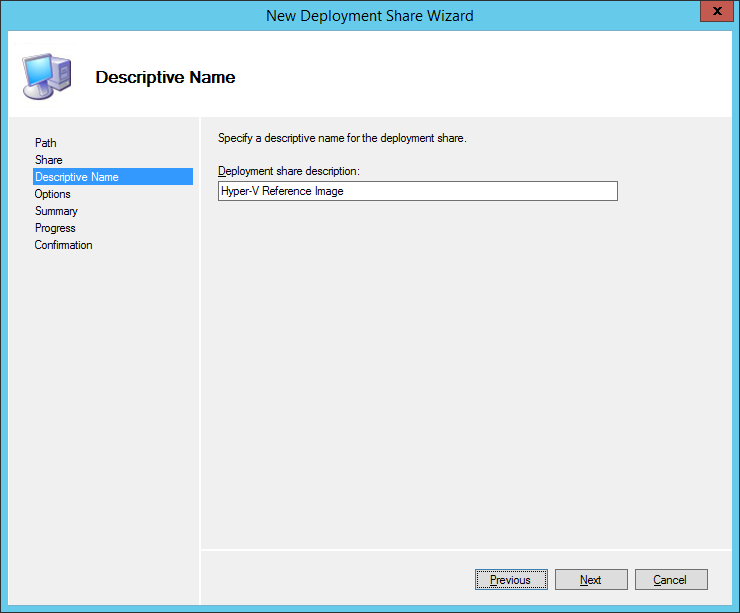
From the Descriptive Name window, enter a description and click Next.
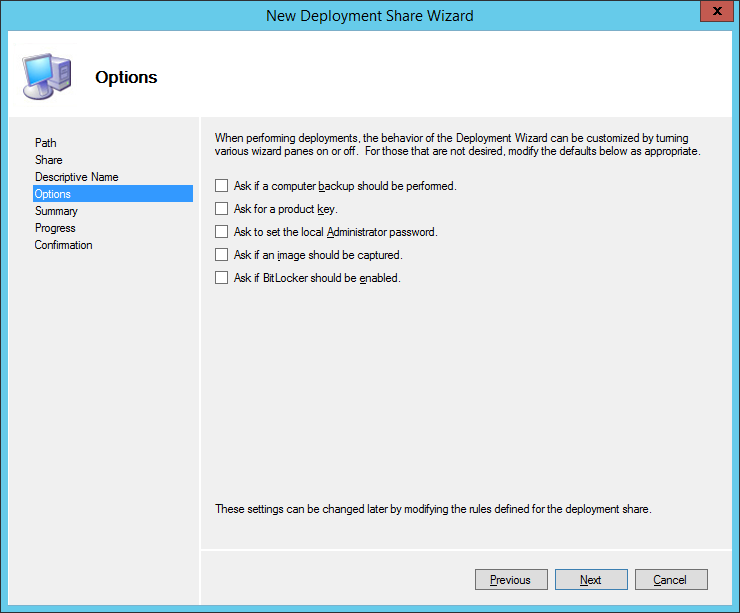
From the Options window, I recommend you unselect all options. You can go through all the desired options to configure the deployment later. Click Next to continue.
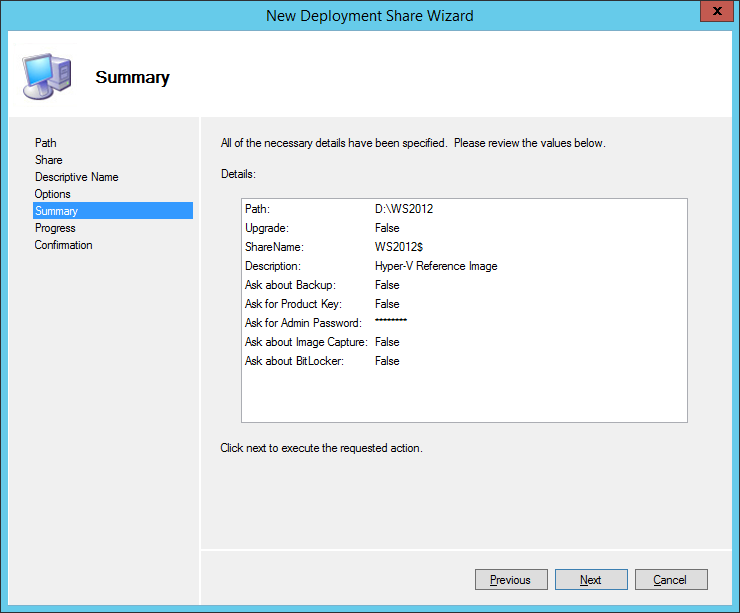
Click Next from the Summary window.
From the Confirmation window, click Finish.
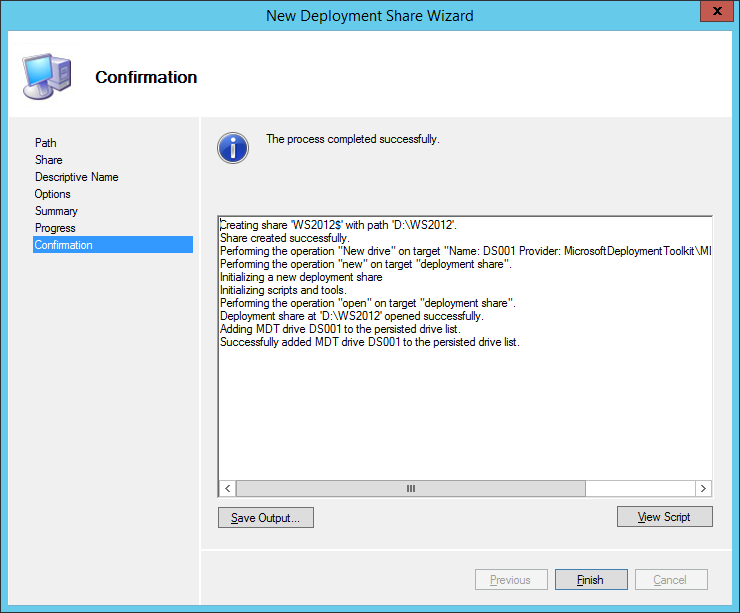
You have now created the deployment share. We now import the OS files.
Step 2 - Importing Operating System Files
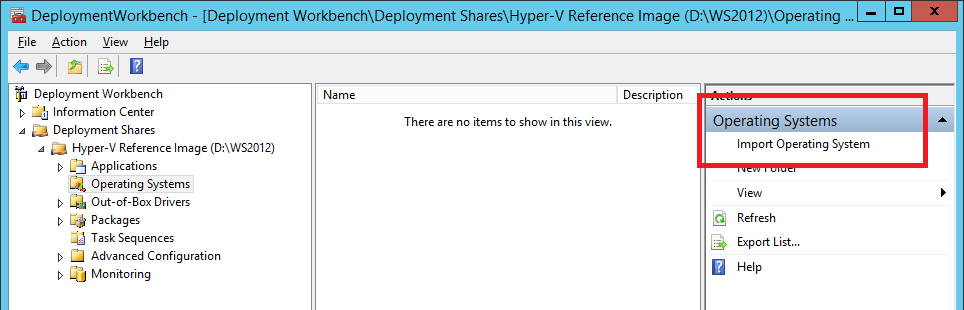
The next step is to import the operating system files. This step involves adding the source files from the Windows Server 2012 or 2012 R2 media ISO file to the MDT deployment share. We add the source media as our baseline on top of which we add configuration items such as environmental roles / features required, OS patches, hotfixes, etc. To begin, highlight the Operating Systems folder from the deployment share, and click the Import Operating System link from the Actions pane.
From the OS Type wizard window, select Full set of source files and click next. This is the option to select if you are using the source media provided by Microsoft. MDT can be used as a deployment tool as well, not just for image engineering. The other two options in this window are for deployment engineering. Since we are using SCVMM for the deployment of our server image, we do not need to be concerned about the two remaining options.

Next supply the source directory from the Source window. This is the top level folder for your CD / DVD drive or your mounted ISO file

From the Destination folder, enter a directory name where the media's contents will be copied to. Keep this folder name short. I have come across deployment errors with MDT where this directory name was too long.

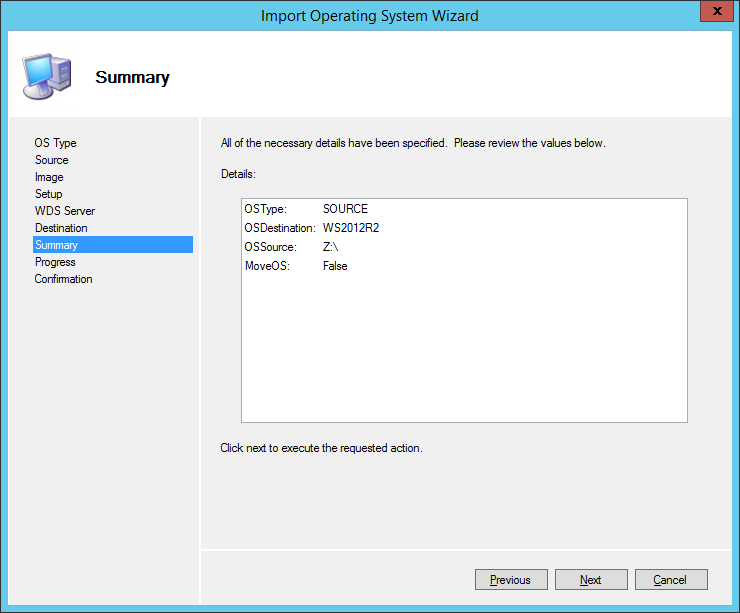
From the Summary window, click next. This begins the copy of the entire contents of the Windows Server media to the deployment share.
Now that the OS source files have been imported, we can proceed with creating a Build & Capture Task Sequence.
Step 3 - Build & Capture Task Sequence
A Task Sequence in MDT is a grouping of sequenced actions that can be used to deploy an operating system, along with supporting applications, updates and drivers, on a target host. In our case, we want to create a task sequence to ultimately use it for Hyper-V bare metal deployment. To that end, we create a task sequence which will contain a server image we can later integrate as part of SCVMM's bare metal deployment process. A reminder that our image is to contain the following components:
- The Windows Server 2012 / 2012 R2 source media
- All OS Critical, Security, Update and Update rollups released up to the date of the image creation
- Any hotfixes required such as failover clustering and Hyper-V recommended hotfixes
- (Optional) Additional software such as backup agents or monitoring agents that we wish to add to the image. This is optional because most agent management servers typically can "push" these agents to hosts and there are benefits to doing server-managed agent deployments. I typically try to avoid adding such agents to the Hyper-V image itself to keep it lean and reduce dependencies on other tools which will require their own updating process which may not be aligned with Microsoft's OS updates frequency.
The Build & Capture Task Sequence will produce a single WIM (Windows Imaging Format) file which we will then convert to a VHD / VHDX file we later import into SCVMM.
Let's begin...
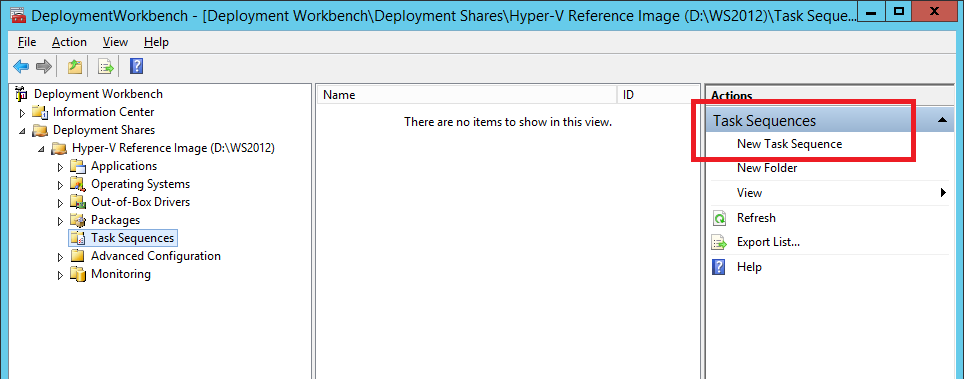
From the Task Sequences folder, click New Task Sequence from the Actions pane.
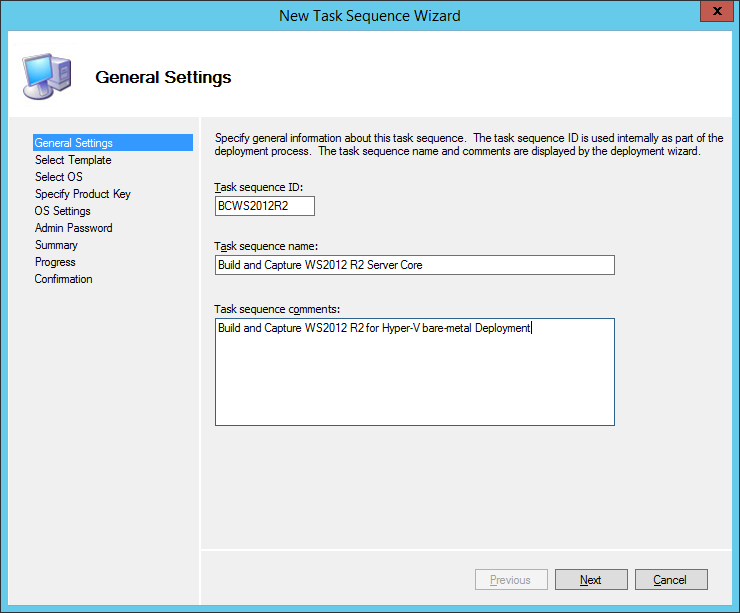
From the General Settings window, enter a Task Sequence ID, a Task Sequence Name and optionally a Task sequence comments entry and click Next to continue.
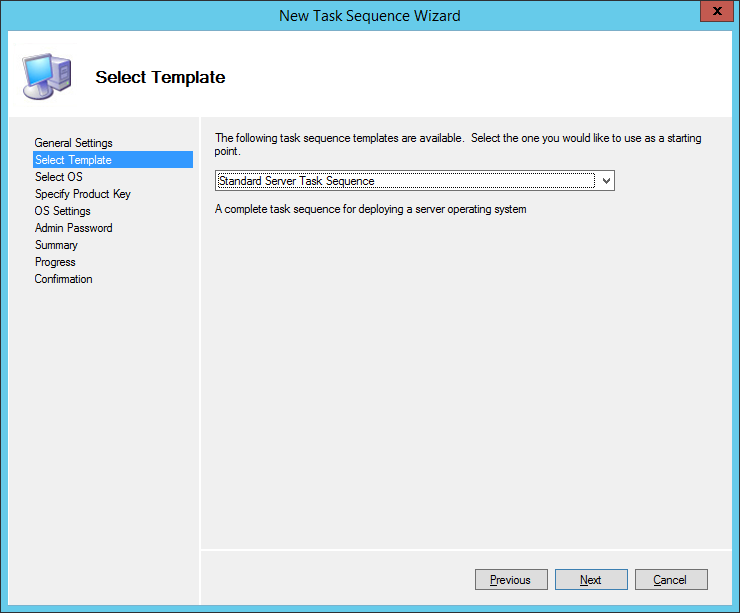
From the Select Template window, select the Standard Server Task Sequence template and click Next.
From the Select OS window, select the OS installation you need for your image. You may have a different list than I do here as I am basing my screen captures on an MSDN source media. The reason you may see multiple selections here is simple: Microsoft can bundle different catalog items on a single DVD / ISO media. What this means is that the installation media is the same, but the deployment license (and subsequently the product key) will be different. What is important to understand here is you need to select the catalog for which you have a product key and license. The other option you need to make here is whether to select the full GUI or Server Core installation. Since this image will ultimately be used for Hyper-V servers, the option I am selecting is Server Core. I strongly recommend you stay with Server Core for Hyper-V hosts, and all Windows Server hosts which support Server Core.

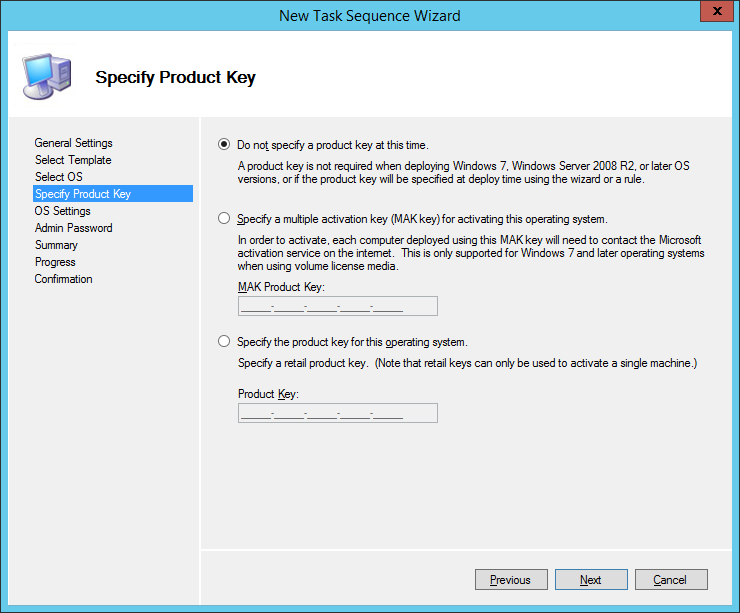
From the Specify Product Key, select the appropriate option relative to the licensing of your Windows Server media. If you are using VL (Volume Licensed) media and you have a KMS (Key Management Server), then select Do not specify a product key at this time. Otherwise, enter the MAK product key or retail key and click Next.
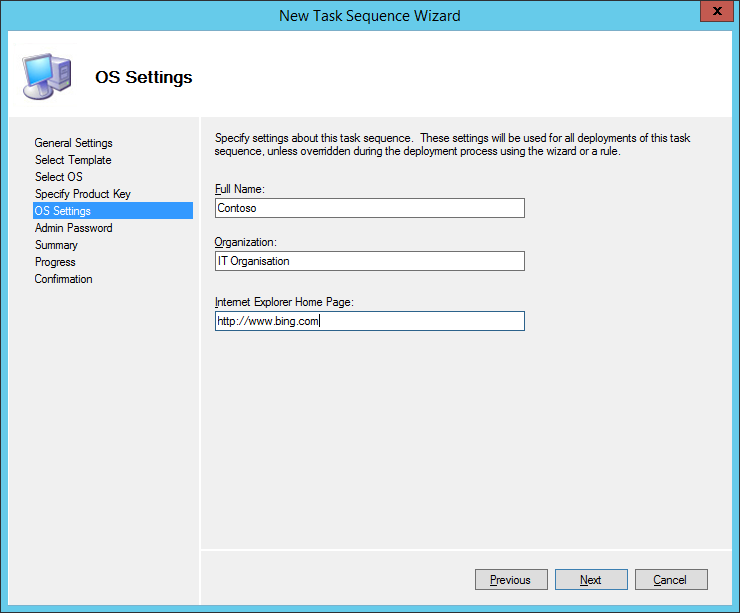
From the OS Settings window, enter the Full Name, Organisation and IE Home Page info and click Next.
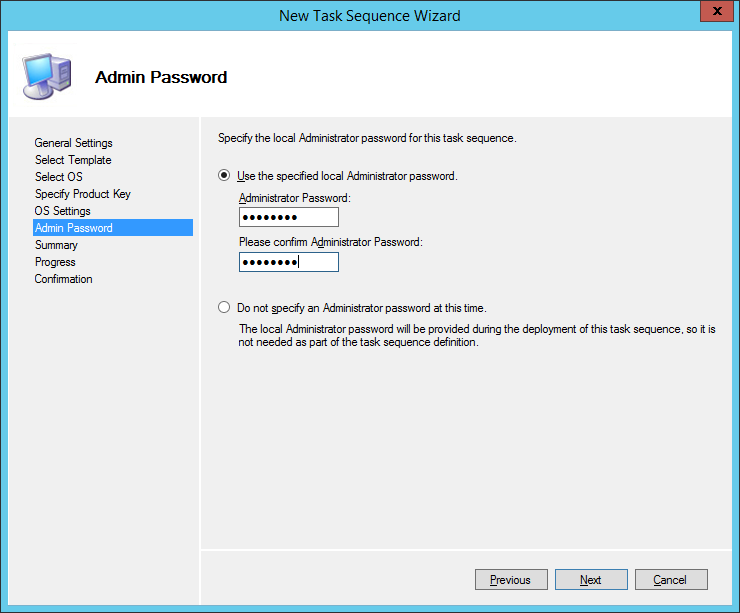
Enter the Admin Password and click Next. Note that this password is hashed in the Unattend.xml file produced as a result of configuration wizard. If you do not wish to have this password stored in the unattend file, then select the Do not specify an Administrator password at this time and you will be prompted to enter one during the Build and Capture of the WIM file. Keep in mind this can be overridden by SCVMM's Guest OS Profile so this password is only for your build environment.
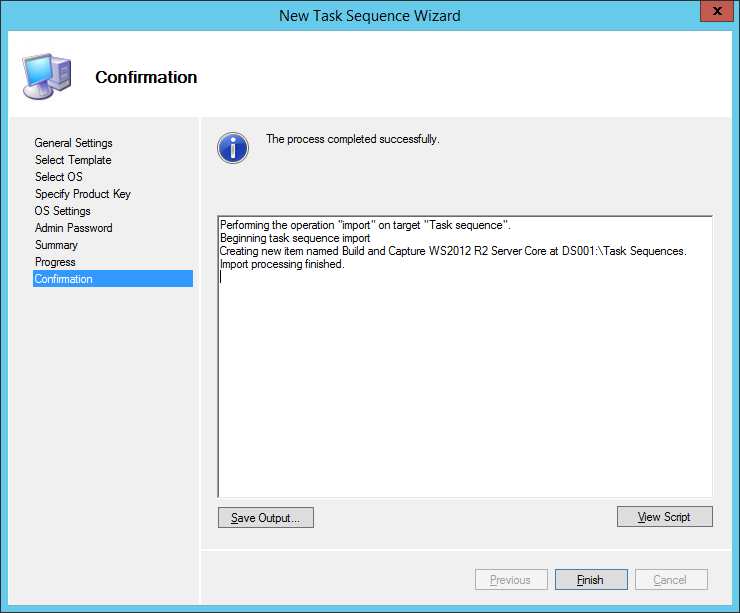
Click Finish from the Confirmation window.
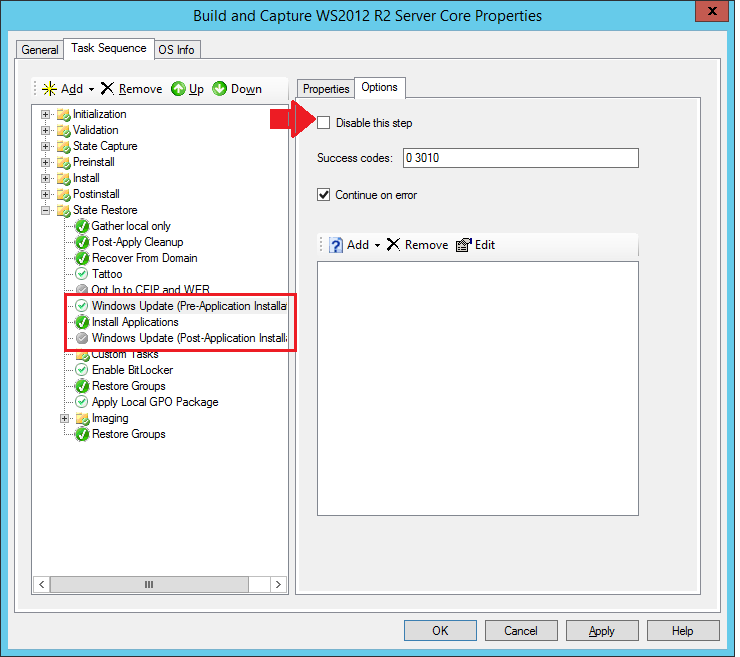
You now have a task sequence! In order to enable this task sequence to get its updates, you need to do two things. The first is accomplished by editing the task sequence. From the task sequence's properties, navigate to the Task Sequence tab. Then scroll down to the State Restore group. From there, highlight the Windows Update (Pre Application Installation ) step. From the Options pane, ensure the Disable this step is unchecked. Repeat the same for the Windows Update (Post-Application Install) step. So why do it twice you ask? The rationale is to update the OS prior to any application installation (Install Applications step) and then again after the application install. For instance, assume you install an application requiring .NET 3.5 as part of the Install Applications step. Well, you would want to ensure any compatibility updates are applied (this is done in the Pre-Application Installation step) and then all the subsequent security updates (this is accomplished with the Post-Application Installation step).
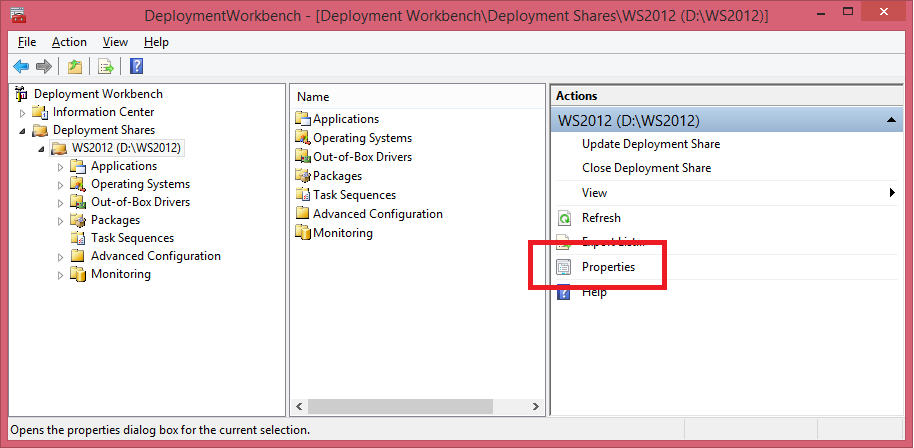
So now we have a task sequence configured to install the OS and update it from Microsoft Update. If you want the task sequence to instead reach out to the WSUS server we built earlier in this blog series, it's very simple. Here's how. You need to add an entry to the CustomSettings.ini file. This is accomplished from the Deployment Workbench's UI. With the Deployment Share highlighted, click on the Properties link from the Actions pane.
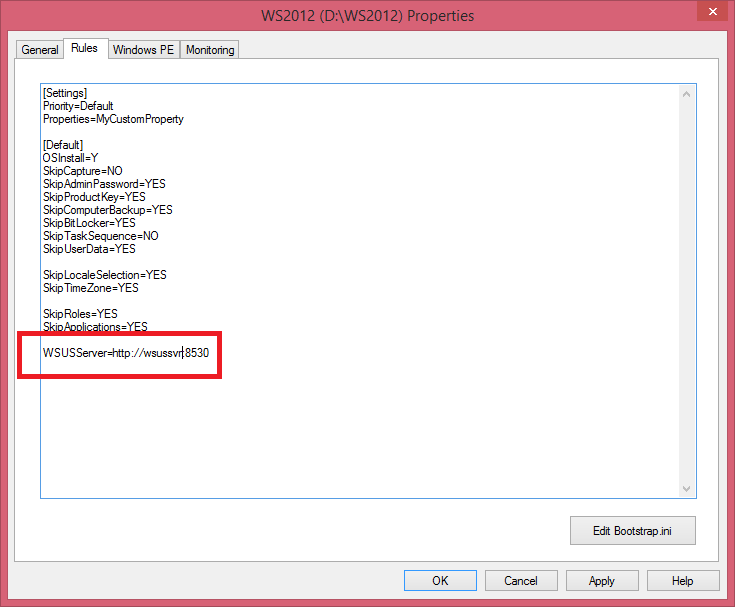
From the share's Properties window, navigate to the Rules tab. There, add the WSUSServer=https://wsusserver:8530 property and replace wsusserver with the FQDN of your WSUS server or IP address. By default, WSUS installs on the TCP port 8530 this is why I added it here.
Before I go on: MDT has a very rich set of properties you can use as part of image engineering. I won't get into the hundreds of options here of course, but I will list the settings exactly how I use them in a very simple test environment. The online MDT help (accessible by pressing F1) is fantastic and details every one of these in detail. Here's what I have in my configuration:
[Settings]
Priority=Default
Properties=MyCustomProperty
[Default]
_SMSTSOrgName=Contoso Corp
OSInstall=Y
SkipCapture=NO
SkipAdminPassword=YES
SkipProductKey=YES
SkipComputerBackup=YES
SkipBitLocker=YES
SkipUserData=YES
SkipRoles=YES
SkipApplications=YES
SkipTimeZone=YES
SkipLocaleSelection=YES
SkipComputerBackup=YES
WSUSServer=https://wsus:8530
ComputerBackupLocation=NETWORK
BackupShare=\\build\ws2012r2u1\Captures
BackupDir=%OSDComputerName%
SLShare=\\build\ws2012r2u1\Logs
TimeZoneName=Eastern Standard Time
KeyboardLocale=en-us
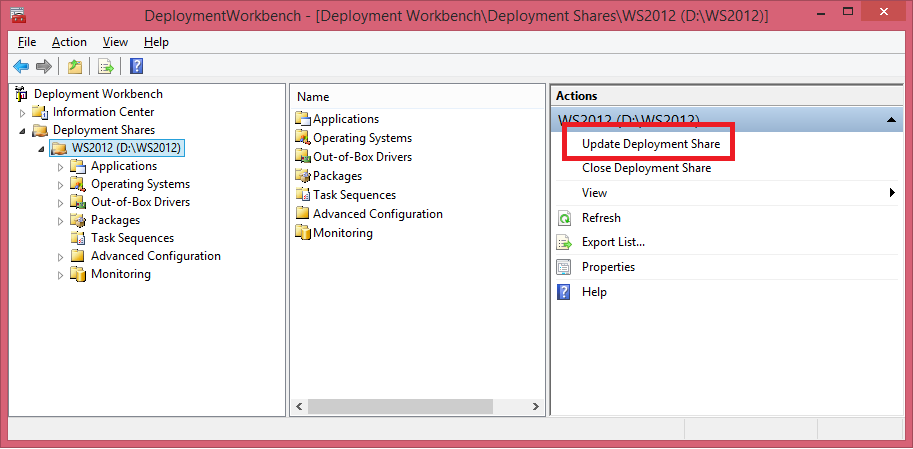
Now that everything is ready, you can update the Deployment Share. Simply click the Update Deployment Share and accept the defaults in the wizard the follows. The first time you do this will take a long time to generate a boot.wim and boot.iso files.
You should now have a boot.iso file located at the boot folder of your deployment share (so in this example it would be under D:\WS2012\Boot - the file should be a bit less than 300 MB in size. We will use this file to boot a blank VM in Hyper-V on a Windows 8.1 PC. The only requirements for this VM is to have network connectivity to the PC / server / VM hosting your MDT deployment share. In the VM's settings, you will point to the ISO file you created in the previous step.

Once you have configured the VM's settings, you can power on the VM. The VM should start up from the CD ROM. The first screen post startup you will see is the MDT welcome wizard shown here.
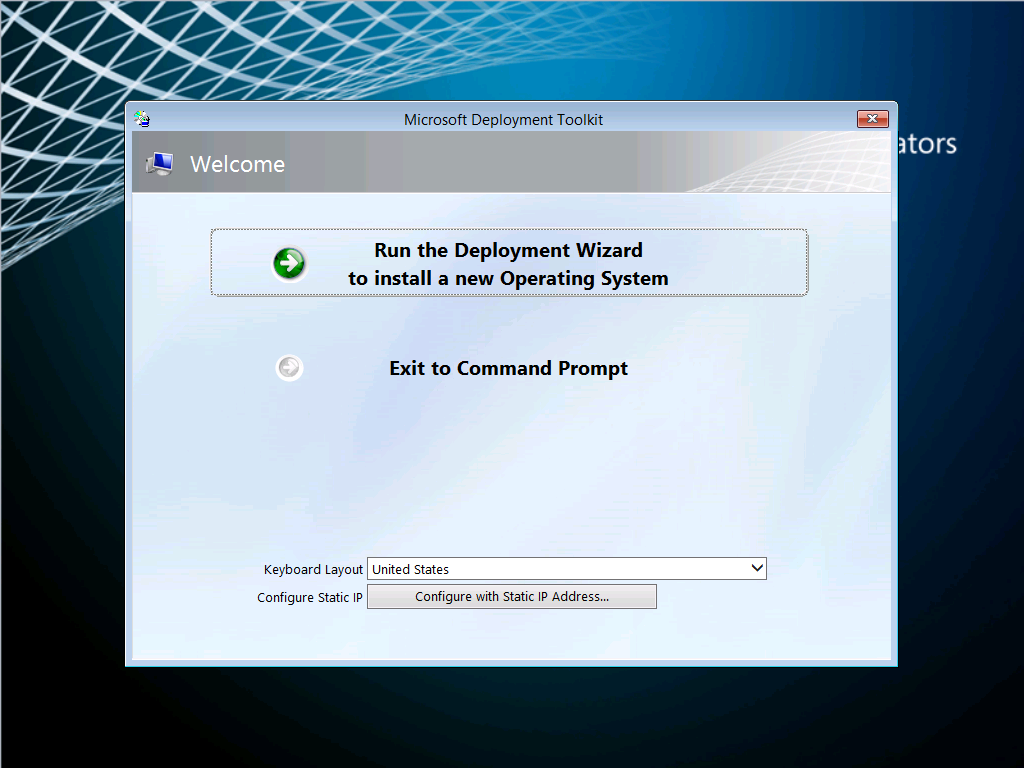
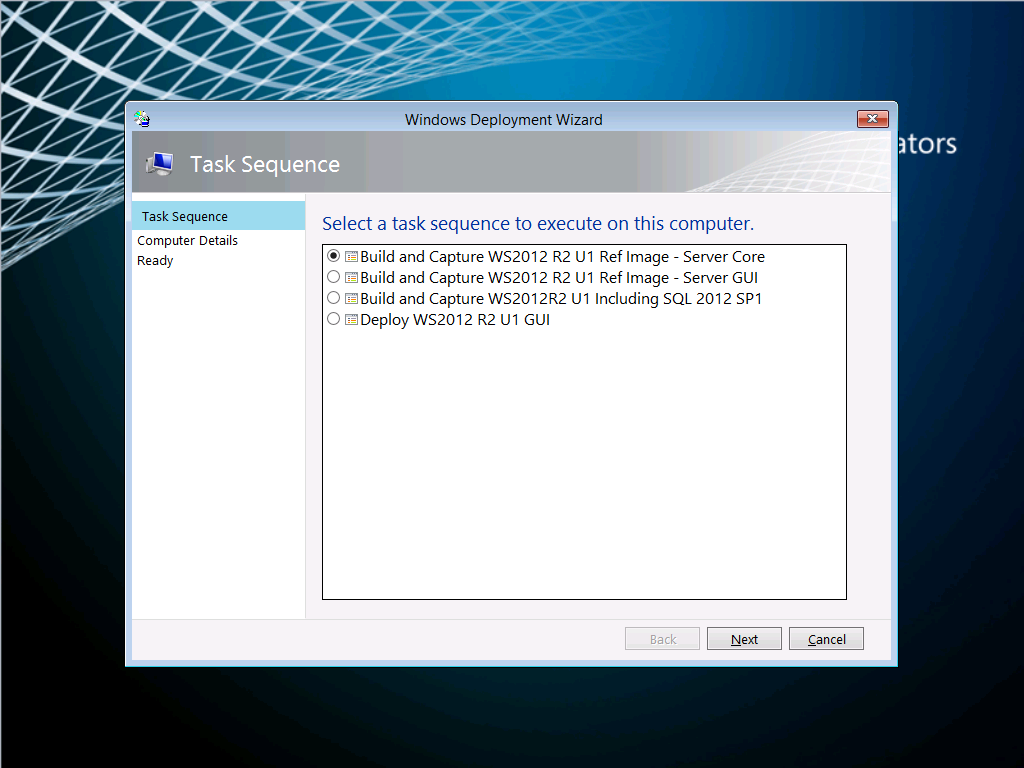
If you have a DHCP server on your network like I do here, then you can simply click the Run the Deployment Wizard to install a new Operating System button. Otherwise, if you are using a static IP address, click the Configure with static IP address button. Remember that in either case, this IP needs to be able to reach the MDT server's deployment share and resolve its name. If DNS isn't working, you will not get very far. It is a good idea at this point to press the F8 button to bring up a command prompt and ensure you have an IP address (using the ipconfig command), and that DNS resolution is working (using ping, nslookup, etc.). Anyway, clicking next will show you task sequences available on your deployment share. Select the one you created earlier in this post and click next.
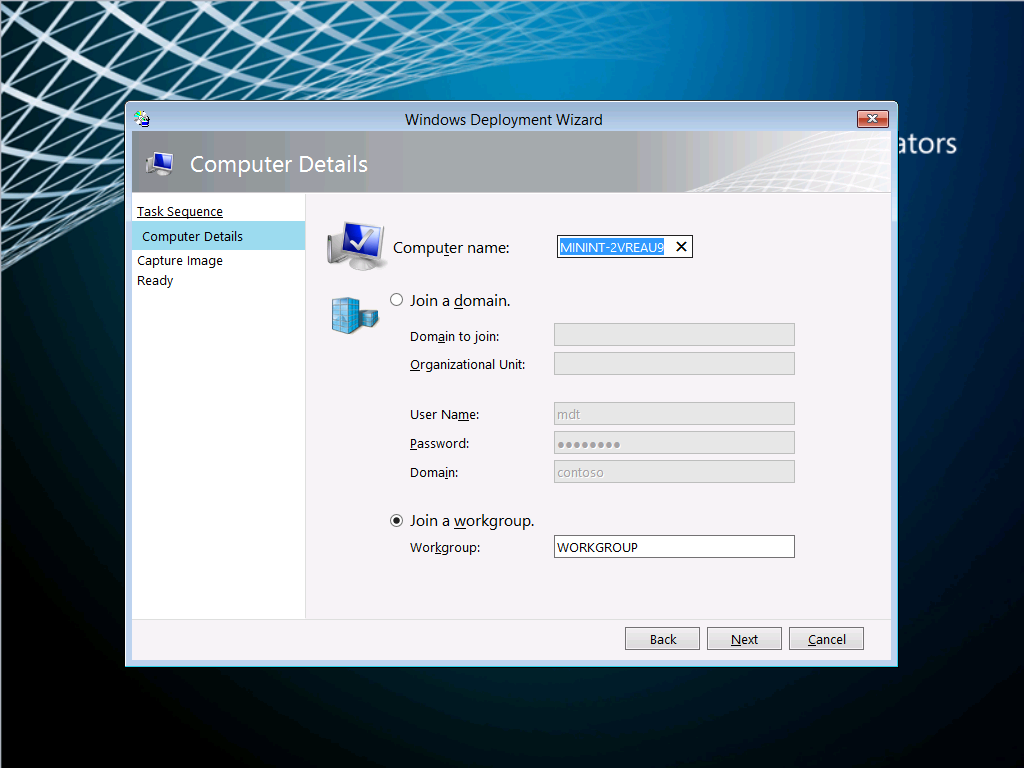
The next step is important, you should not enter any domain info. If you do, the MDT wizard will not show you the capture option for this VM. I typically leave it at default, and click next.
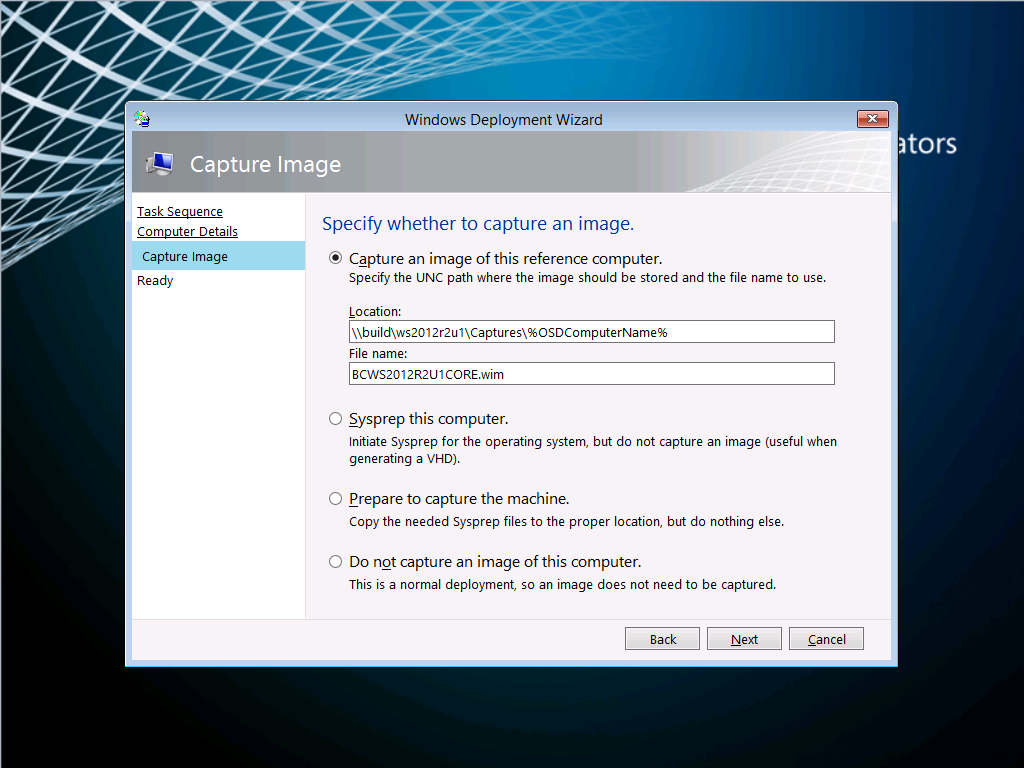
Finally, select the Capture an image of this reference computer. By default, the File name is equivalent to the VM. Click Begin at the next screen and watch MDT does its thing! This process can take anywhere from 45 mins to 4 hours depending on which version of Windows Server you are using (Windows Server 2012 would take longer to build than 2012 R2 Update 1 for instance due to the increased number of updates available to 2012 vs. 2012 R2 Update 1).
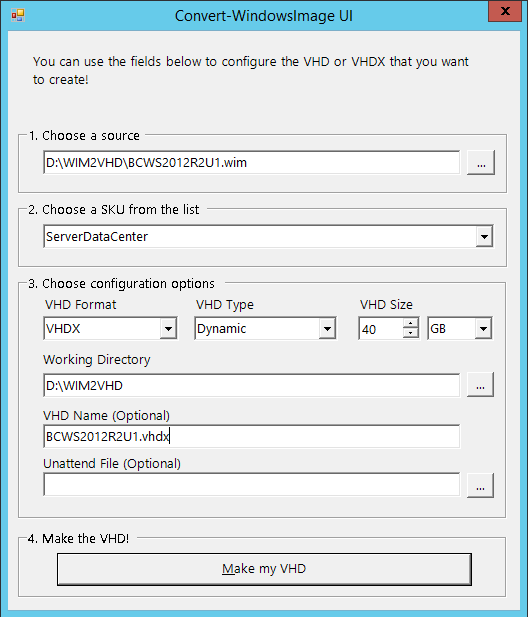
Once MDT has finished creating the WIM, navigate to the deployment share under the Captures folder (in our case, D:\WS2012\Captures . We now have a fully sysprepped and updated WIM file. Now, SCVMM expects a VHD / VHDX file and now a WIM for bare metal provisioning and / or VM disks. We will now use the WIM2VHD tool to convert it to a usable VHDX file. First, grab the tool at https://gallery.technet.microsoft.com/scriptcenter/Convert-WindowsImageps1-0fe23a8f then run it either using the GUI (with the -showui command) or pass the necessary parameters via command line (ex. .\Convert-WindowsImage.ps1 -showui) - you should see the WIM2VHD UI. The fields are self-explanatory. Click Make my VHD when ready
You should now have a VHD / VHDX file ready for consumption by SCVMM! I usually take this same file and use it as part of my VM templates and / or bare metal provisioning. The process is the same to get to the VHD / VHDX file.
I hope this has been helpful :)