Azure template to deploy a forest with two domains, part 1 -- using the template
This is Part 1 in a series. This is the whole series:
- Part 1: using the template
- Part 2: Understanding the template structure
- Part 3: visualizing the template
This blog has been a while in the making. For various reasons I needed a simple way to quickly create a test forest in Azure with two domains, and two domain controllers each. When I started this little project, I had a couple of simple requirements.
- A one-shot Azure template with no configuration steps before or after template deployment.
- Must create a root and child domain.
- Should have a choice between one or two DCs per domain.
- Should support as many current operating systems as possible.
- Should be publicly available.
- Should be re-usable by other templates.
In this first part of the series I will only discuss how to deploy it, and what you will end up with. In the next part I will discuss the technical design and the problems I had to solve.
To deploy the template you only need an active Azure subscription and enough permissions to create all required resources. The template will create the following resources:
- a storage account.
- four virtual machines, two for each domain in the forest. You can pick the operating system from Windows Server 2012, Windows Server 2012 R2 (default), and Windows Server 2016.
- two availability sets, one for each domain.
- a VNET with a subnet for the domain controllers, NICs for each VM, and public IP addresses.
- a Network Security Group (NSG) limiting incoming traffic to just RDP.
The project is hosted on GitHub. I have created a stable V1.0 release here that will receive only bugfixes -- if any. To deploy, simply hit the following button and enter parameters that you like. All have reasonable defaults except for the Resource Group name and the admin password that you must supply. This password should be at least 8 characters long, and be complex.

Deployment should take about an hour, depending a bit on the options that you select. Fair warning: the default will deploy four VMs with SSD storage and a network. This is not free. Make sure to deallocate the VMs or to remove the environment when you are done with it.
So how will you know that all went well? Let's step through it.
- Create the environment using the button above. You will enter the name for a new or existing Resource Group, and an administrator password. After deployment starts it will leave you logged on to the Azure ARM portal.
- Wait until it's done: select your Resource Group, then select "Deployments". After about an hour all Deployments should show green checkboxes. Red ones are a problem, blue curlies mean that the Azure deployment is not finished.
- Select the Resource Group's Overview. Find the first DC of the forest root, by default "rootdc1". Select it, and click Connect to initiate an RDP session. If your firewall allows it, you should be able to log on.
- A quick check to see that AD is doing its job: on the DC, create an elevated command prompt, and type: repadmin /replsum. It should show you the four DCs replicating properly.
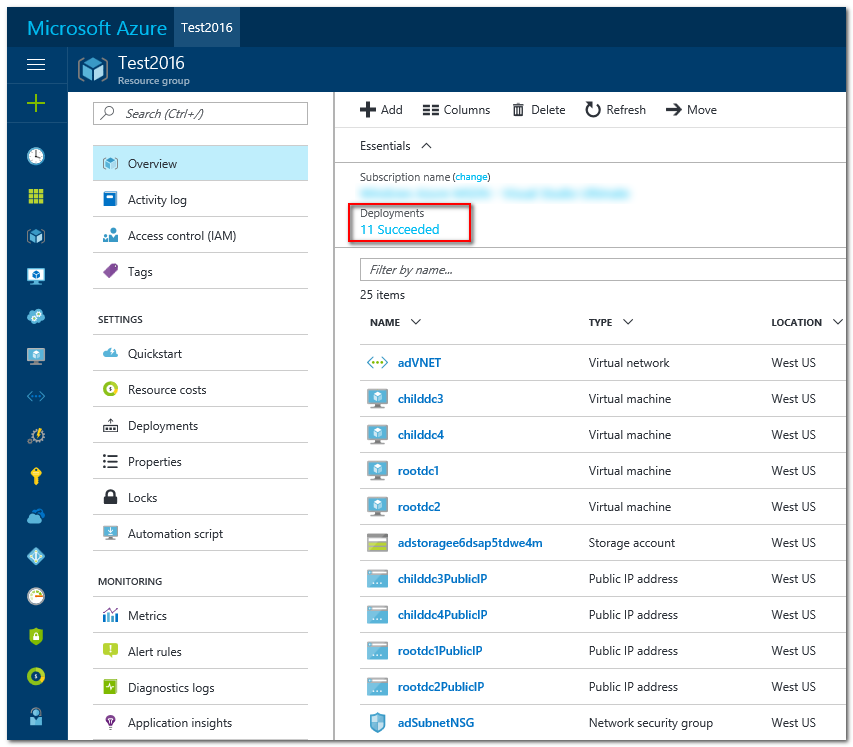
The following is a snapshot from the portal show a successful template deployment as seen from the portal.
From a security perspective, be aware that the solution is deployed in its own isolated VNET. It would not be hard to connect it to other VNETs using for instance VNET peering or a gateway if that is what you want. However, the VMs do have an internet connection. This is required for full functionality of the Azure Agent in the VMs. Also, each VM is reachable from the internet using RDP from anywhere. If this is a concern, edit the Network Security Group to allow incoming RDP only from your environment.