Consume ASP.NET Web API hosted in Windows Azure from HTML5 and JavaScript Windows Store Application using WinJS.xhr
In this blog we will look at consuming an ASP.NET Web API which is hosted in Windows Azure from an HTML application using WinJS.xhr.
Task 1: Create a Database in Azure
First we will create a database in Windows Azure which will be exposed using the Web API. In this example I am using the SyncDB database and the Products table. You can use this Walkthrough to create the SyncDB database.
Logon to the Windows Azure Portal. After you have logged in you will see the portal as shown below. Click on SQL Databases link on the left menu and then click on New as shown below.

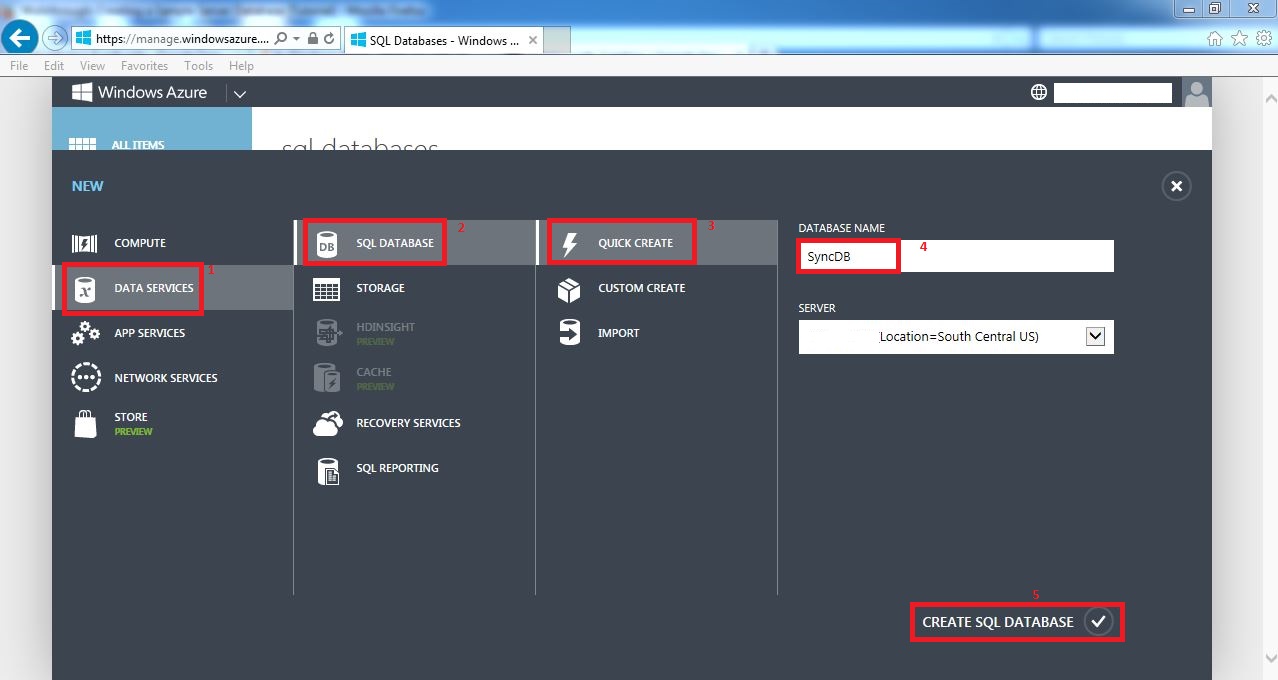
You will see the options below. Select Data Services -> SQL Database -> Quick Create. In the Database Name text box enter SyncDB and then click on Create SQL Database. See the figure below for reference.
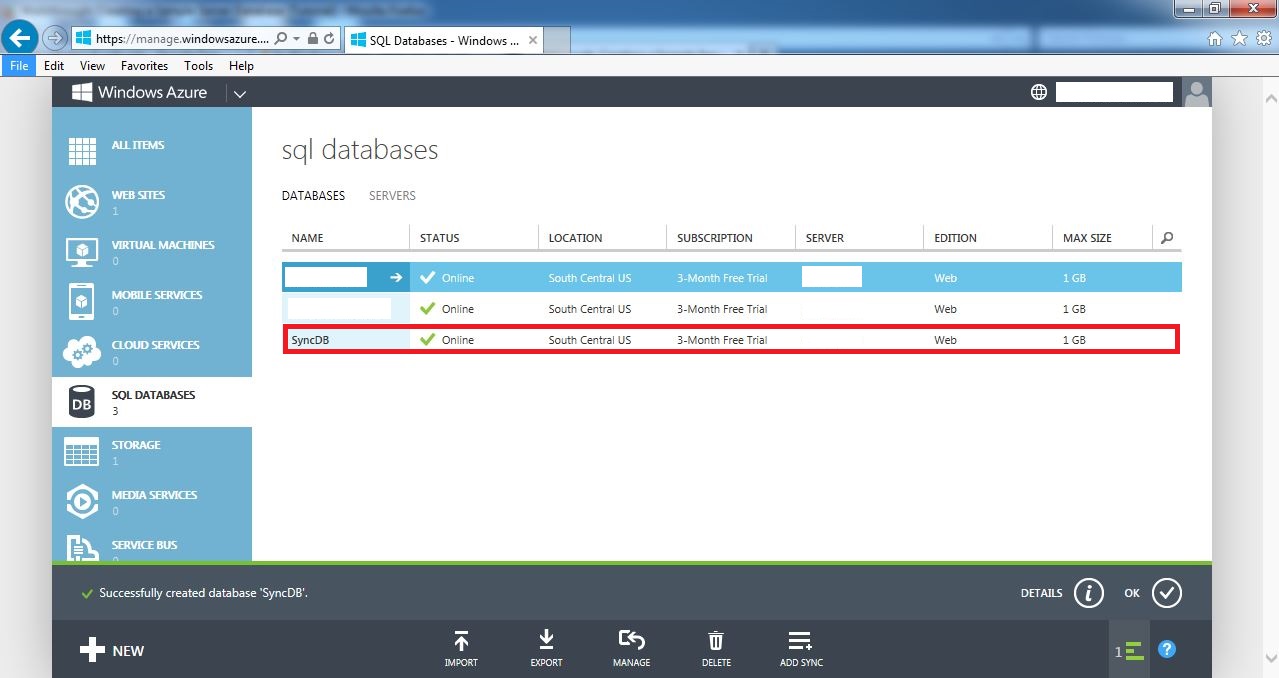
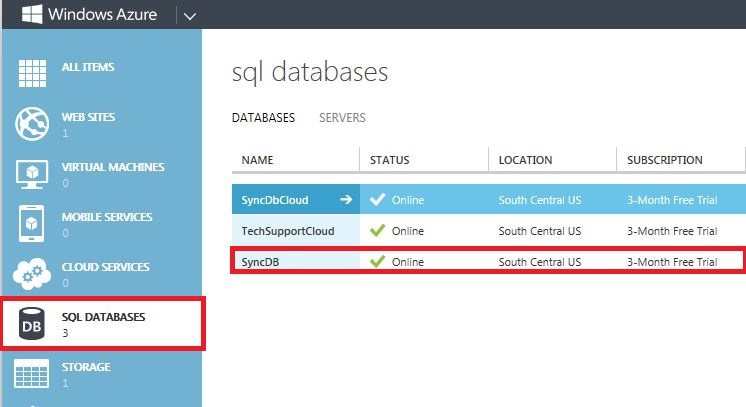
Once you have created the new SQL Database you will see SyncDB in the list of databases on the management portal as shown below. Click on the SyncDB database.
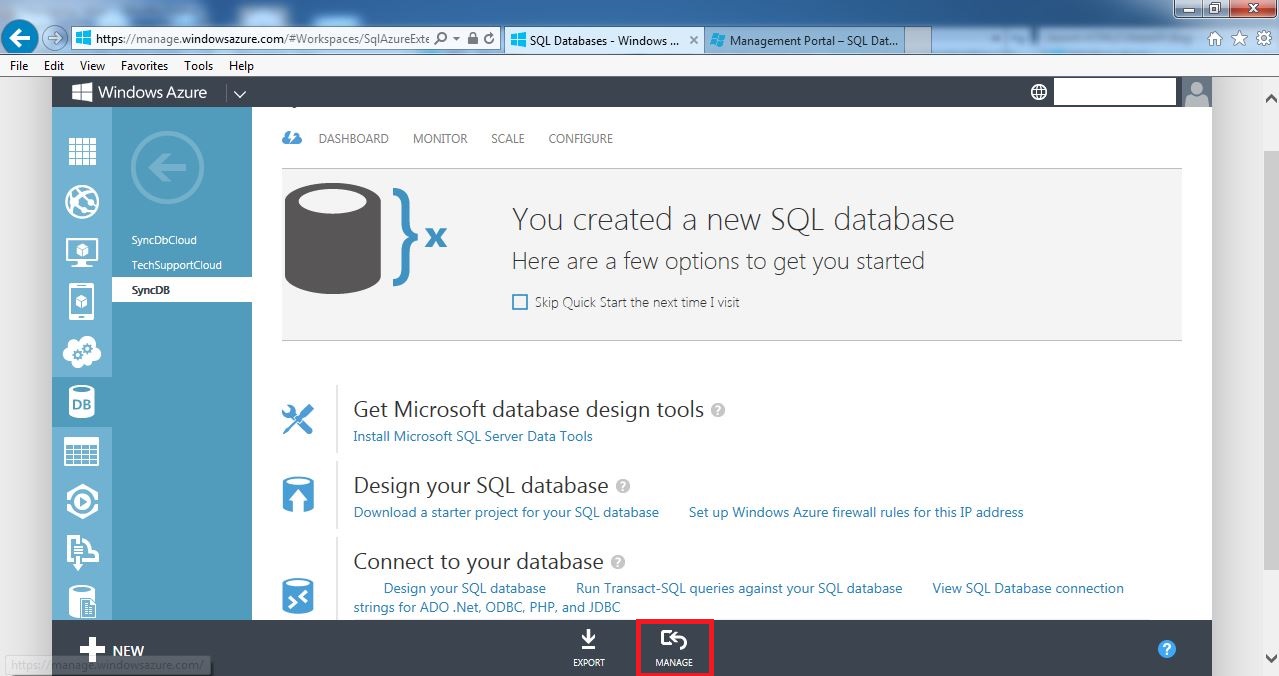
When you click on the SyncDB database you will see the screen below. Click on Manage at the bottom of the screen (you might have to click on it multiple times).
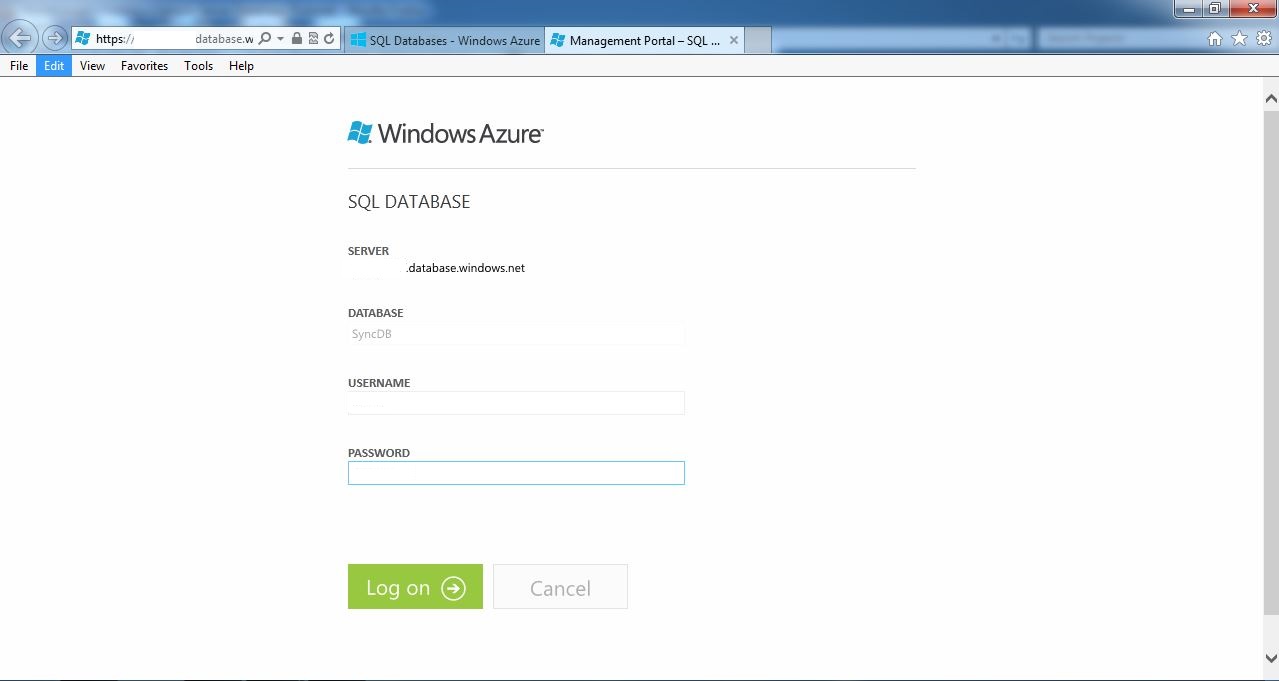
This will take you to the SQL Database Management portal login screen. Enter the Database server username and password and click on Log on. This is the username and password you chose when you first created the Database Server.
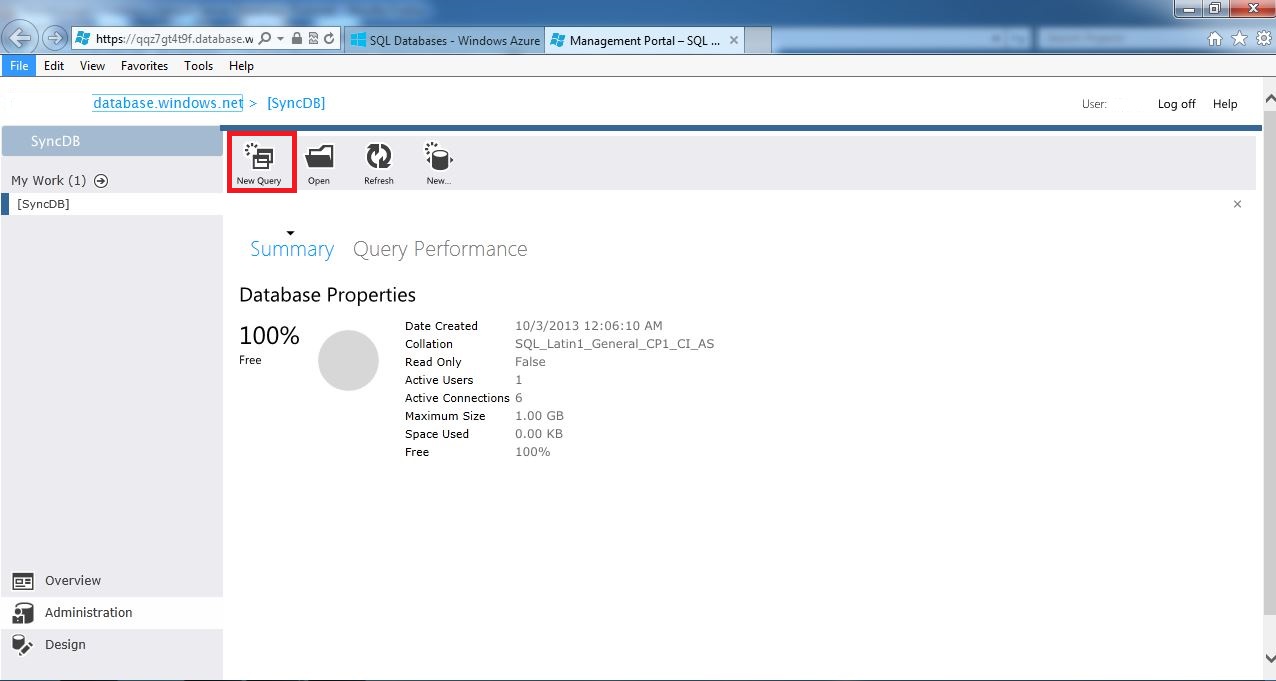
Once you login to the SQL Database Management portal you will see the screen below. Click on New Query.
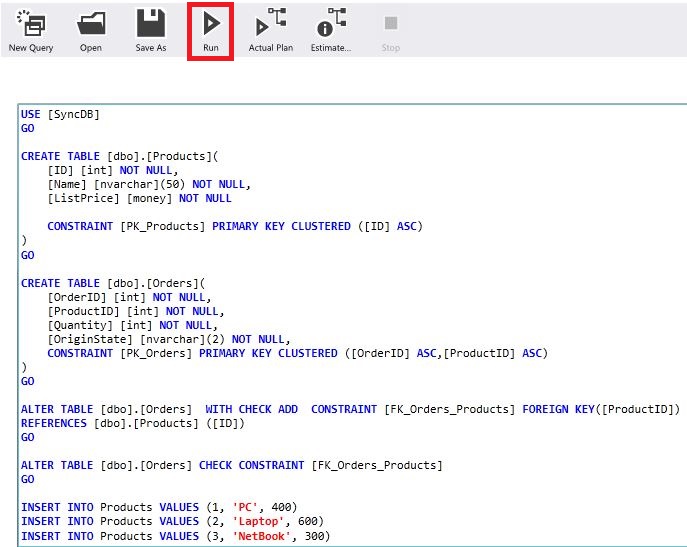
Once the New Query window opens enter the SQL code from the Walkthrough (only enter code starting from line USE [SyncDB] onward) and click Run as shown below.
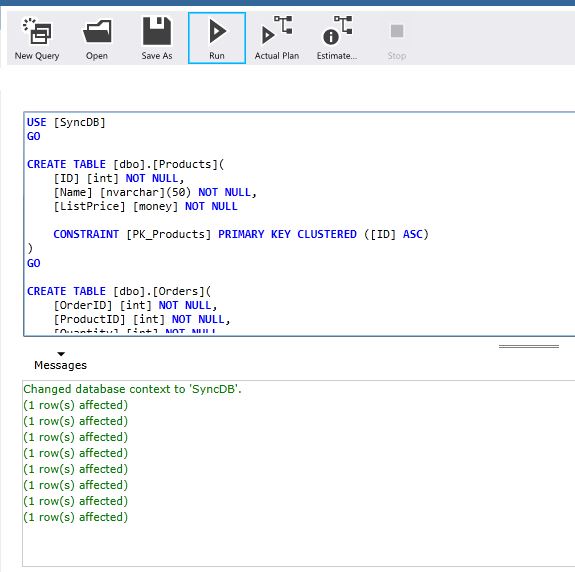
The SQL Code will execute as shown below.
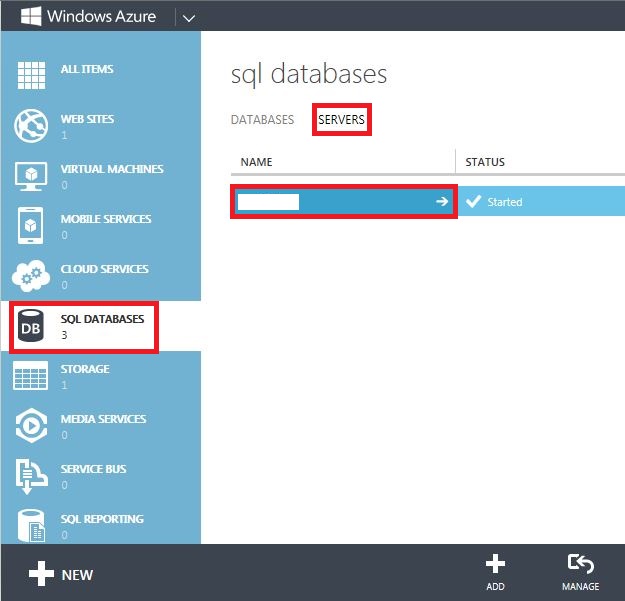
You can now close the query window. Go back to the Windows Azure Management Portal, click on SQL Databases on the left menu and then click on Servers and then select your database server from the list as shown below.
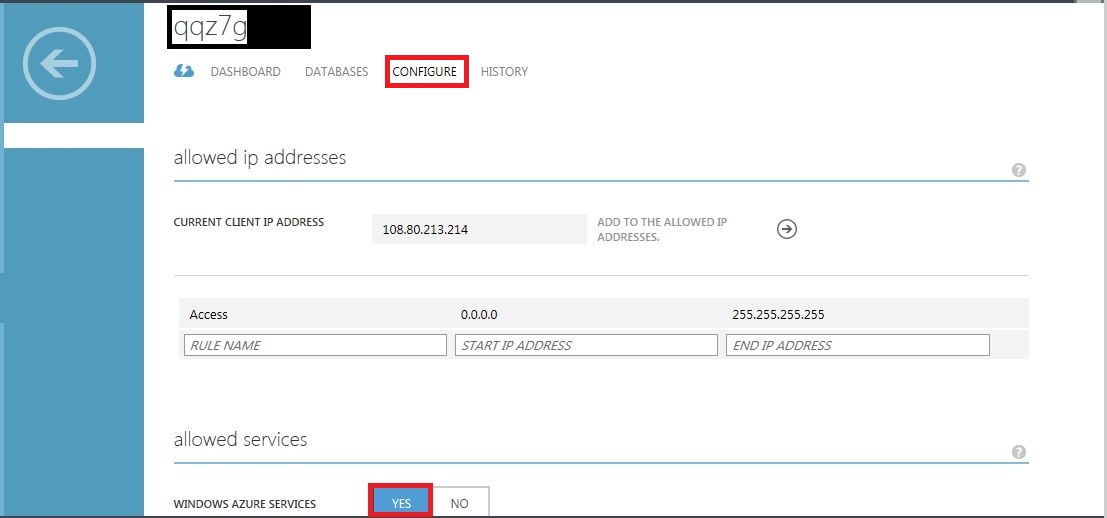
You will then see the Dashboard for the database server. Click on the Configure option and make sure the Windows Azure Services under allowed services section has Yes selected as shown below. Hence our Web API will be able to connect to the SQL Server.
Task 2: Create an ASP.NET Web API
Before we create a Web API in Azure we need to install the Windows Azure SDK for Visual Studio 2012.
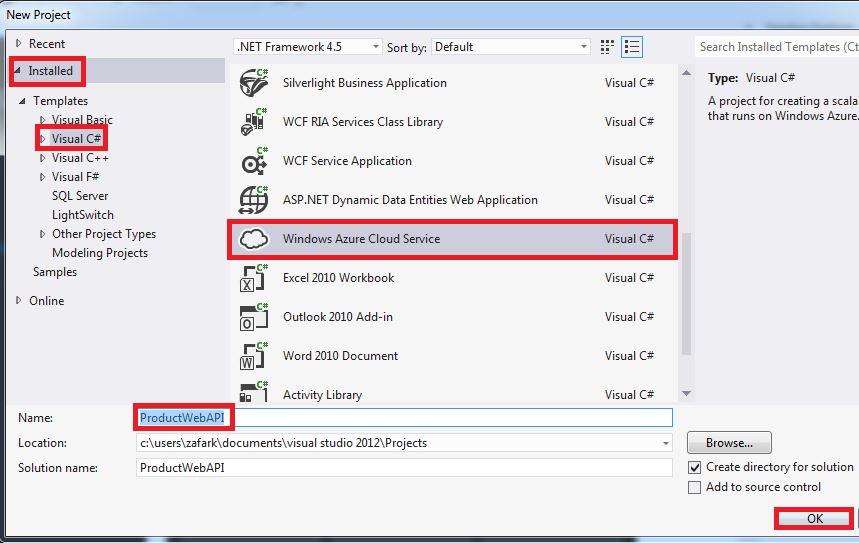
After you have installed the SDK open Visual Studio 2012 and create a new project. From the Installed templates select Windows Azure Cloud Service. In the Name text box type ProductWebAPI and click OK as shown below.
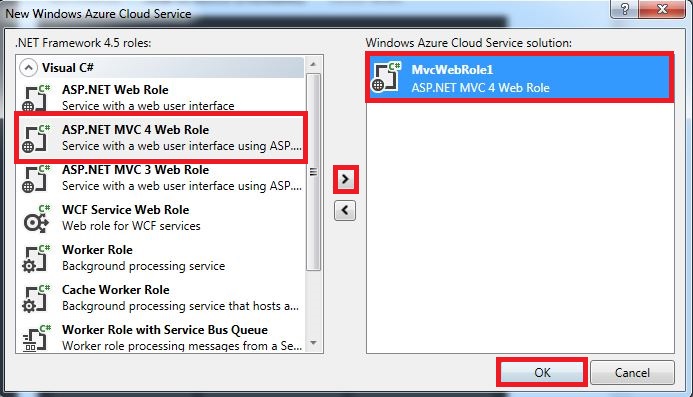
You will then see the New Windows Azure Cloud Service dialog box. Select ASP.NET MVC 4 Web Role and add it to the Windows Azure Cloud Service Solution as shown below.
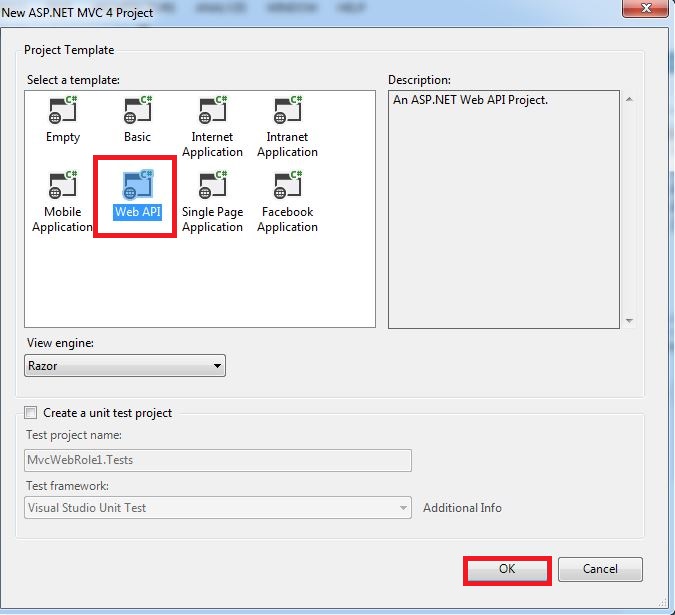
Then from the New ASP.NET MVC 4 Project Dialog box select Web API template. Click on OK. See the figure below.
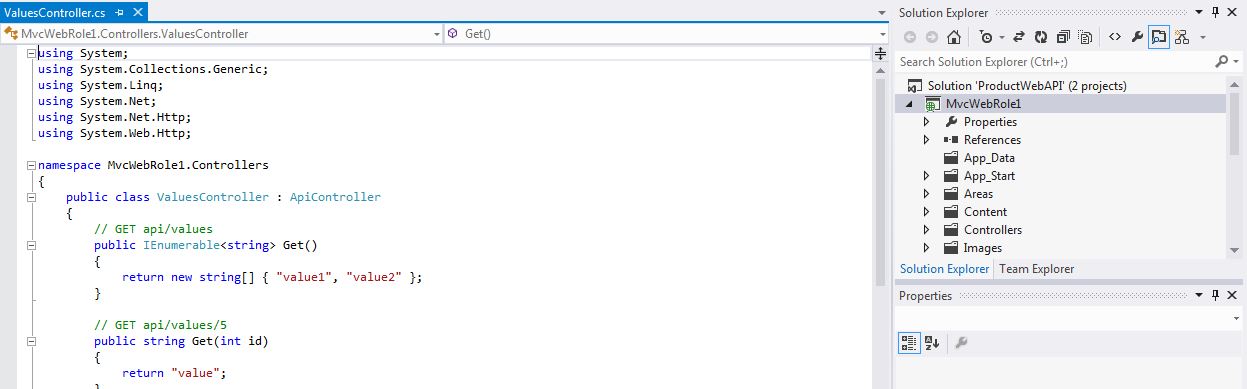
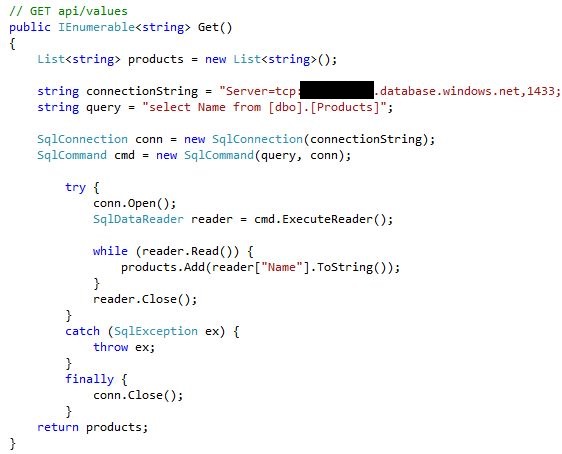
Once you click OK, you will see the ProductWebAPI solution with the MvcWebRole1 project. We will modify the Get method in the ValuesController.cs class to get a list of products from our SyncDB database.
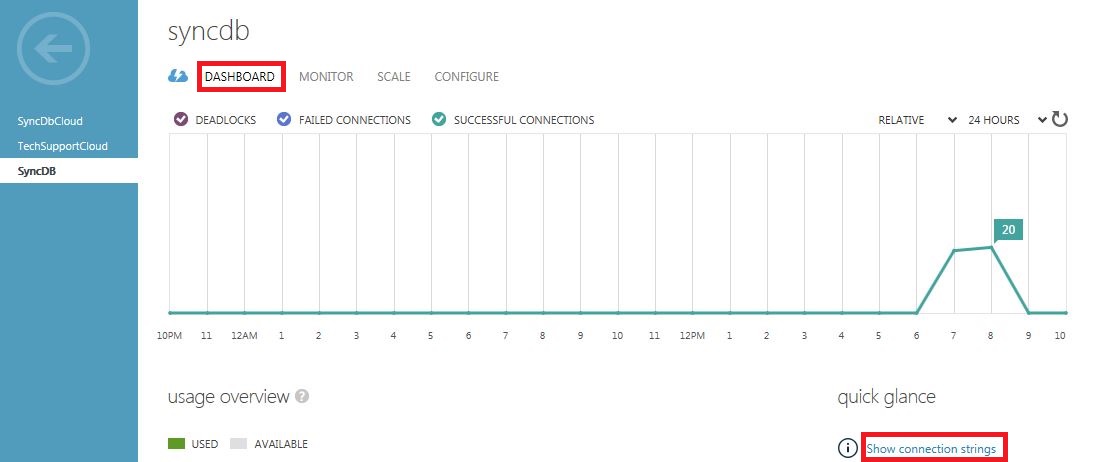
Before we modify the C# code, we need to get the connection string to connect to the SyncDB database. To get the connection string go to the Windows Azure Management Portal, click on the SQL Databases and click on the SyncDB database as shown below.
Click on Dashboard and click on Show connection strings on the bottom right.
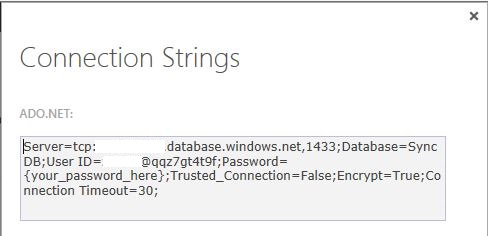
When you see the Connection Strings select the ADO.NET connection string as shown below. Replace {your_password_here} with the Server Password.
Before we modify the Get method add the following namespaces to the code.
using System.Data;
using System.Data.SqlClient;
The modified Get method is shown below.
Task 3: Deploy the Web API to the Cloud
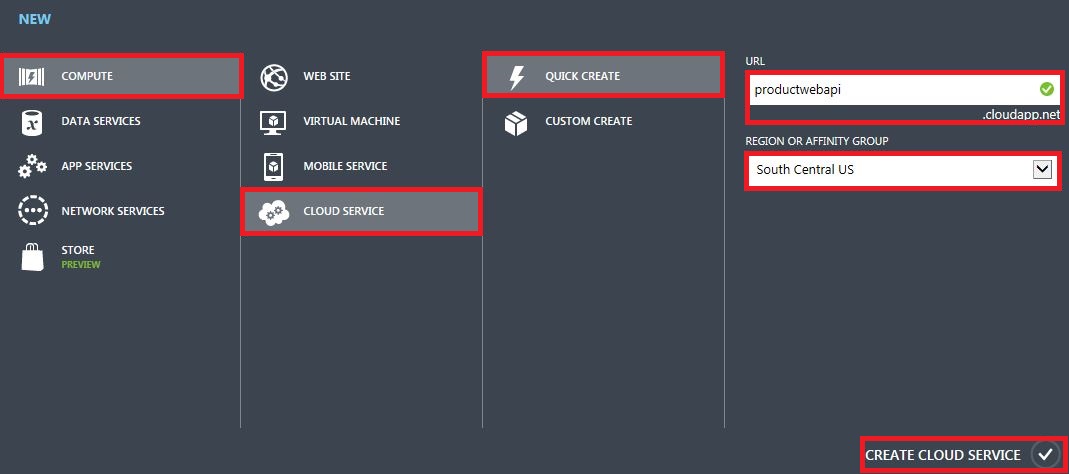
Since we have created the Web API we will now deploy the Web API to the cloud. In order to do so we will first create a new Cloud Service. Go back to the Windows Azure Management Portal and click on Cloud Services from the left menu. Then click on Create a Cloud Service as shown below.
You will then see the screen below. I have named my URL productwebapi as shown below. Click on Create Cloud Service.
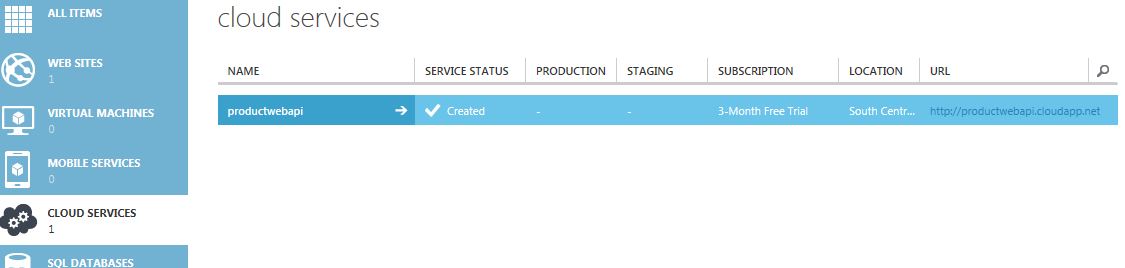
We can see that the Cloud Service has been created.
We will now package our Web API and then upload it to the productwebapi cloud service.
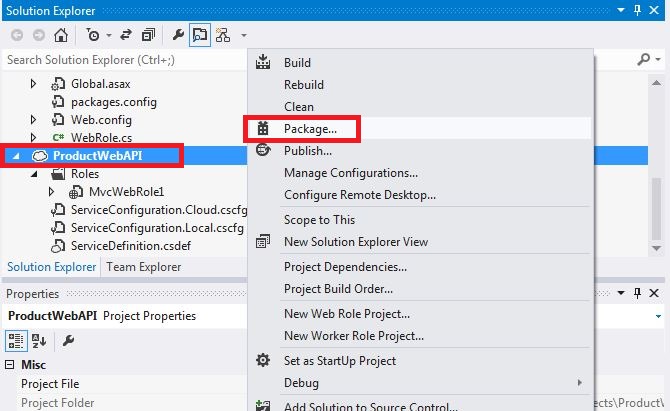
Lets go back to Visual Studio 2012, right click on ProductWebAPI Project and click on Package as shown below.
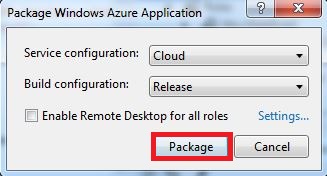
When you see the Package Windows Azure Application dialog box, click Package.
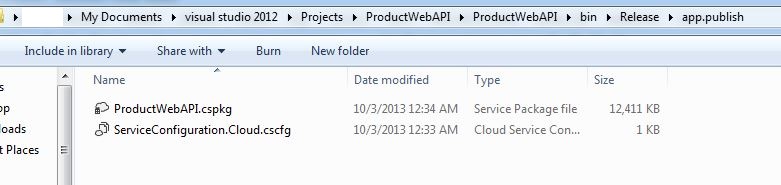
The packaged files are now available on my computer at the location shown below (please note the location). We can see the package and configuration files.
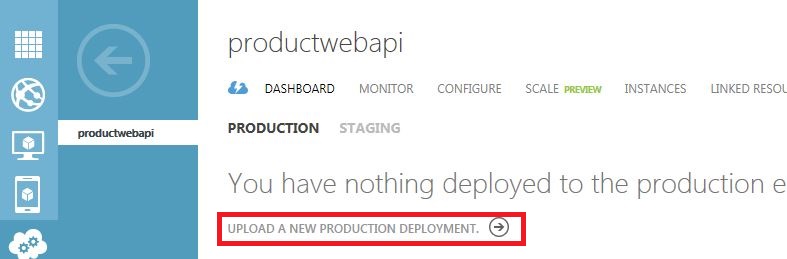
We now go back to the Windows Azure Management Portal, click on Cloud Services and then select the productswebapi cloud service. We then click on Upload a New Production Deployment as shown below.
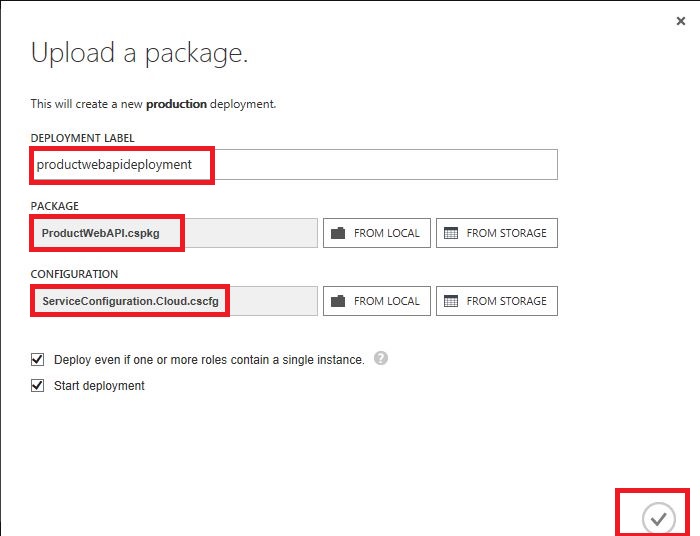
Enter the Deployment Label, the Package and the Configuration files (these were created and stored locally on the computer and we noted the location). Click on the check to complete the upload as shown.
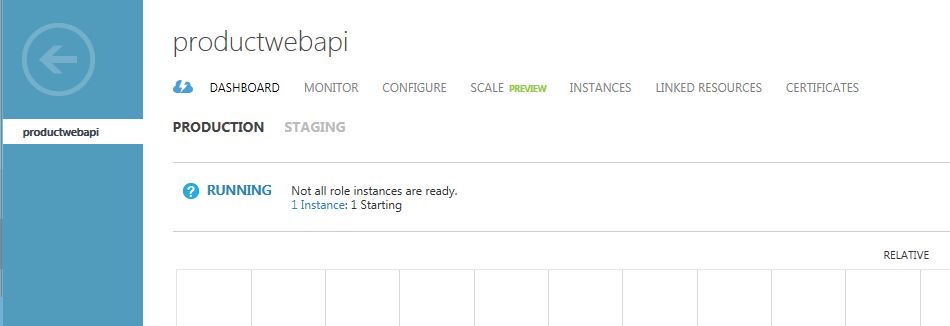
It will take a few minutes to complete the deployment. Till then you will see screen below.
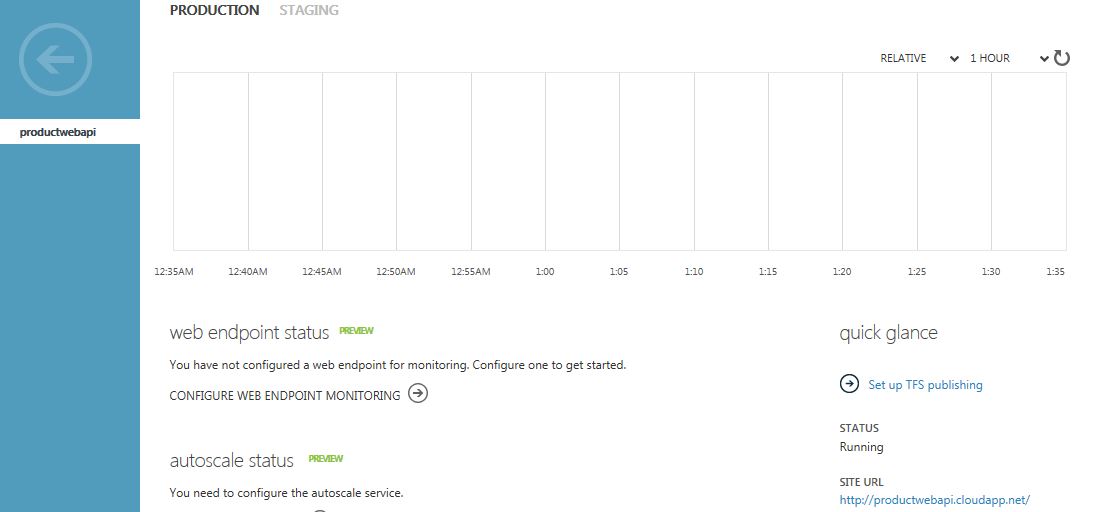
Once the deployment is complete you will see the screen below. Our site URL is https://productwebapi.cloudapp.net/.
We can access the Get method from a browser by appending api/values to the end of the link. When we go to the link https://productwebapi.cloudapp.net/api/values we will be prompted to save or open the file containing JSON data.
Task 4: Create a Windows Store App using HTML and JavaScript to consume the Web API
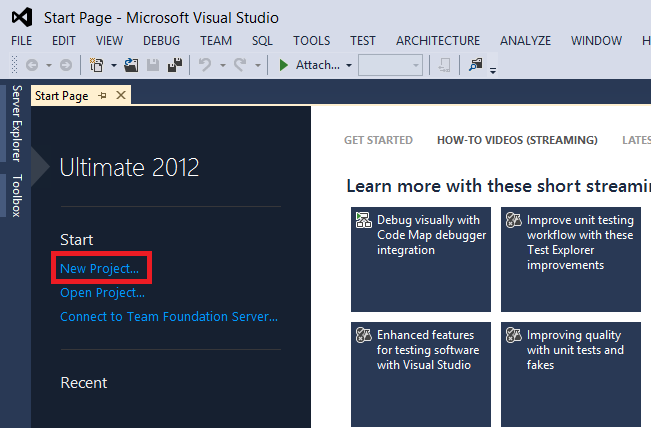
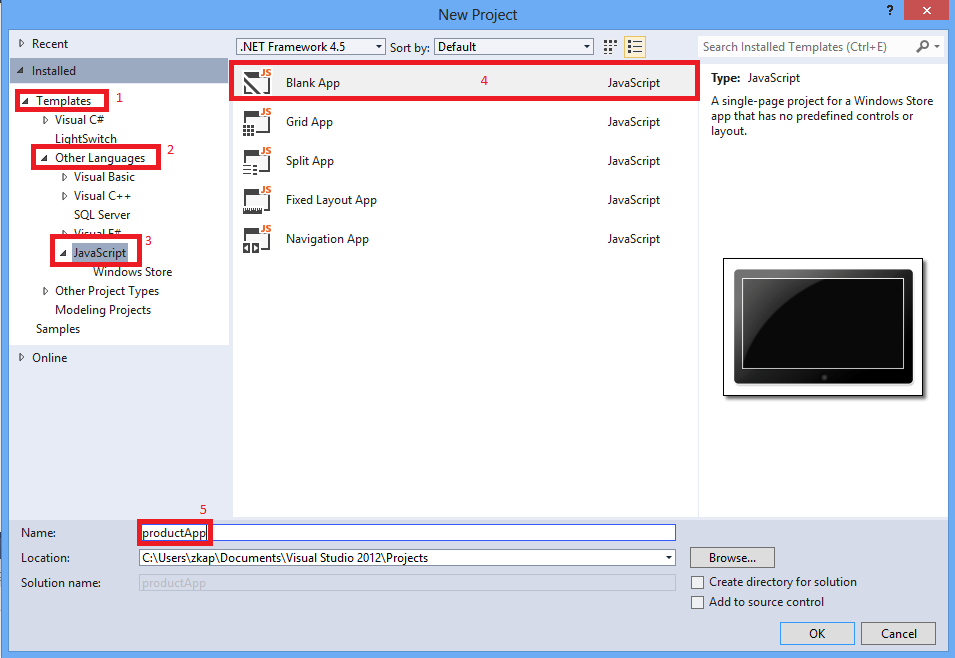
Open Visual Studio 2012 and click on the New Project link as shown below.
From the New Project Dialog Box select Templates -> Other Languages -> JavaScipt. In the center pane select Blank App. In the Name text box type productApp and click OK as shown below.
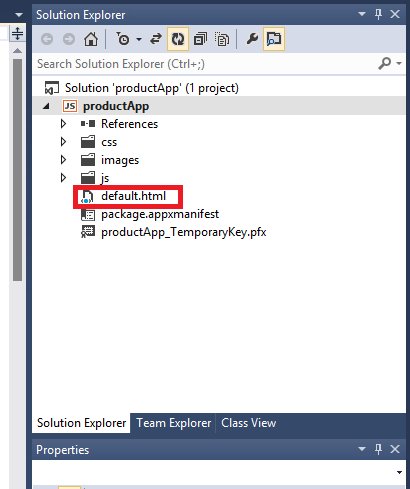
Once you click on OK the new project is created as shown below. Double Click on the default.html file to open it.
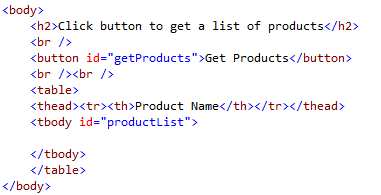
In the default.html file replace the code in the <body> section with the code below.
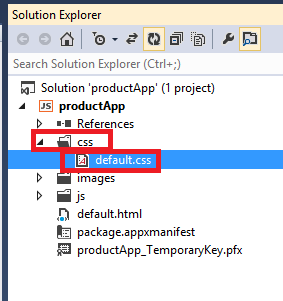
In the productApp project expand the css folder and open the default.css file.
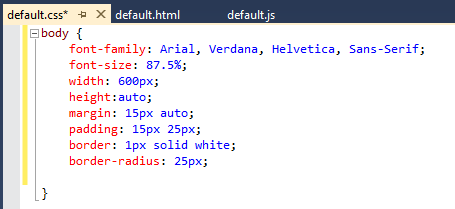
In the default.css file add the CSS rule for the body element as shown below.
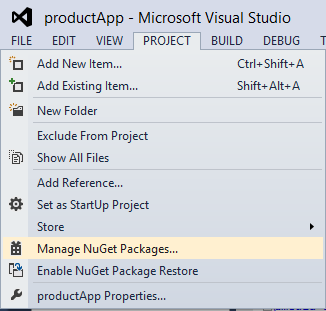
Now we need to add the JQuery library to our Solution. Click on the Project menu and select Manage Nuget Packages as shown below.
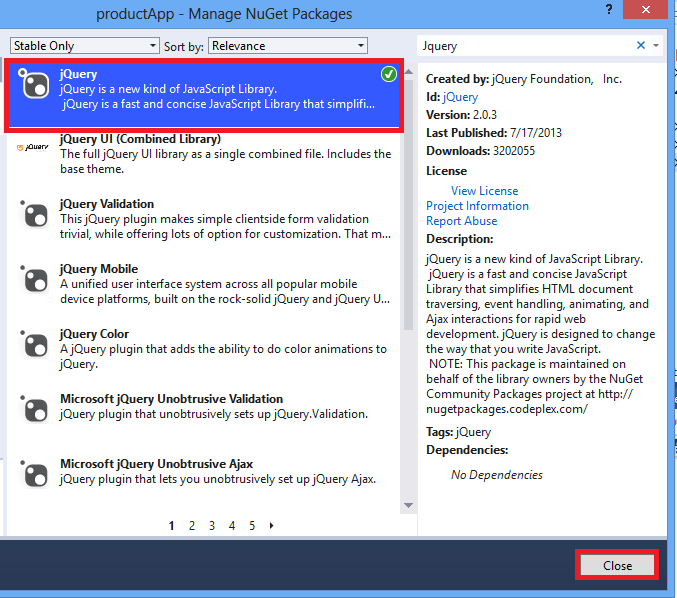
In the Manage NuGet Packages dialog box search for jQuery in the top right hand side. Then from the middle pane once you see the jQuery library, click on the Install button as shown below.

Once the jQuery library is installed a green check is placed next to the jQuery library in the middle pane as shown below. Close the dialog box.
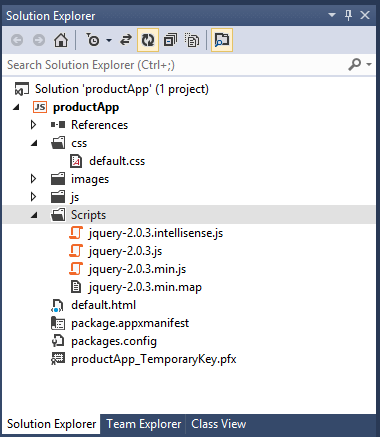
Now you should see the jQuery files in the Scripts folder in the Solution explorer as shown below.
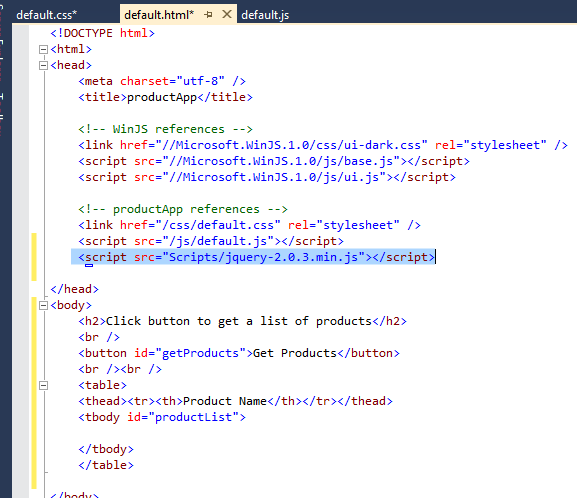
Go back to the default.html file and drag the jquery-2.0.3.min.js file under the productApp references section as shown below. We will need to use the jQuery library to populate the table body with id productList.
Now we go back to the default.js file and add an event handler for the Get Products button. In the default.jsfile after the app.oncheckpoint function, add the buttonGetProductsClickHandler function as shown below.This function uses the WinJS.xhr to consume the Web API and populates the JSON data received from the Web API into the table body with id productList. The url used to call the Web API and get the JSON data is https://productwebapi.cloudapp.net/api/values

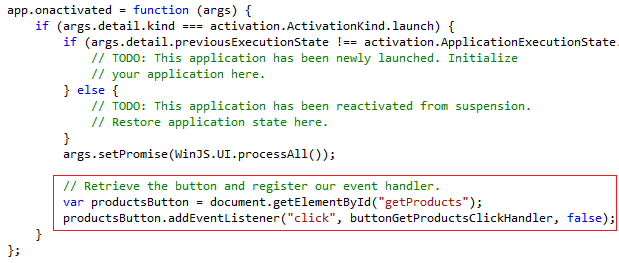
Finally we need to register the buttonGetProductsClickHandler event handler. We register the event handler in the onactivated event handler in default.js, we retrieve getProducts and use addEventListener to register our event handler for the click event. Add this code after the call to WinJS.UI.processAll as shown below.
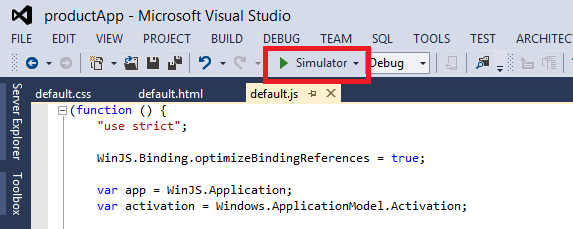
Now test the application in the Windows 8 Simulator as shown below.
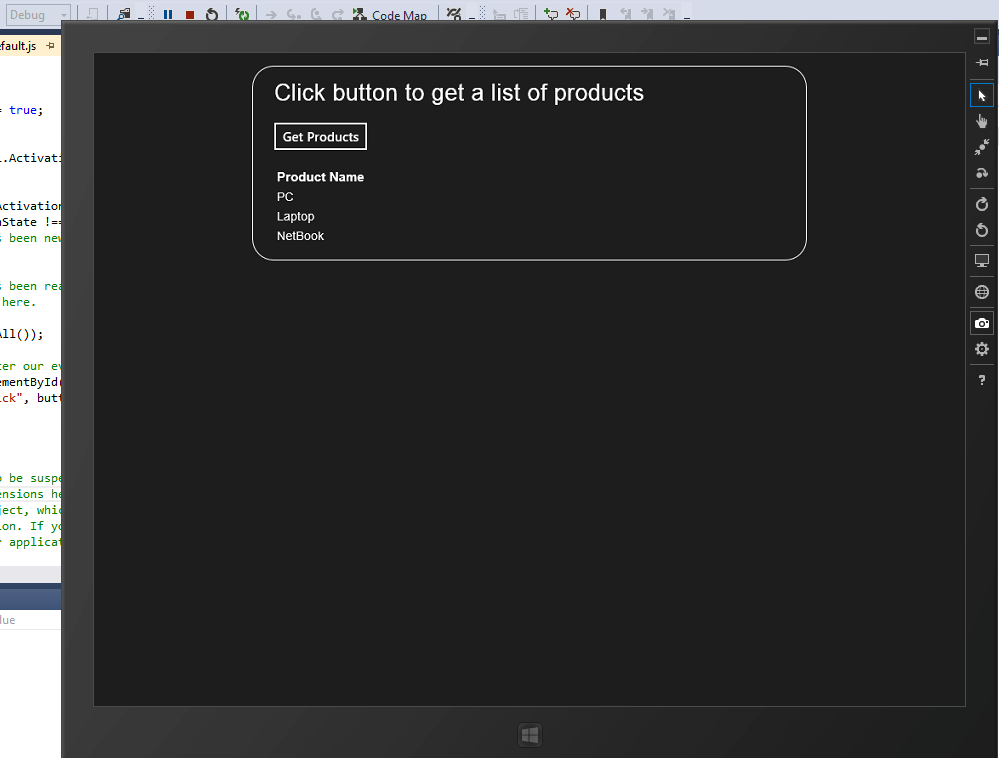
When you click on Get Products button in the simulator you will see the products displayed as shown below.
That's it! We have successfully created a HTML and JavaScript Windows Store Application which consumes a Web API hosted in WIndows Azure using WinJS.xhr.