AzureAD: Setup SSO to G-Suite for free, and govern access! (Google Apps)
Did you know Azure Active Directory can provide Single Sign-On (SSO) to G-Suite (Google Apps)? In this blog, we will explore how to set this up from both the Azure AD side and also the G-Suite side.
Once SSO is configured, consider creating policies for Conditional Access to govern how G-Suite is accessed (e.g. only from a managed device, specific network, monitor for threats of the credentials such as for sale on the dark web, etc). For more information on G-Suite and Azure AD integration for SSO, see Tutorial: Azure Active Directory integration with G Suite
Note: SSO for up to 10 apps comes with the free version of AzureAD. For additional capability, P1 or P2 may be required. See Azure Active Directory pricing for more information.
Important: Chromebooks can sign-in with Azure AD credentials, see this video! (and here for more information)
Also Important: Once SSO is enabled in G-Suite only Azure AD credentials will be authorized and all legacy credentials (i.e. G-Suite credentials) will not be authorized for sign-in. If the user is using a Windows 10 device that is AADJ, then they will not need to type in their password to access G-Suite, SSO from Win 10 will automatically be available.
Let's begin!
Add G-Suite to Azure AD and configure it:
From within the Azure portal navigate to Azure Active Directory -> Enterprise Applications -> New Application and search for G Suite then click Add:
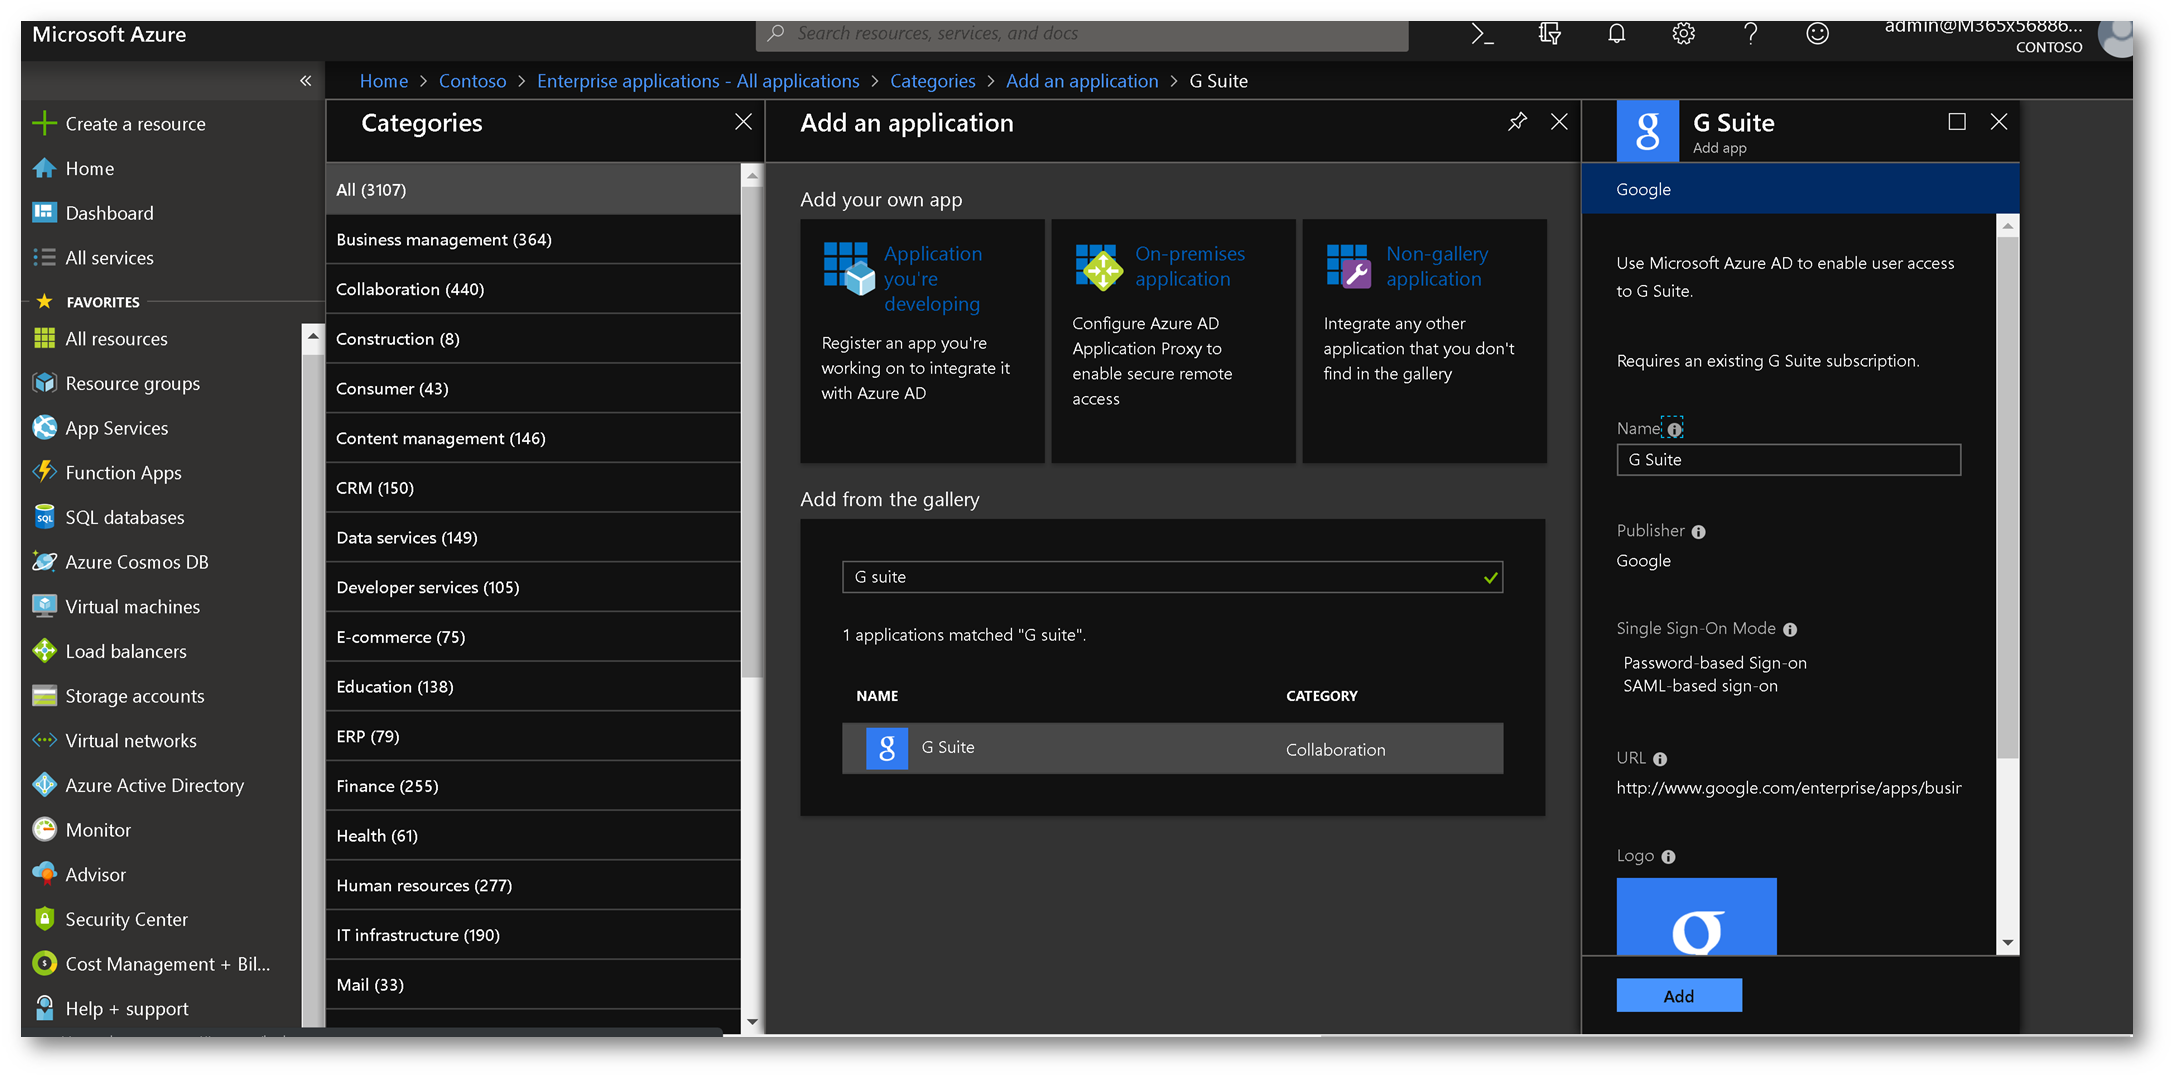
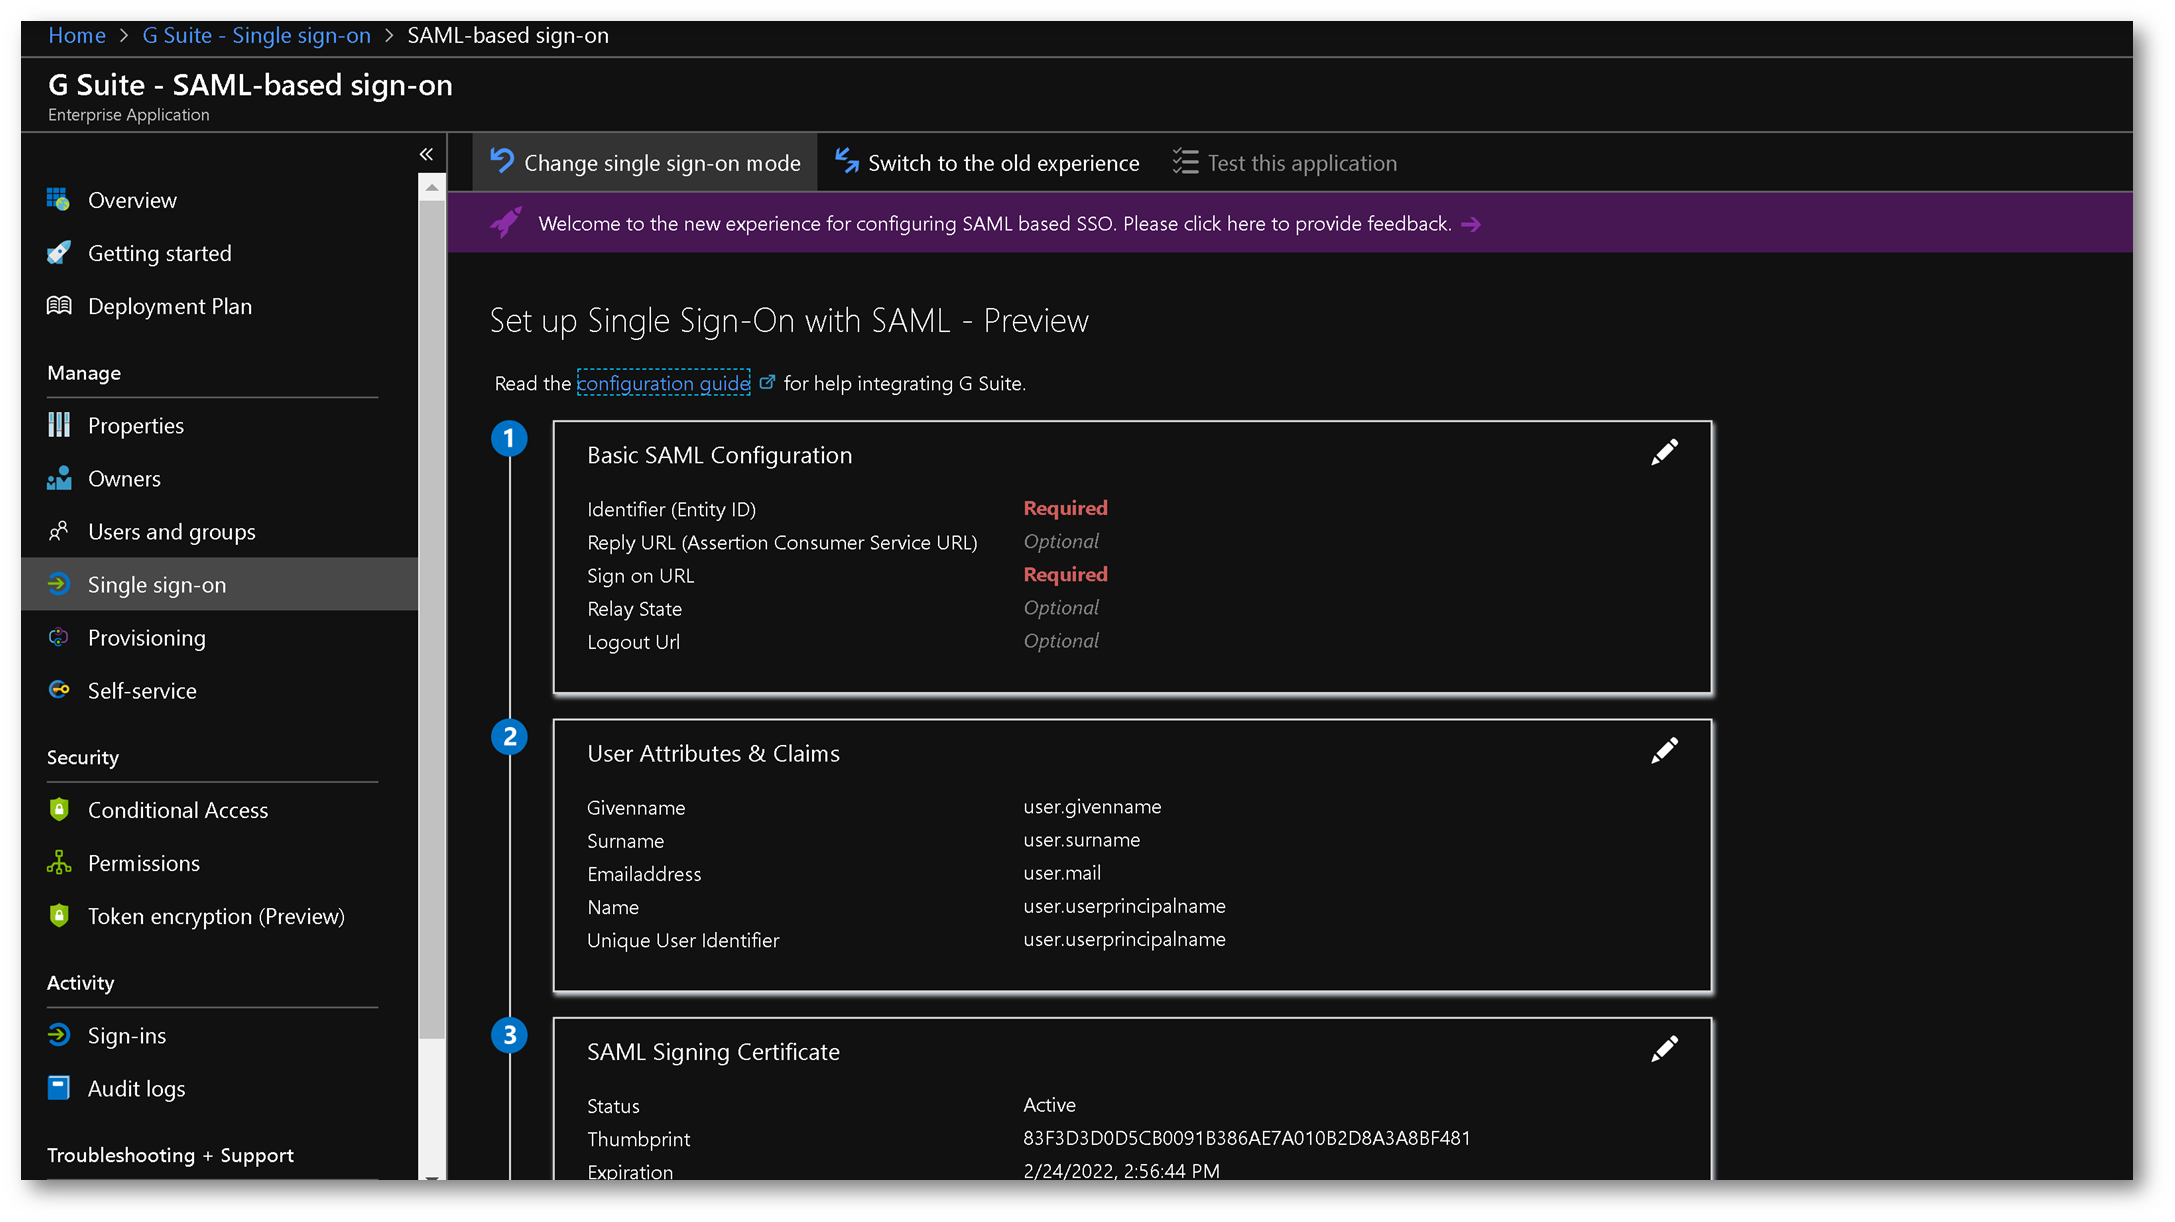
Once added, click Single Sign-on and click SAML

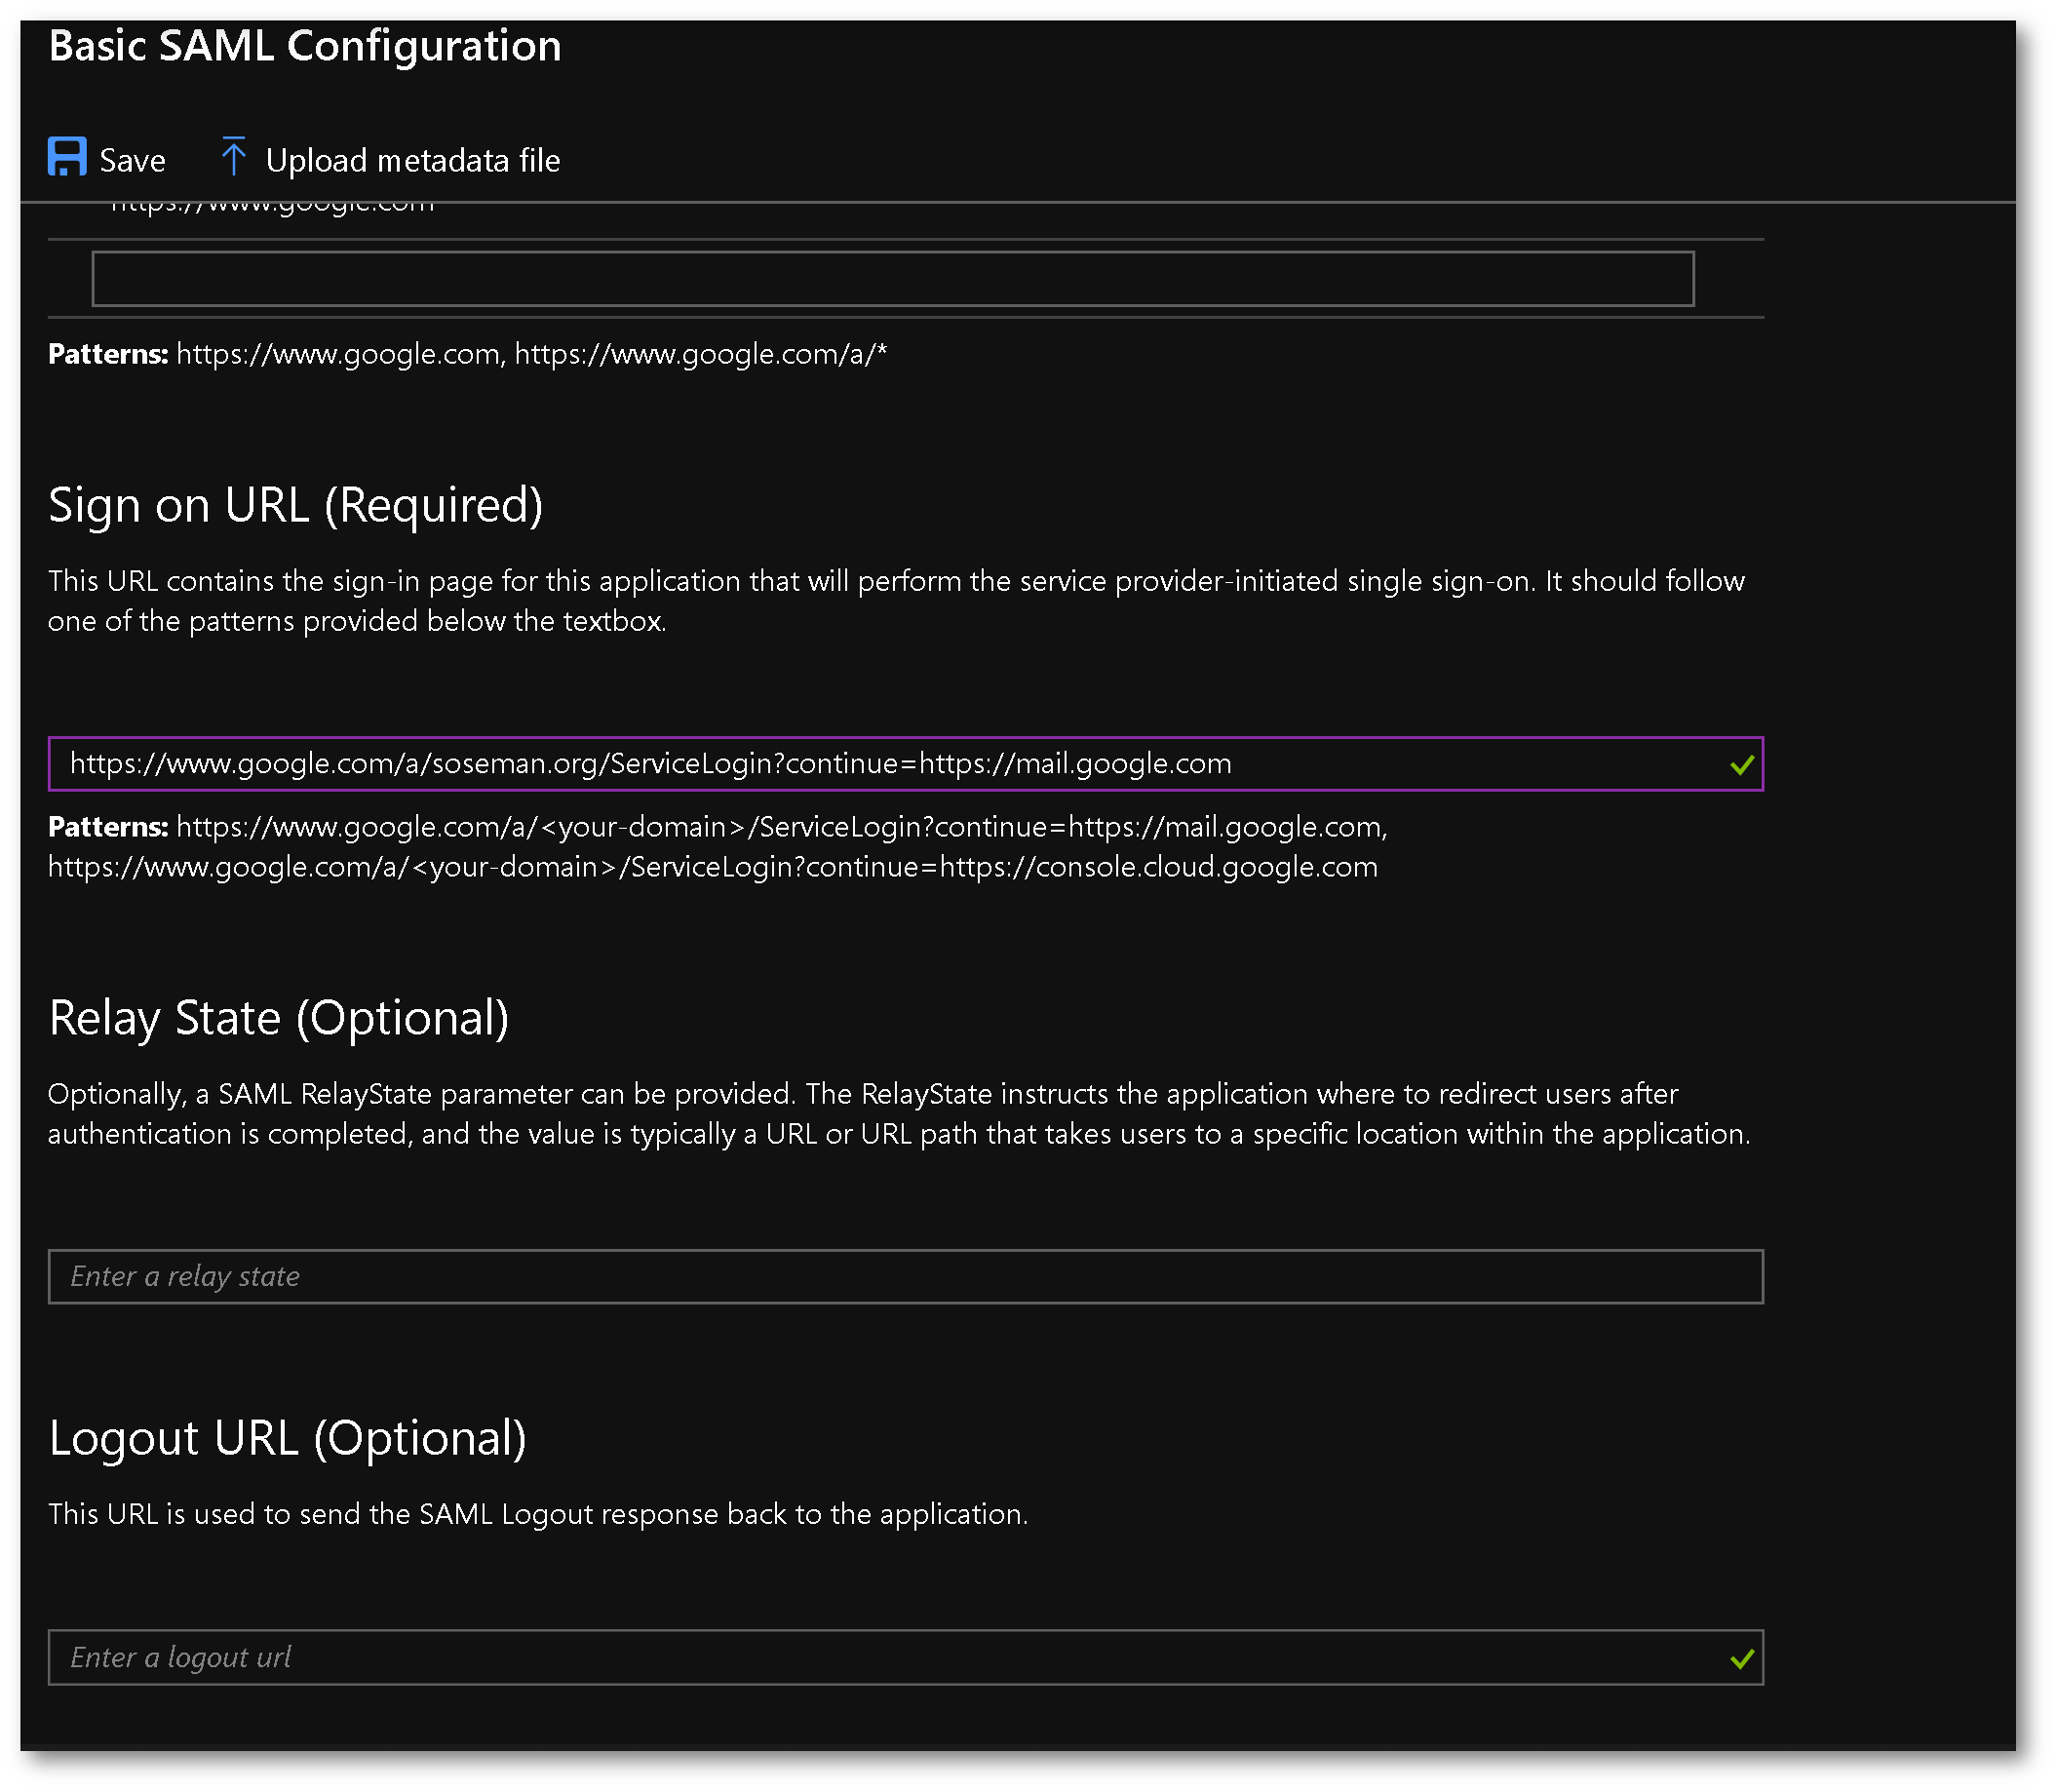
Edit the Basic SAML Configuration by clicking the pencil icon:
Configure using the following parameters:

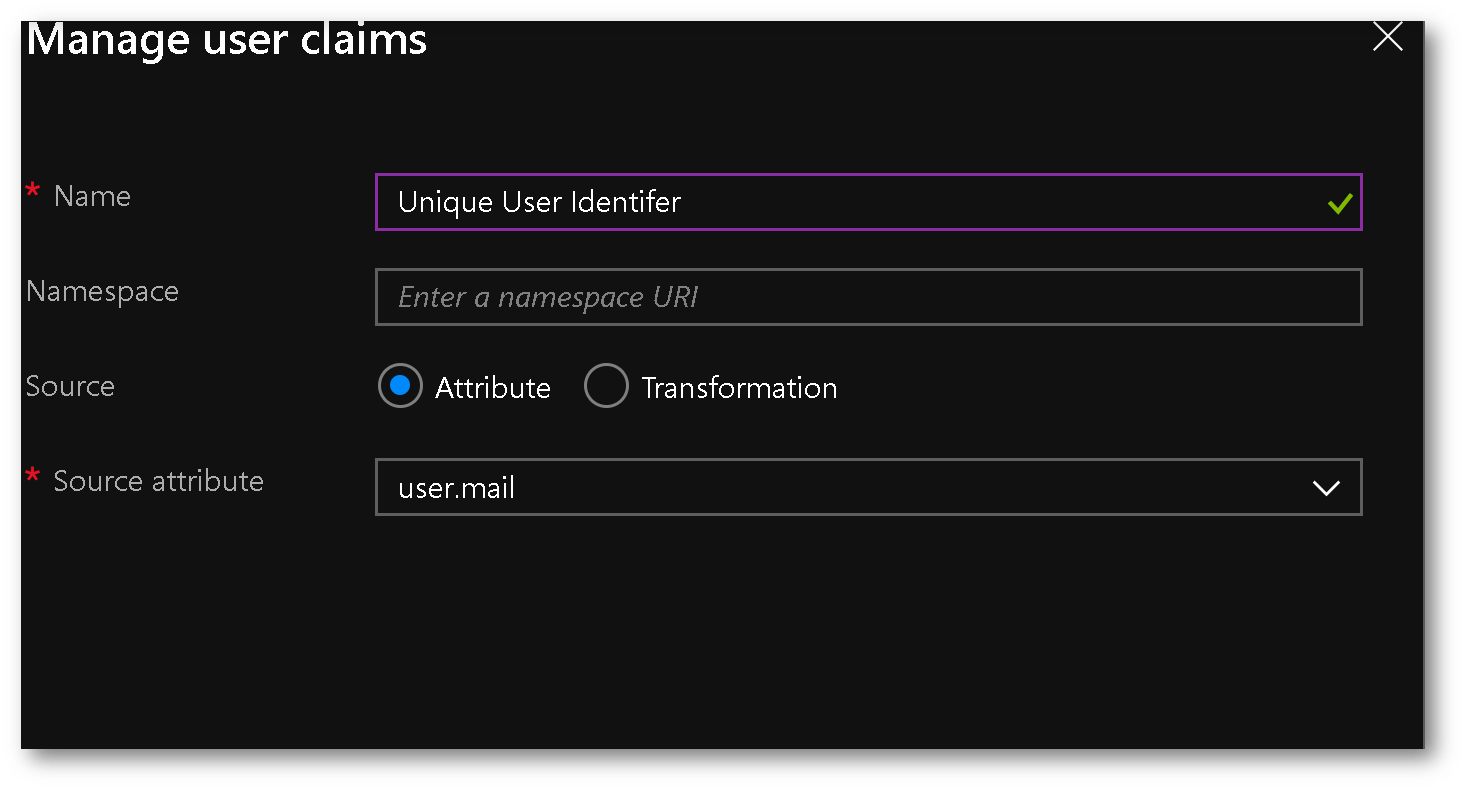
Click Save. For User Attributes & Claims click the pencil icon:
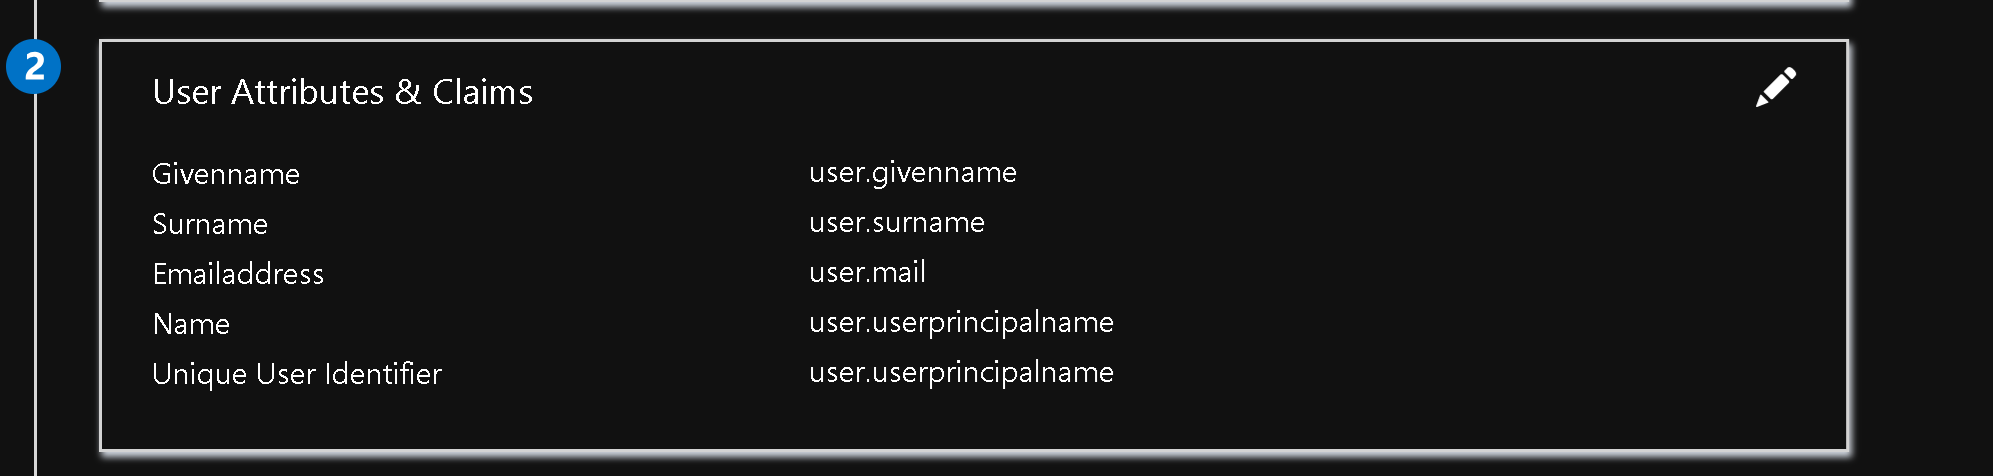
Add a new claim:
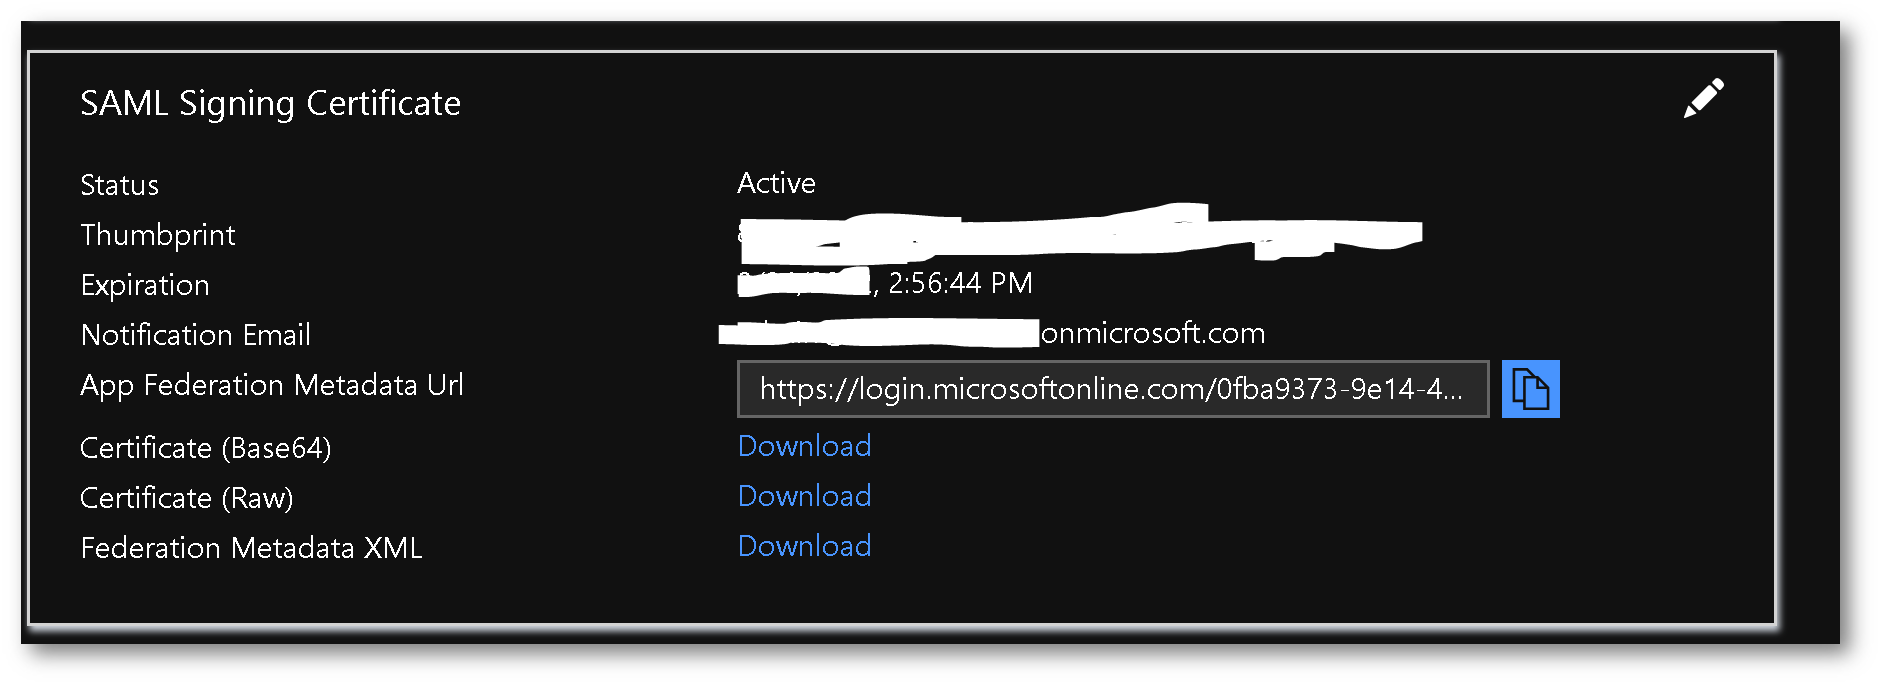
Go back to the main SAML SSO configuration page, and download the base64 certificate for SAML Signing Certificate:
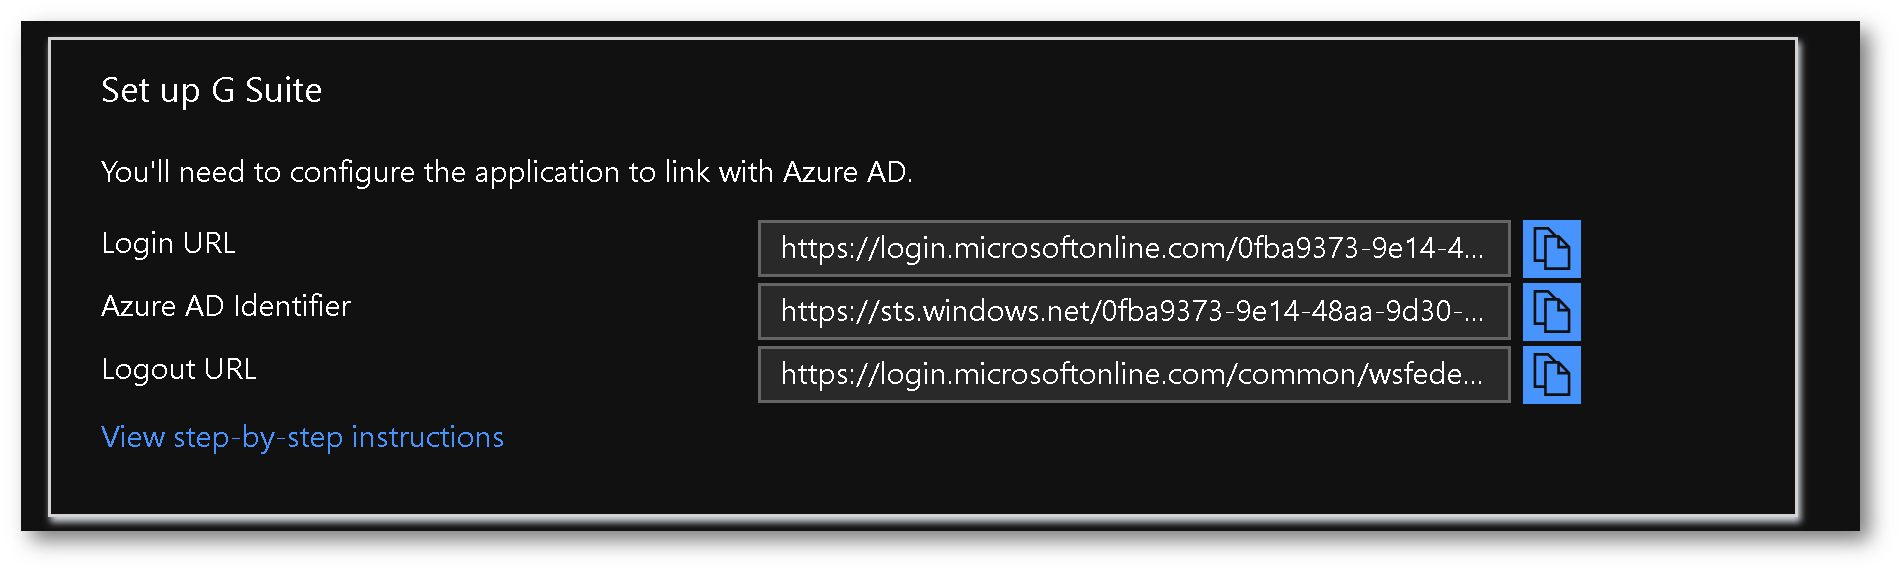
Copy the following URLs to a scratch pad, we'll use these to configure G-Suite:
Setup G-Suite for SSO:
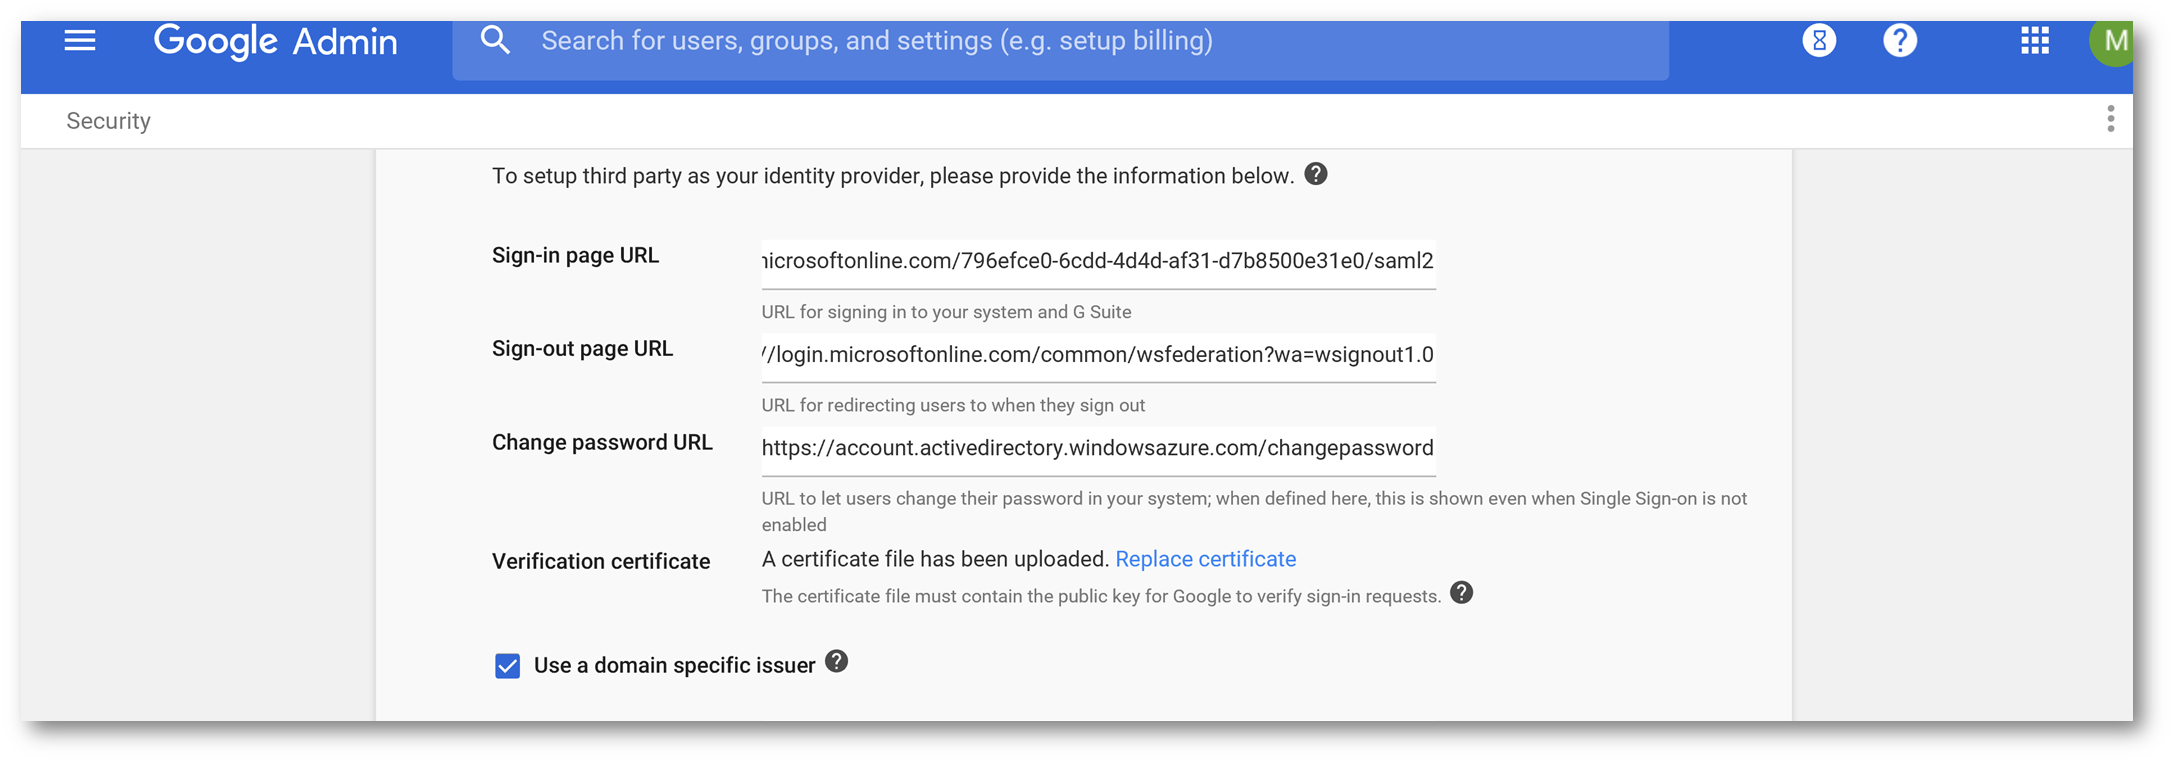
See this article for more information on configuring G-Suite for SSO. From within G-Suite navigate to Admin –> Security -> Setup SSO. Paste the URLs you copied in the last step, into the SSO configuration, upload the certificate you downloaded previously, check the box for use a domain specific issuer and then click Save:
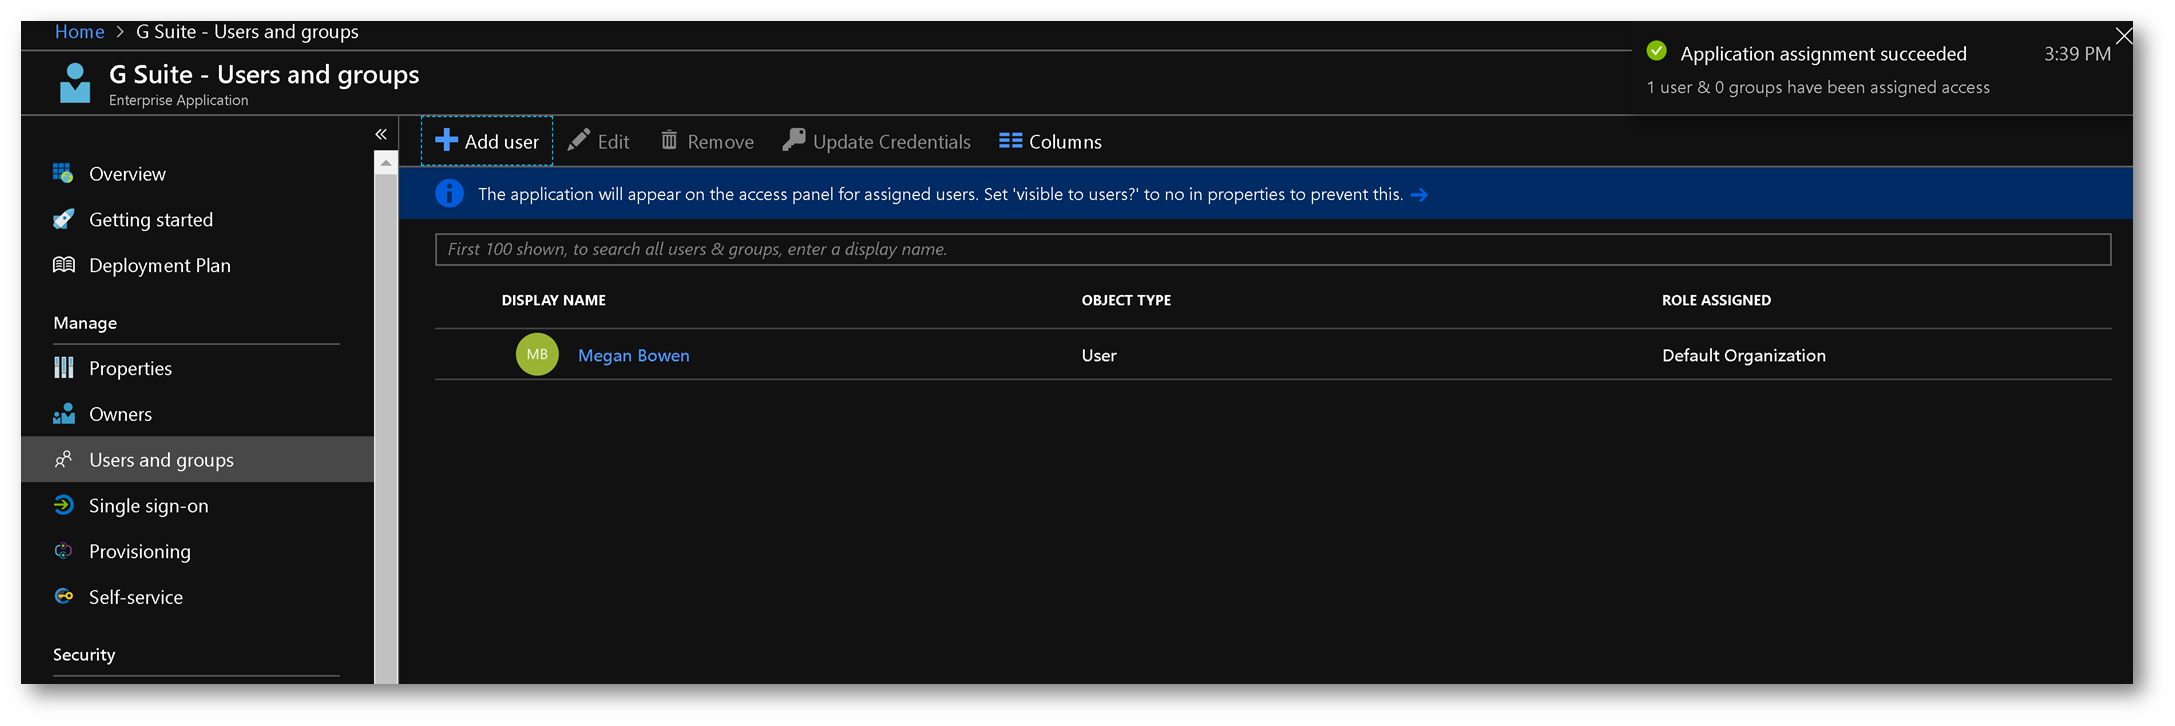
Assign the user to G Suite
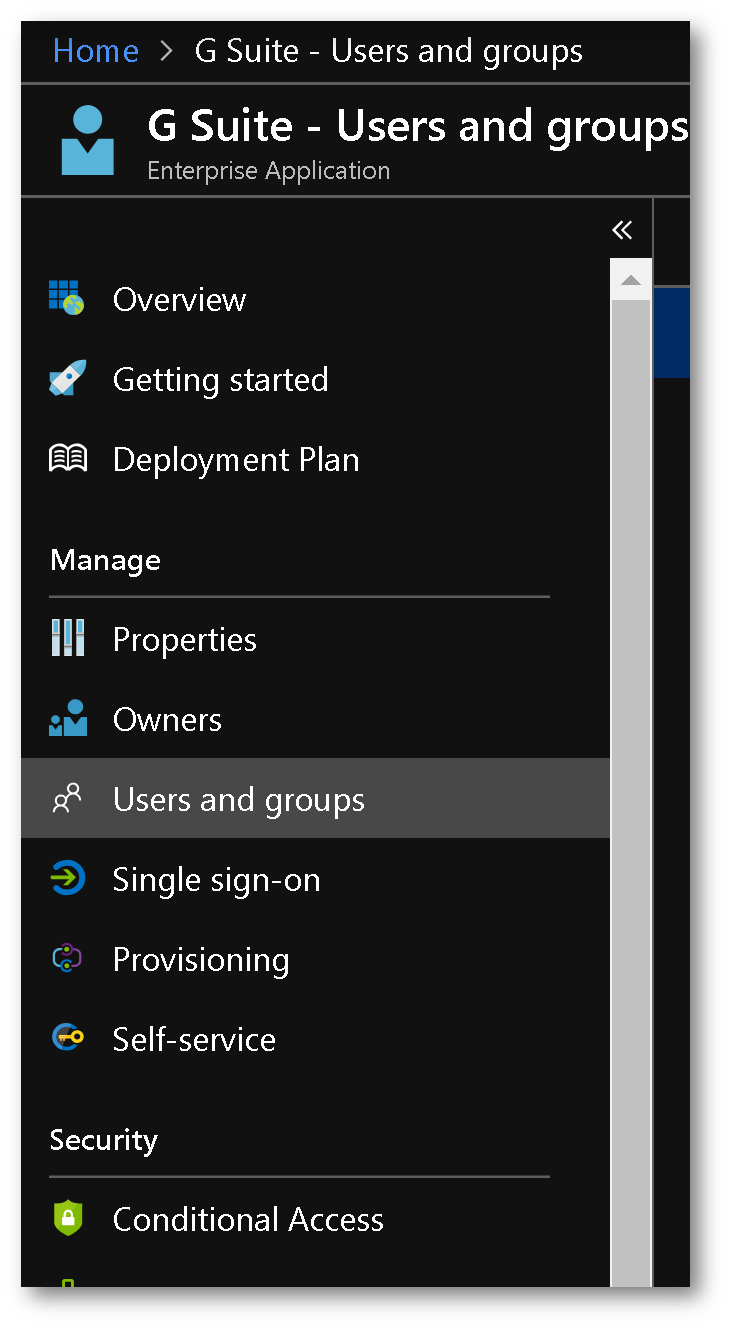
Back in the Azure portal, click Users & Groups from within the G-Suite Enterprise Application:
Add a new user to G-Suite:
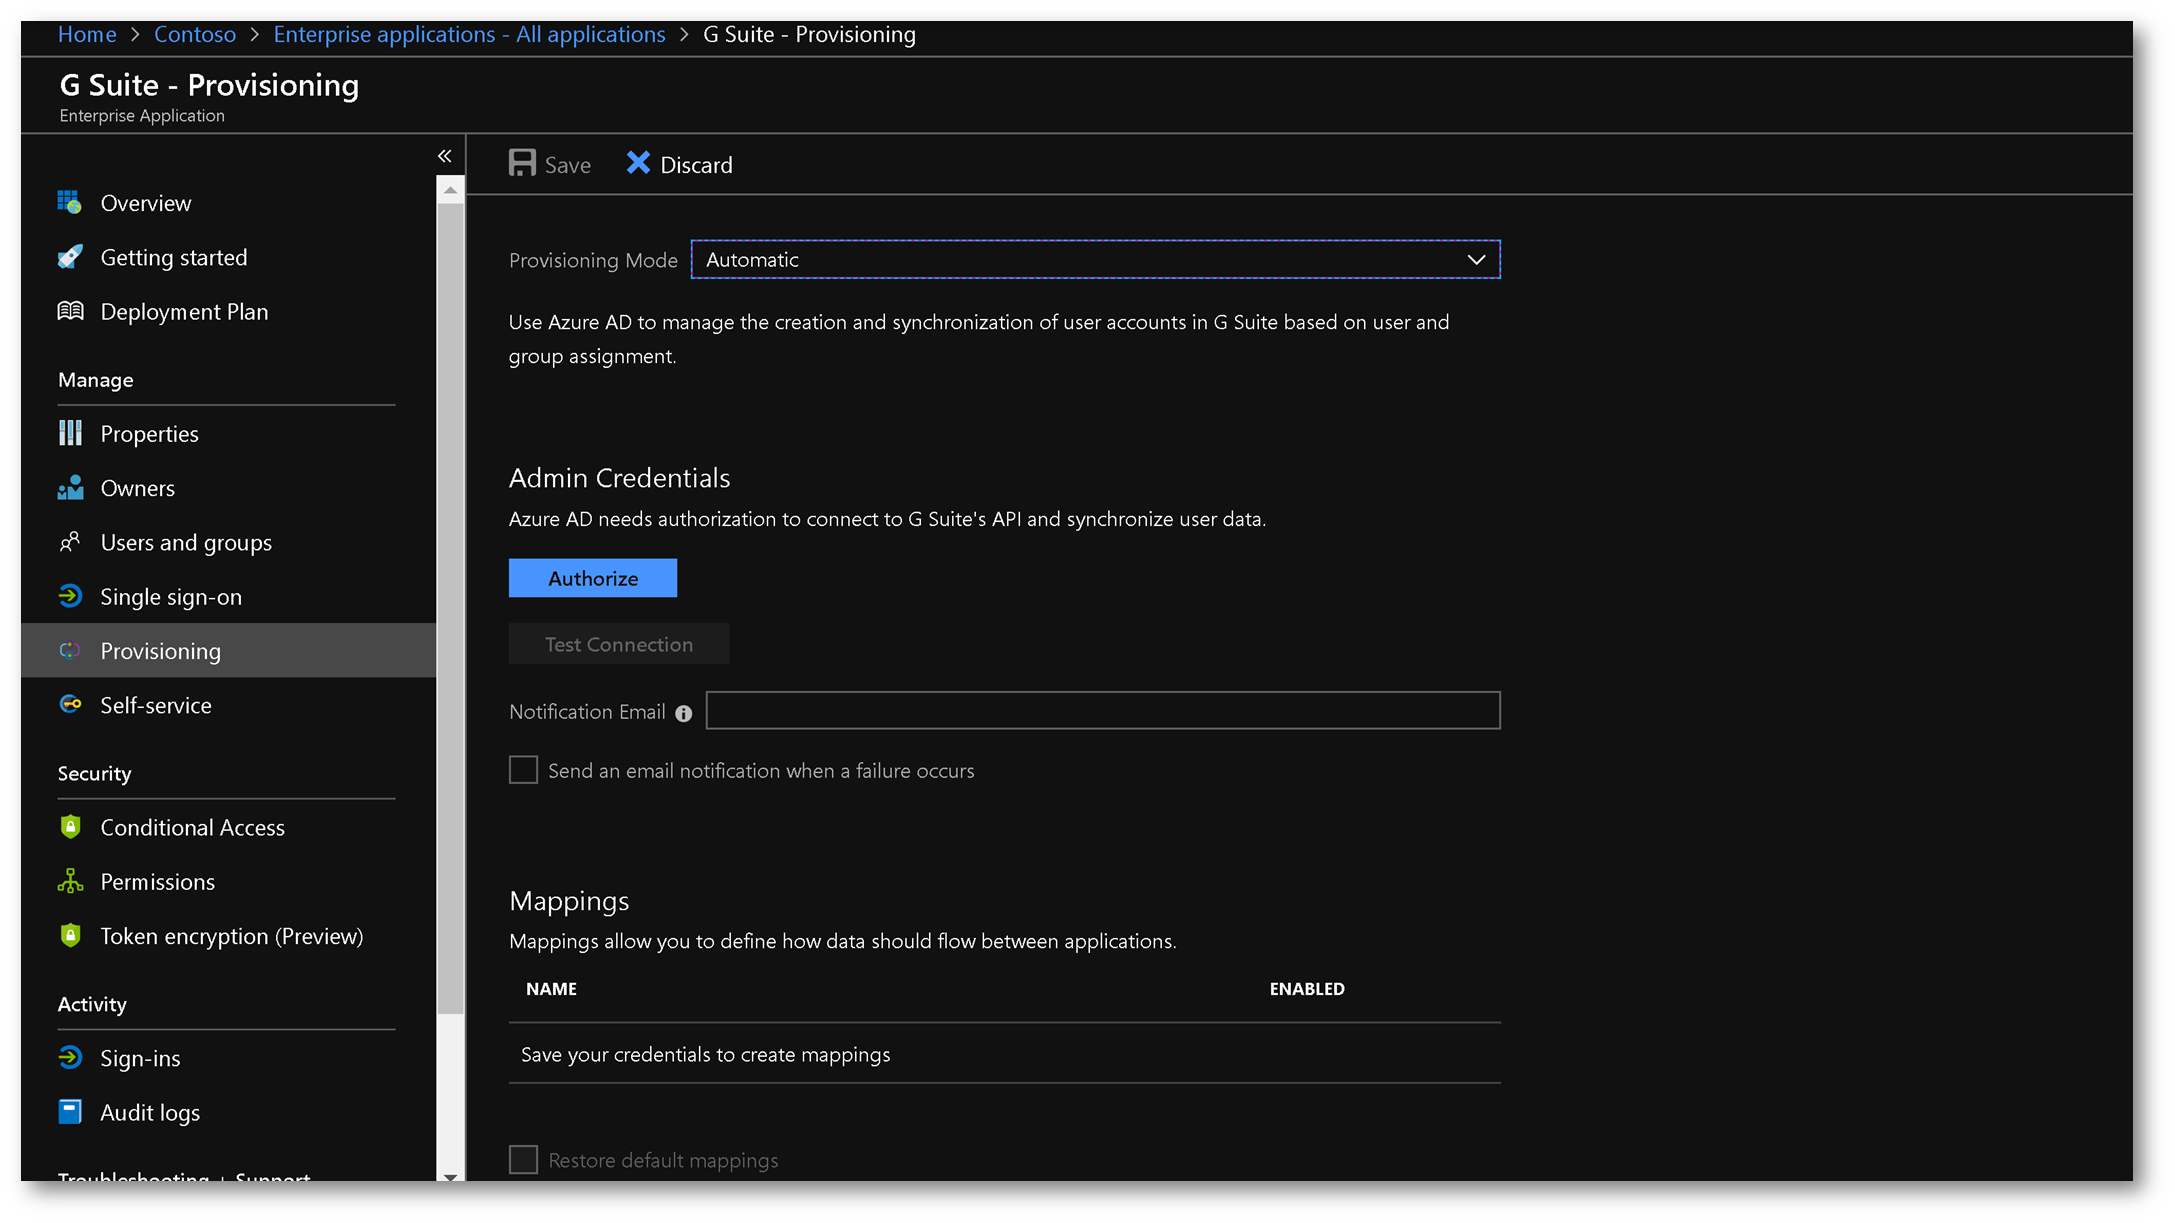
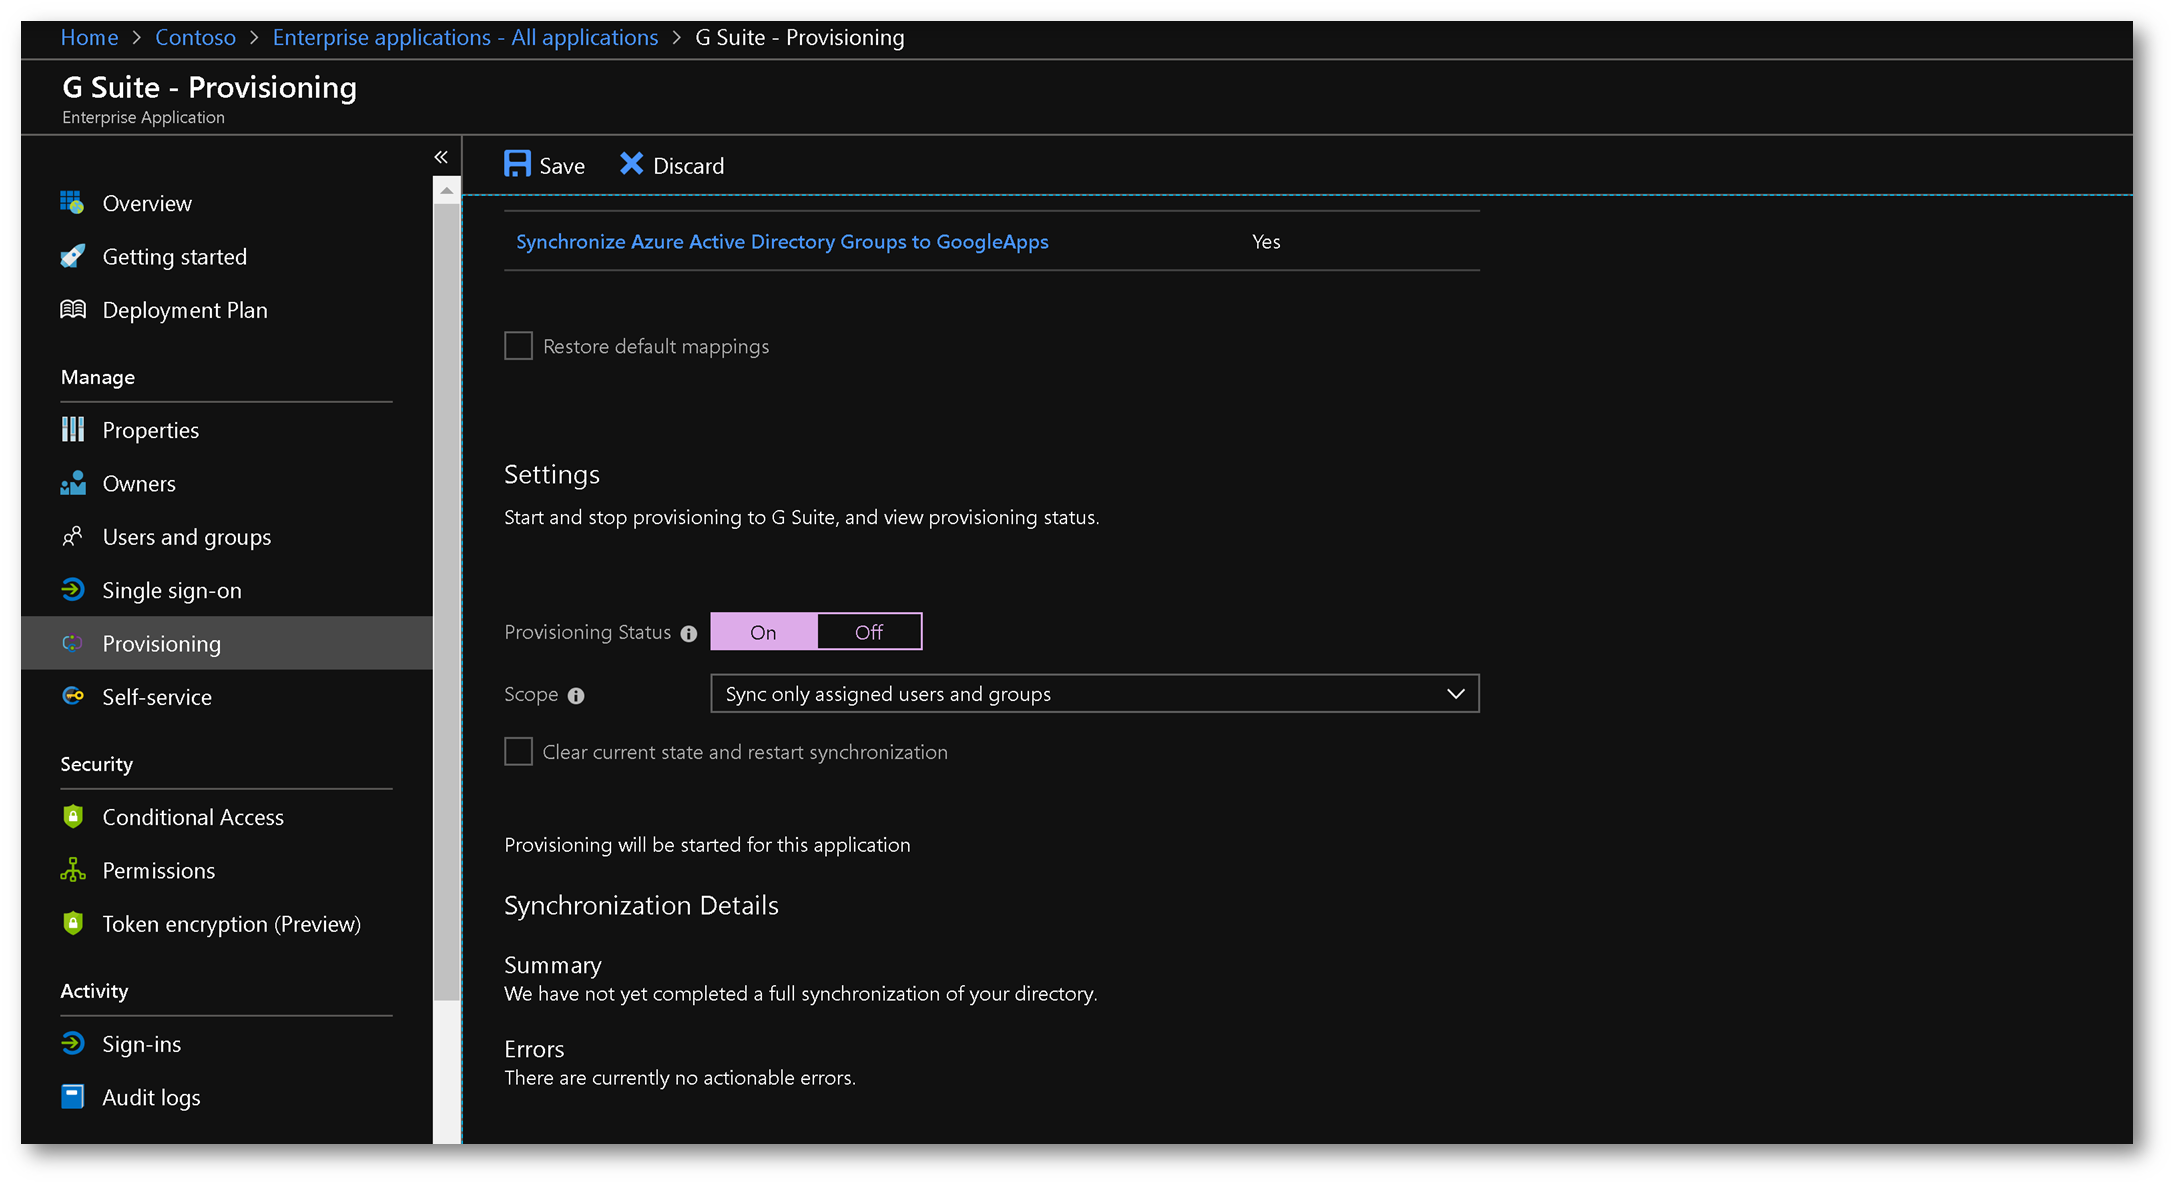
Turn on Provisioning:
Click on Provisioning and go through the steps on the blade. Starting with changing Provisioning Mode to Automatic.
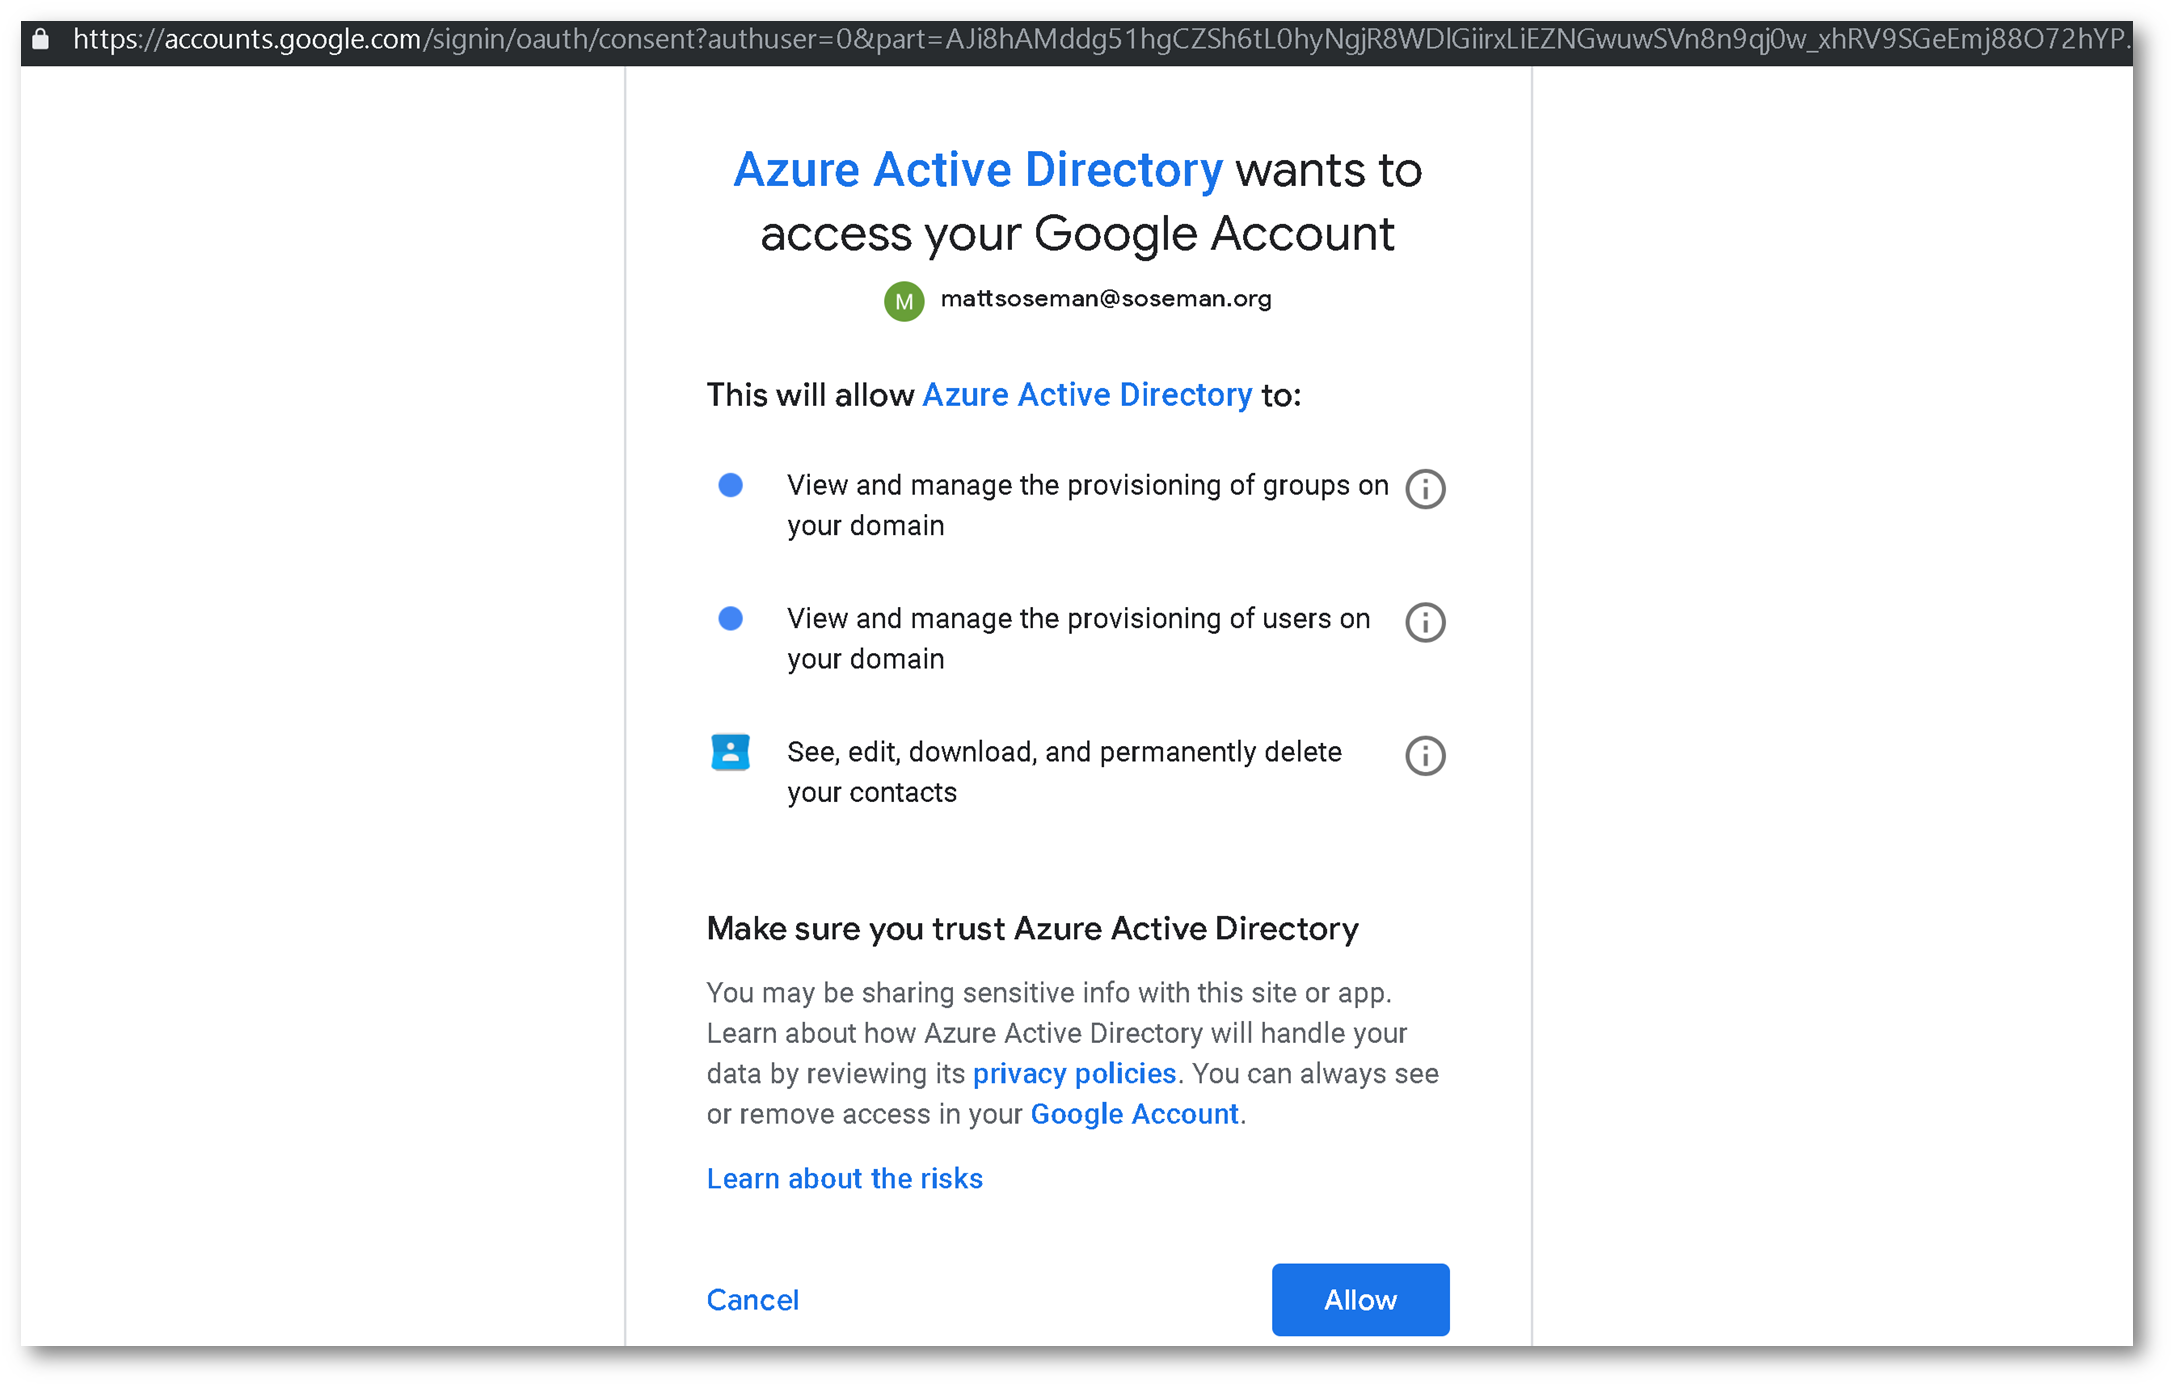
Then click Authorize and type in your G-Suite credentials to go through the authorization process. Grant consent:
Back in the Azure portal, click Save to save your provisioning configuration. Once saved, you can opt to enable automatic synchronization of identities from Azure AD to G-Suite by clicking On for Provisioning Status:
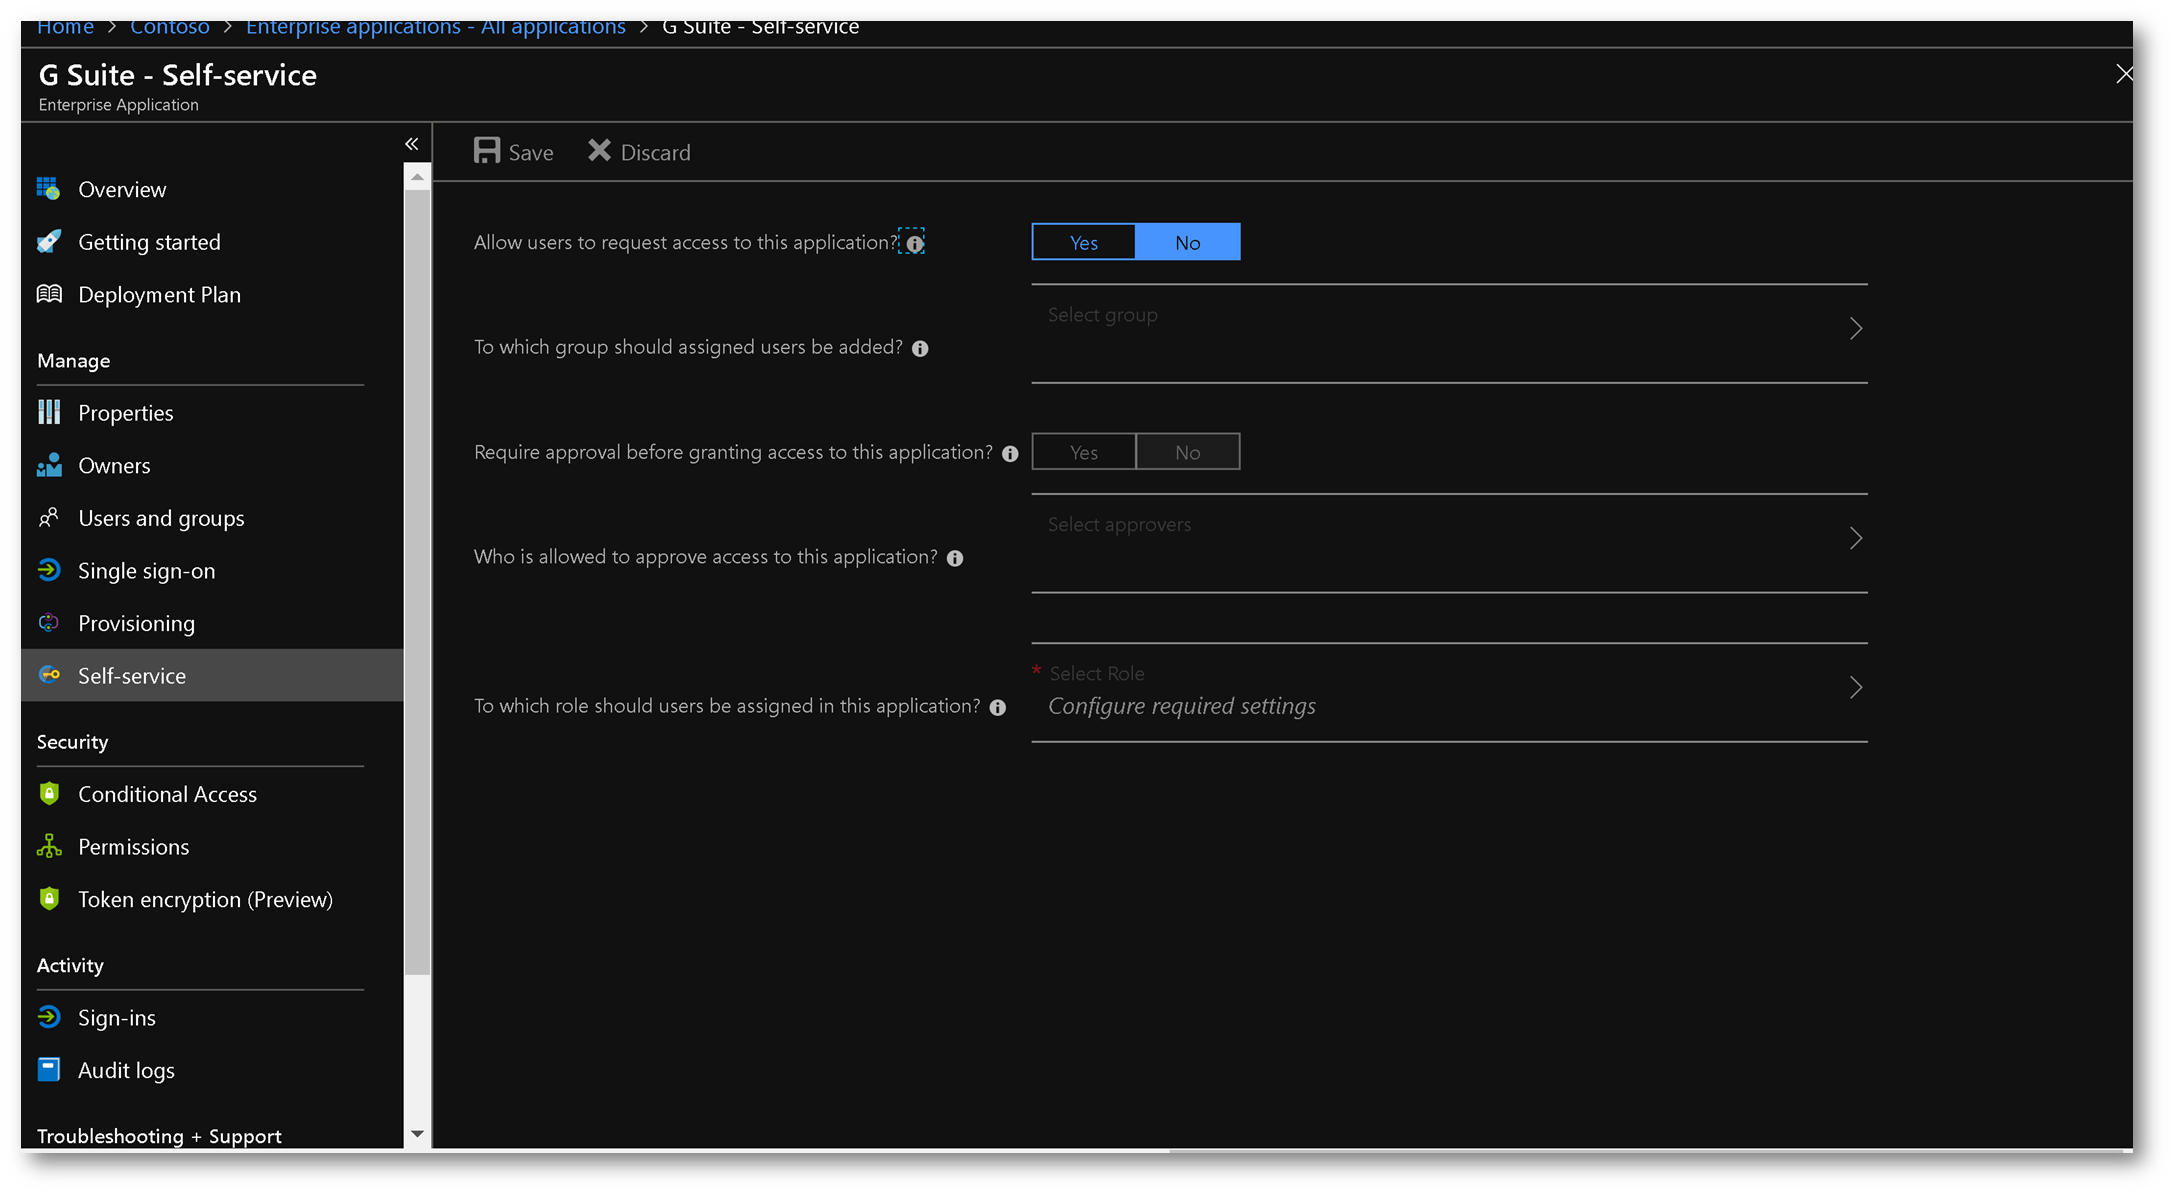
Side bar, I could configure self service for end-users!
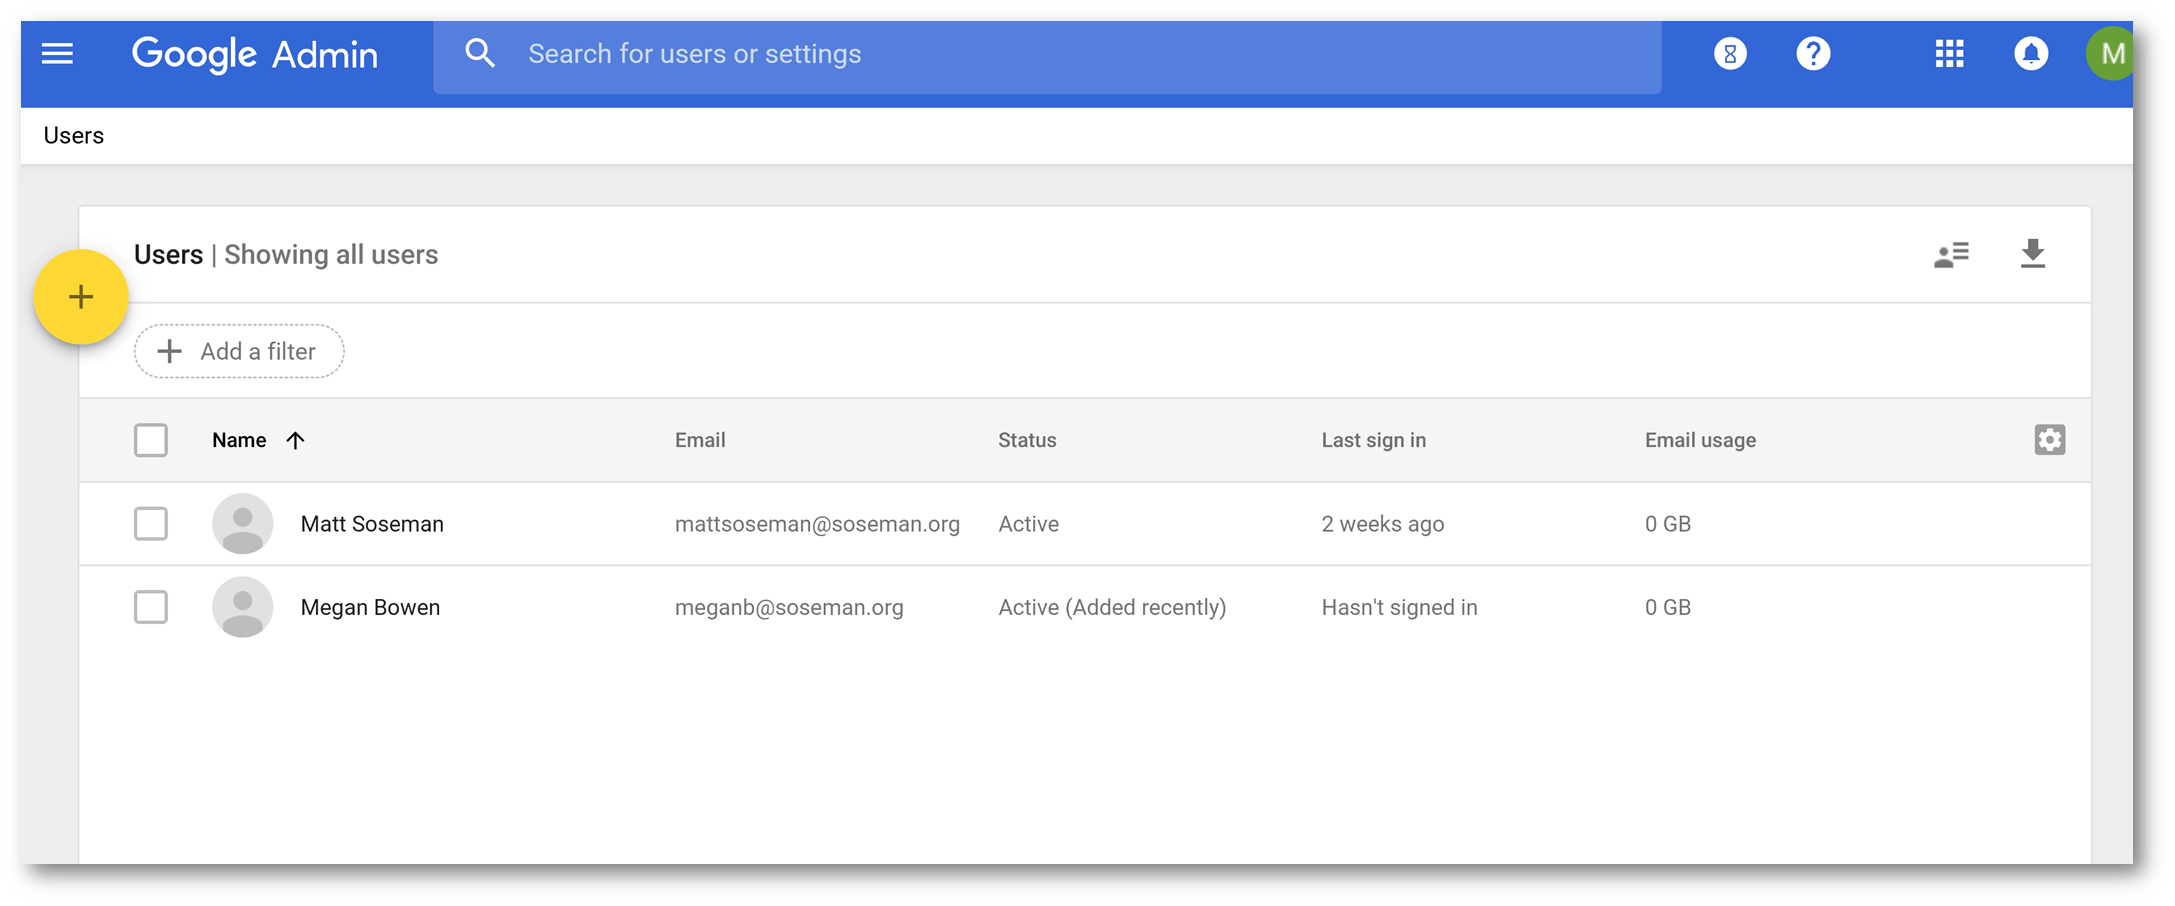
Back in G-Suite, you will notice the assigned users will start to sync:
Time to test!
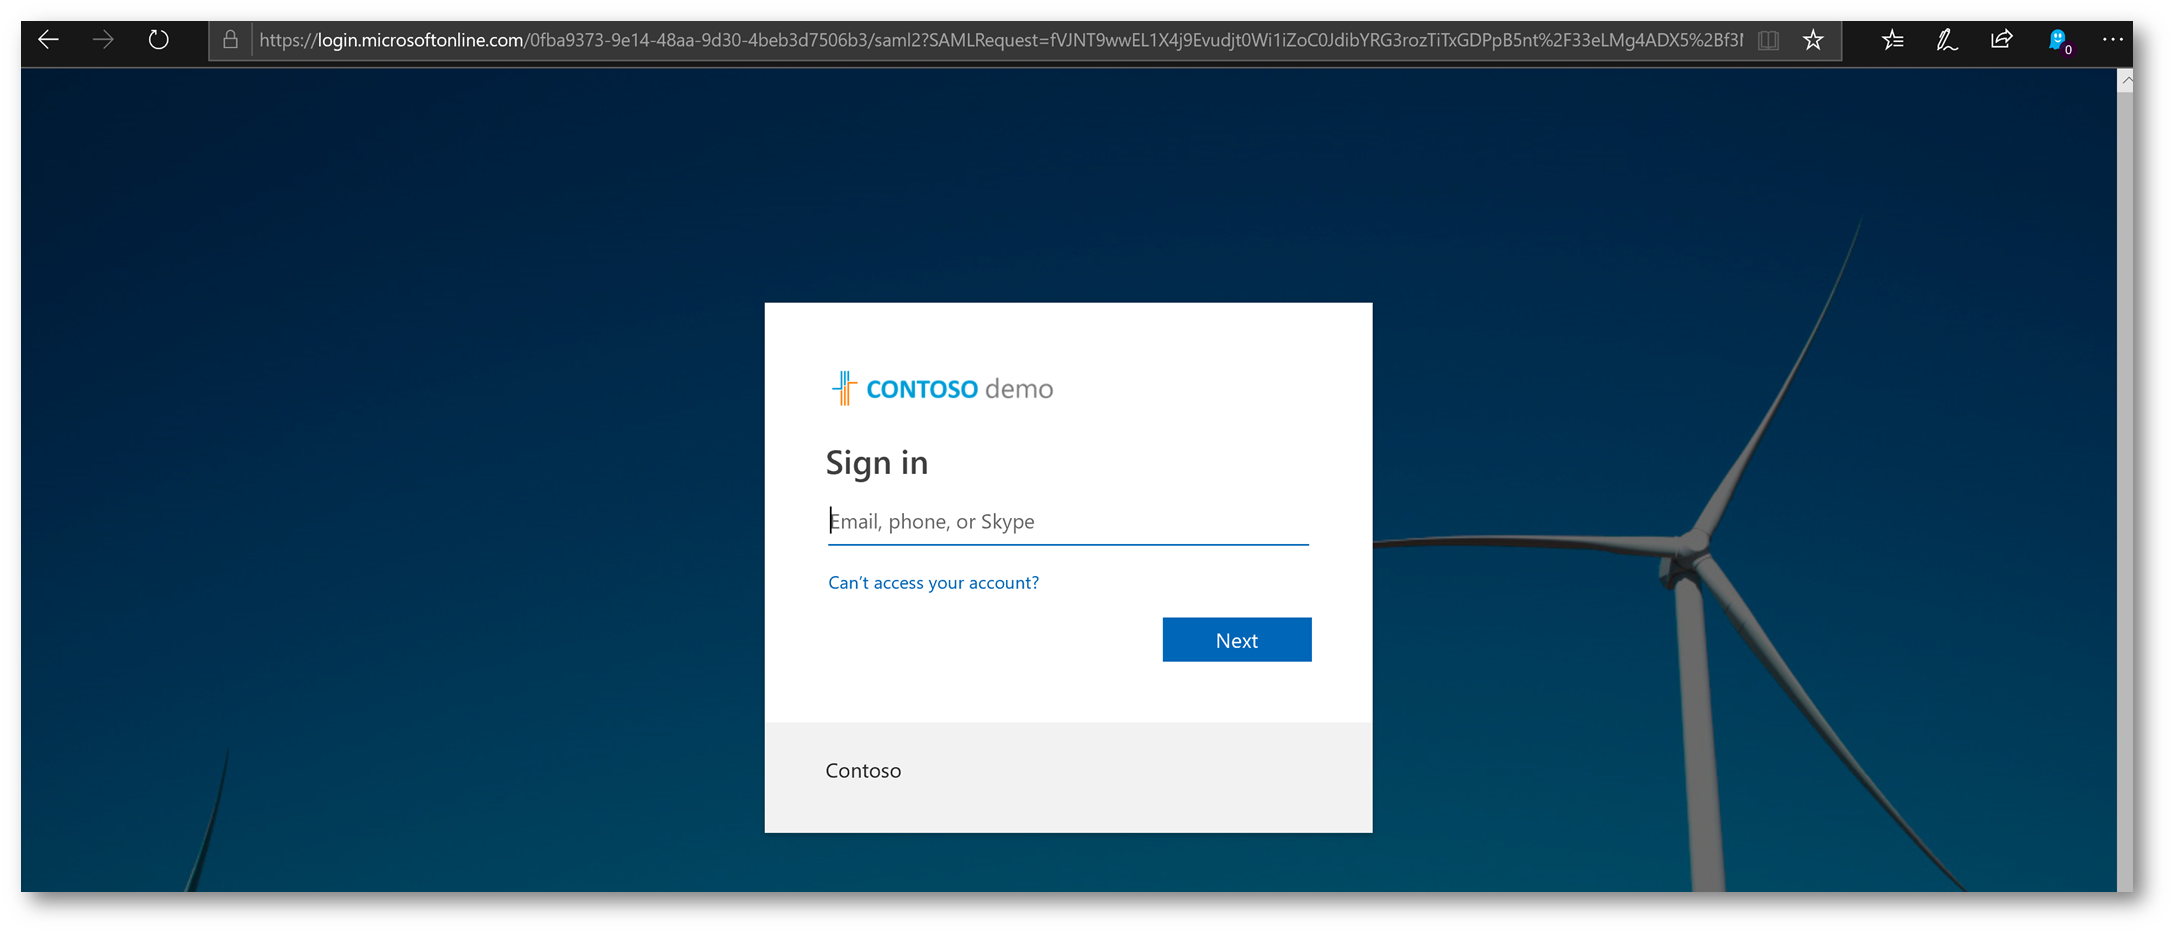
I'm going to navigate to https://mail.google.com/a/soseman.org:

Notice this will redirect to Azure Active Directory:
Notice it challenges me for multi-factor authentication!
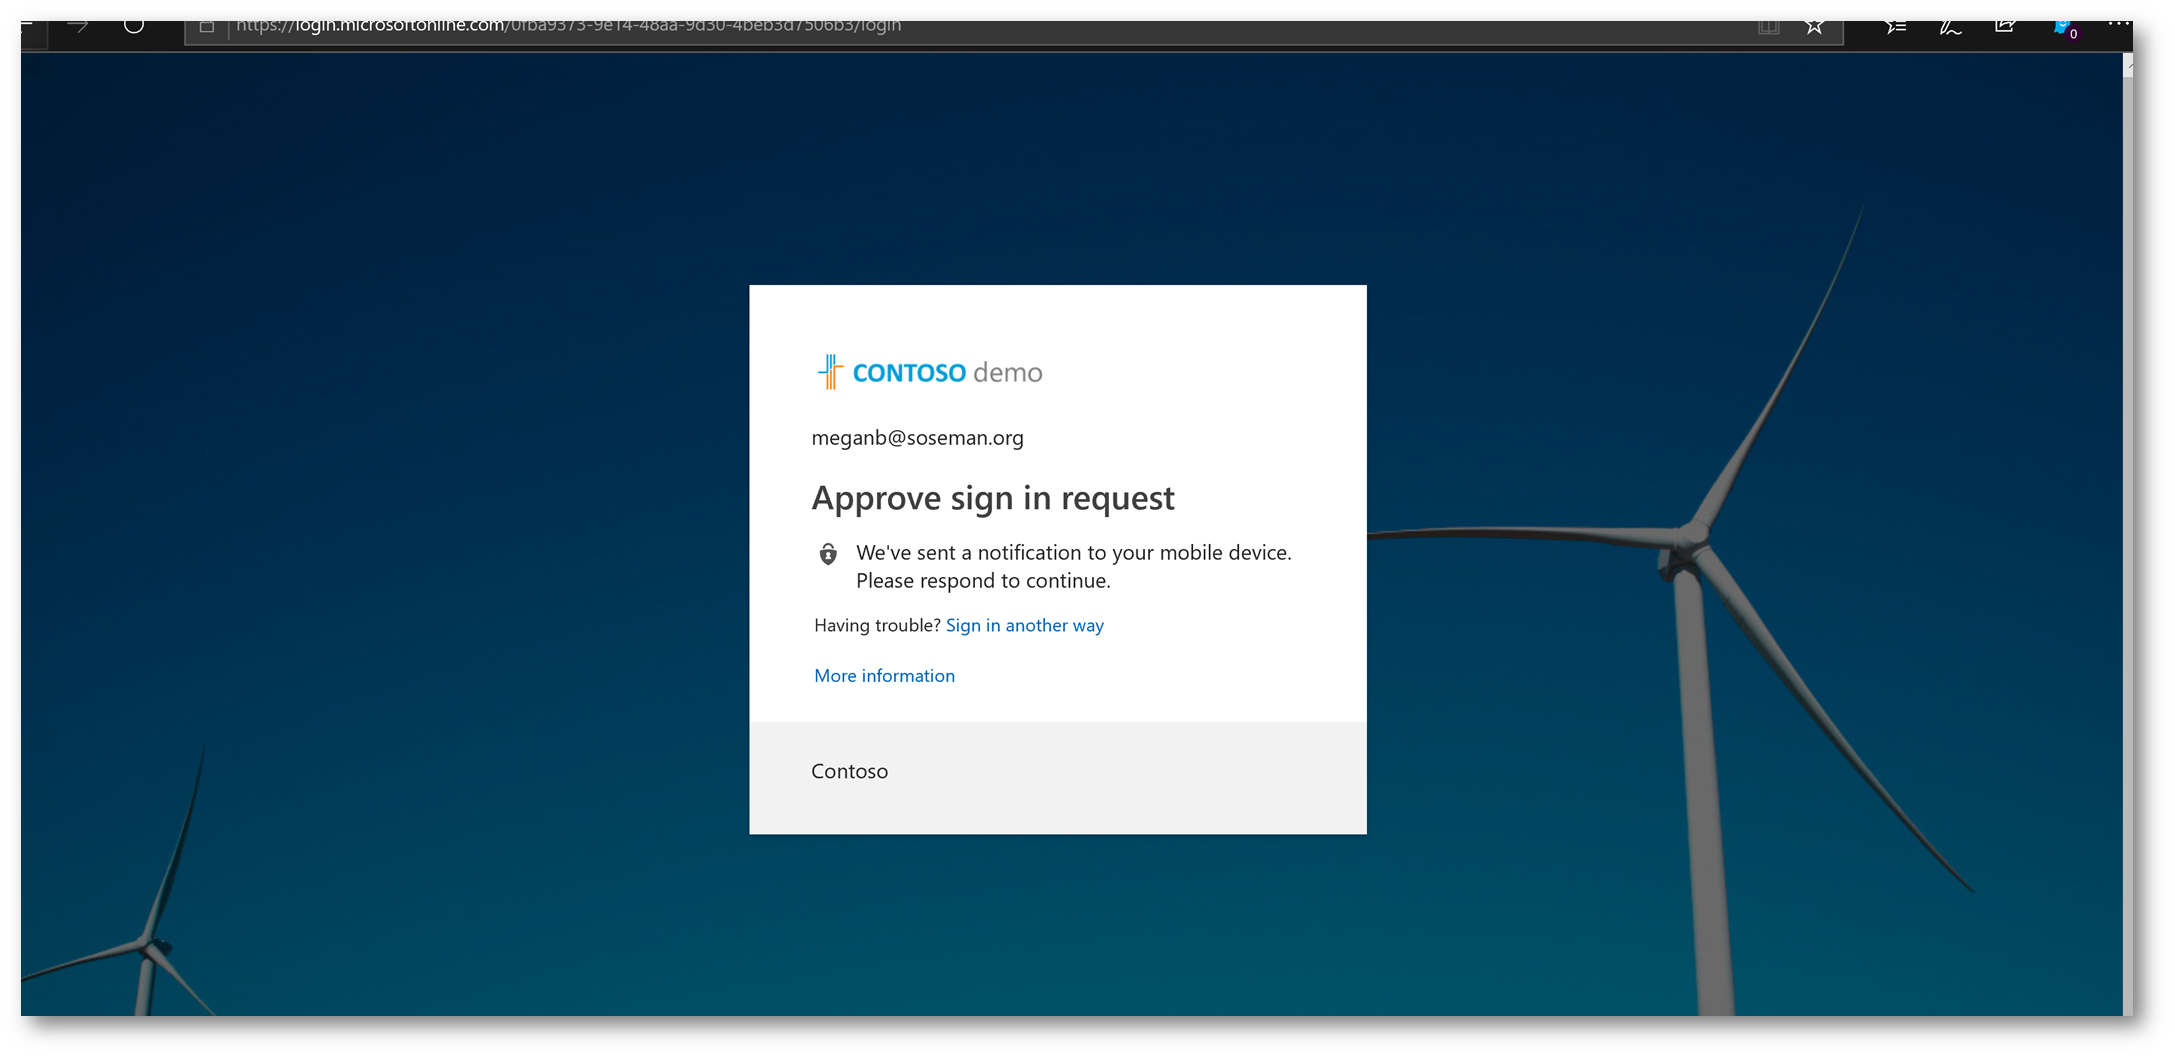
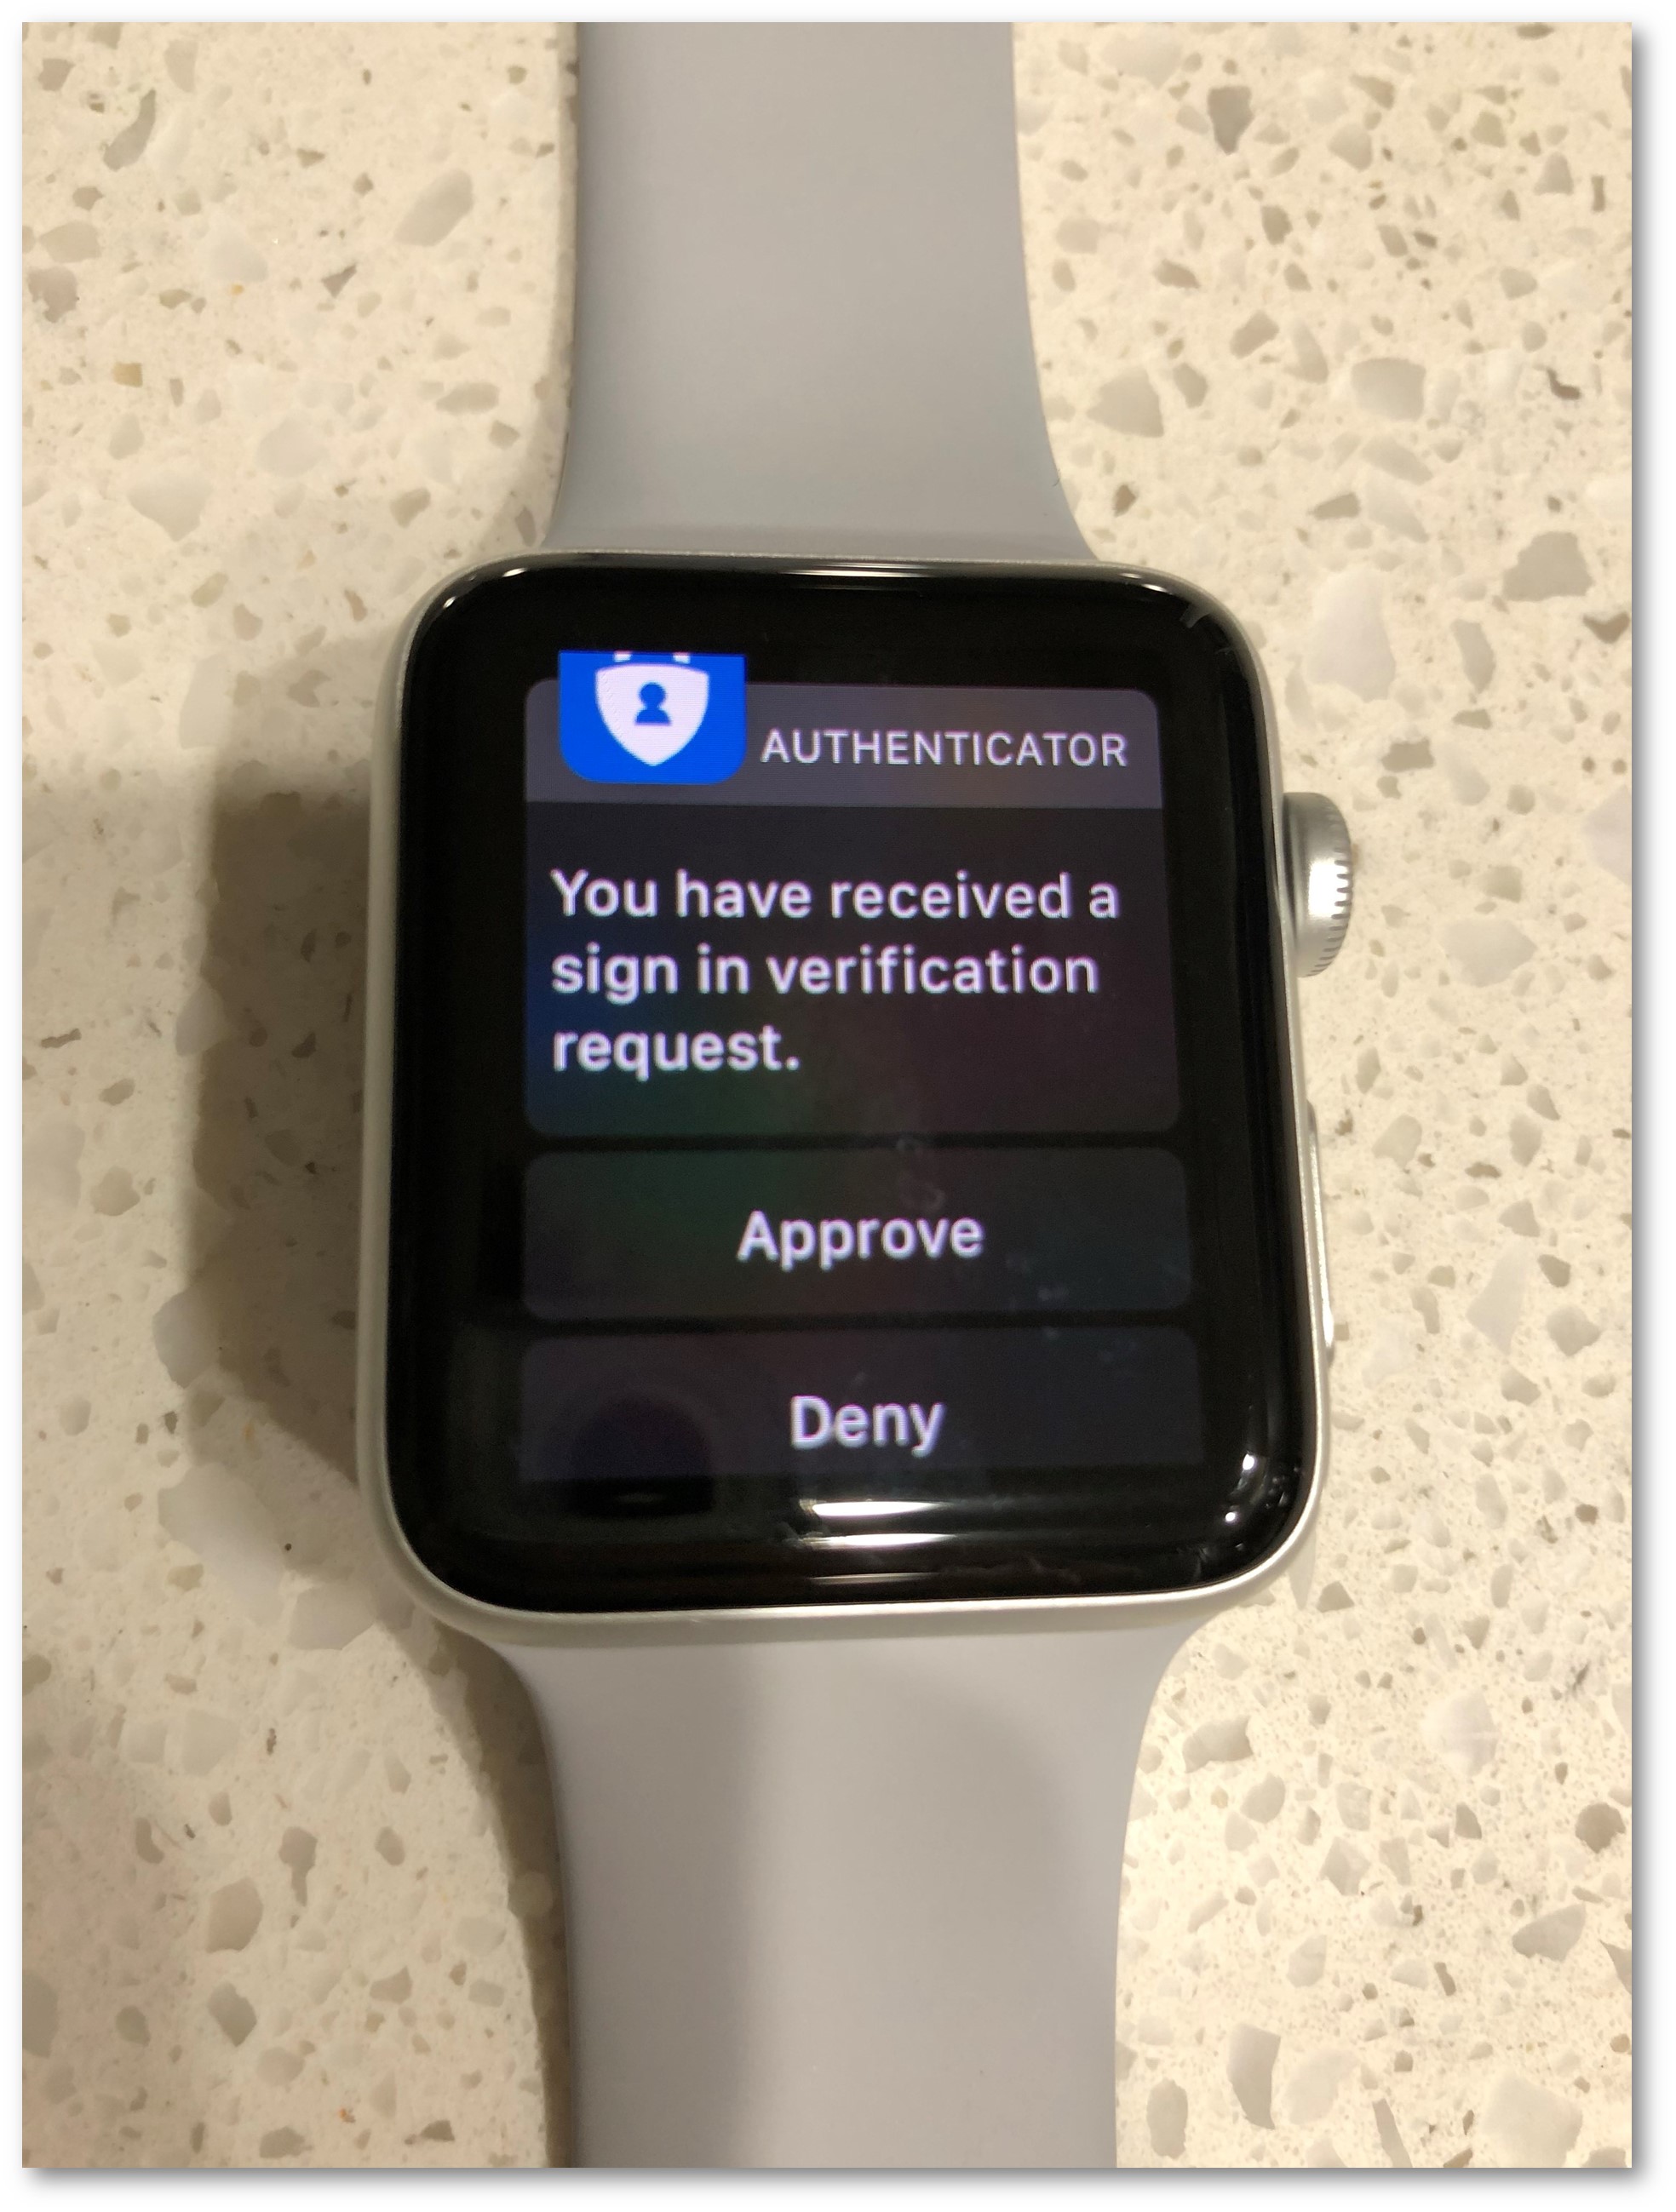
And I respond to the challenge using my Apple Watch :)
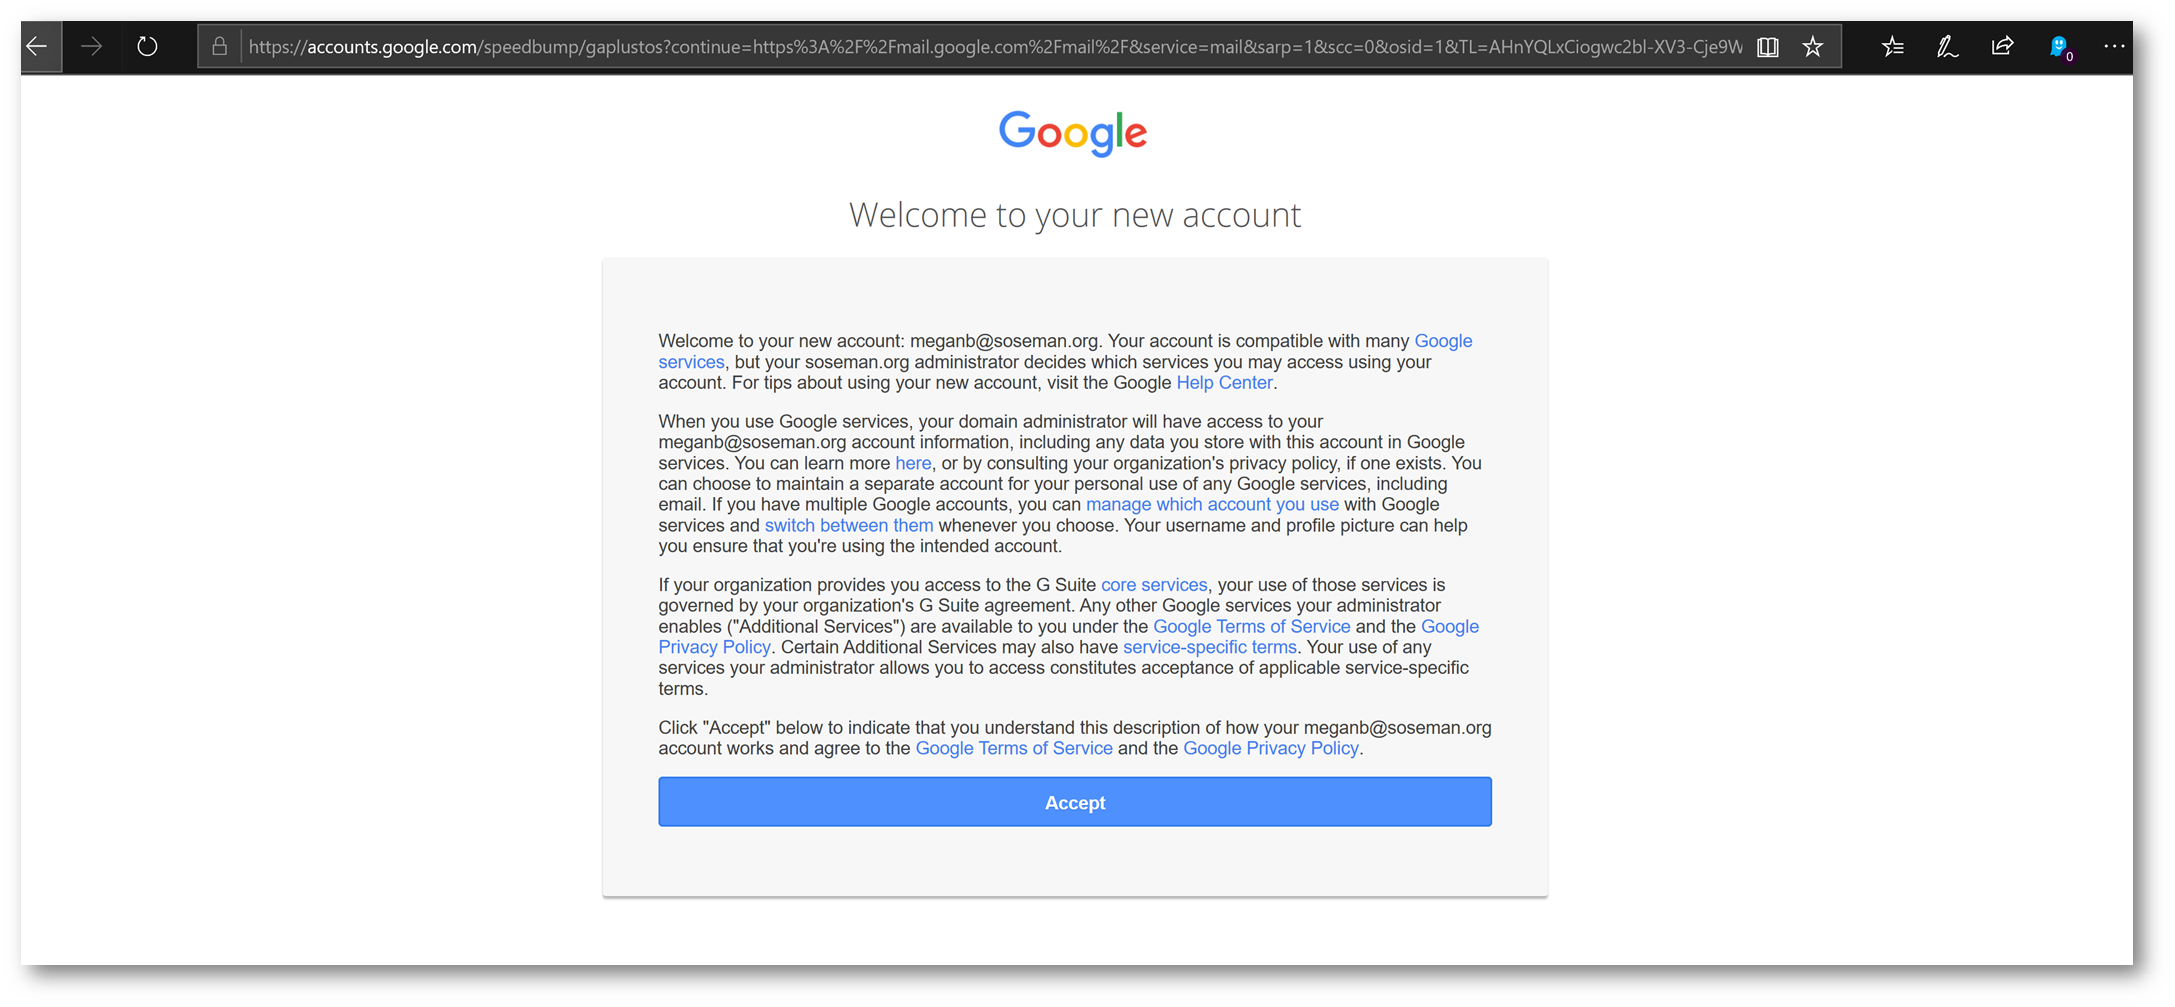
Once authenticated, accept the terms and conditions:
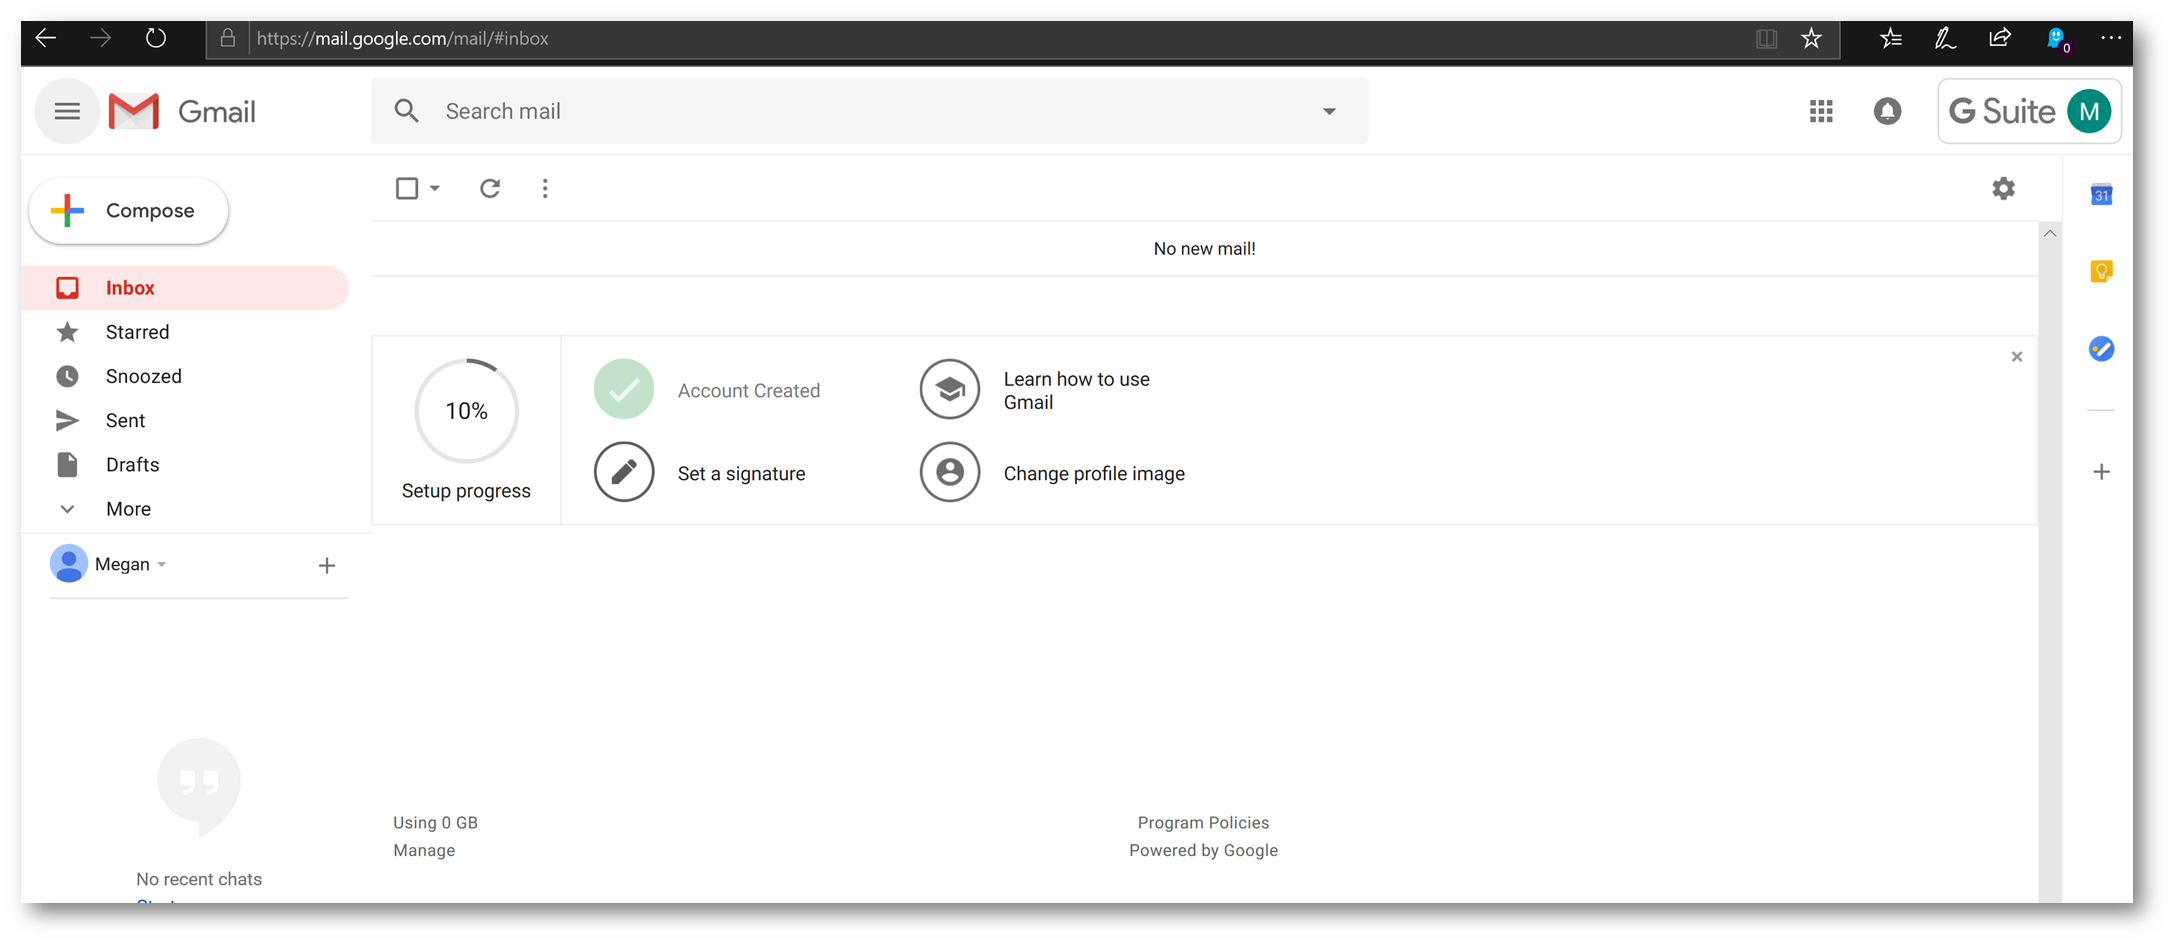
Now, I'm logged in and ready to use G-Suite!
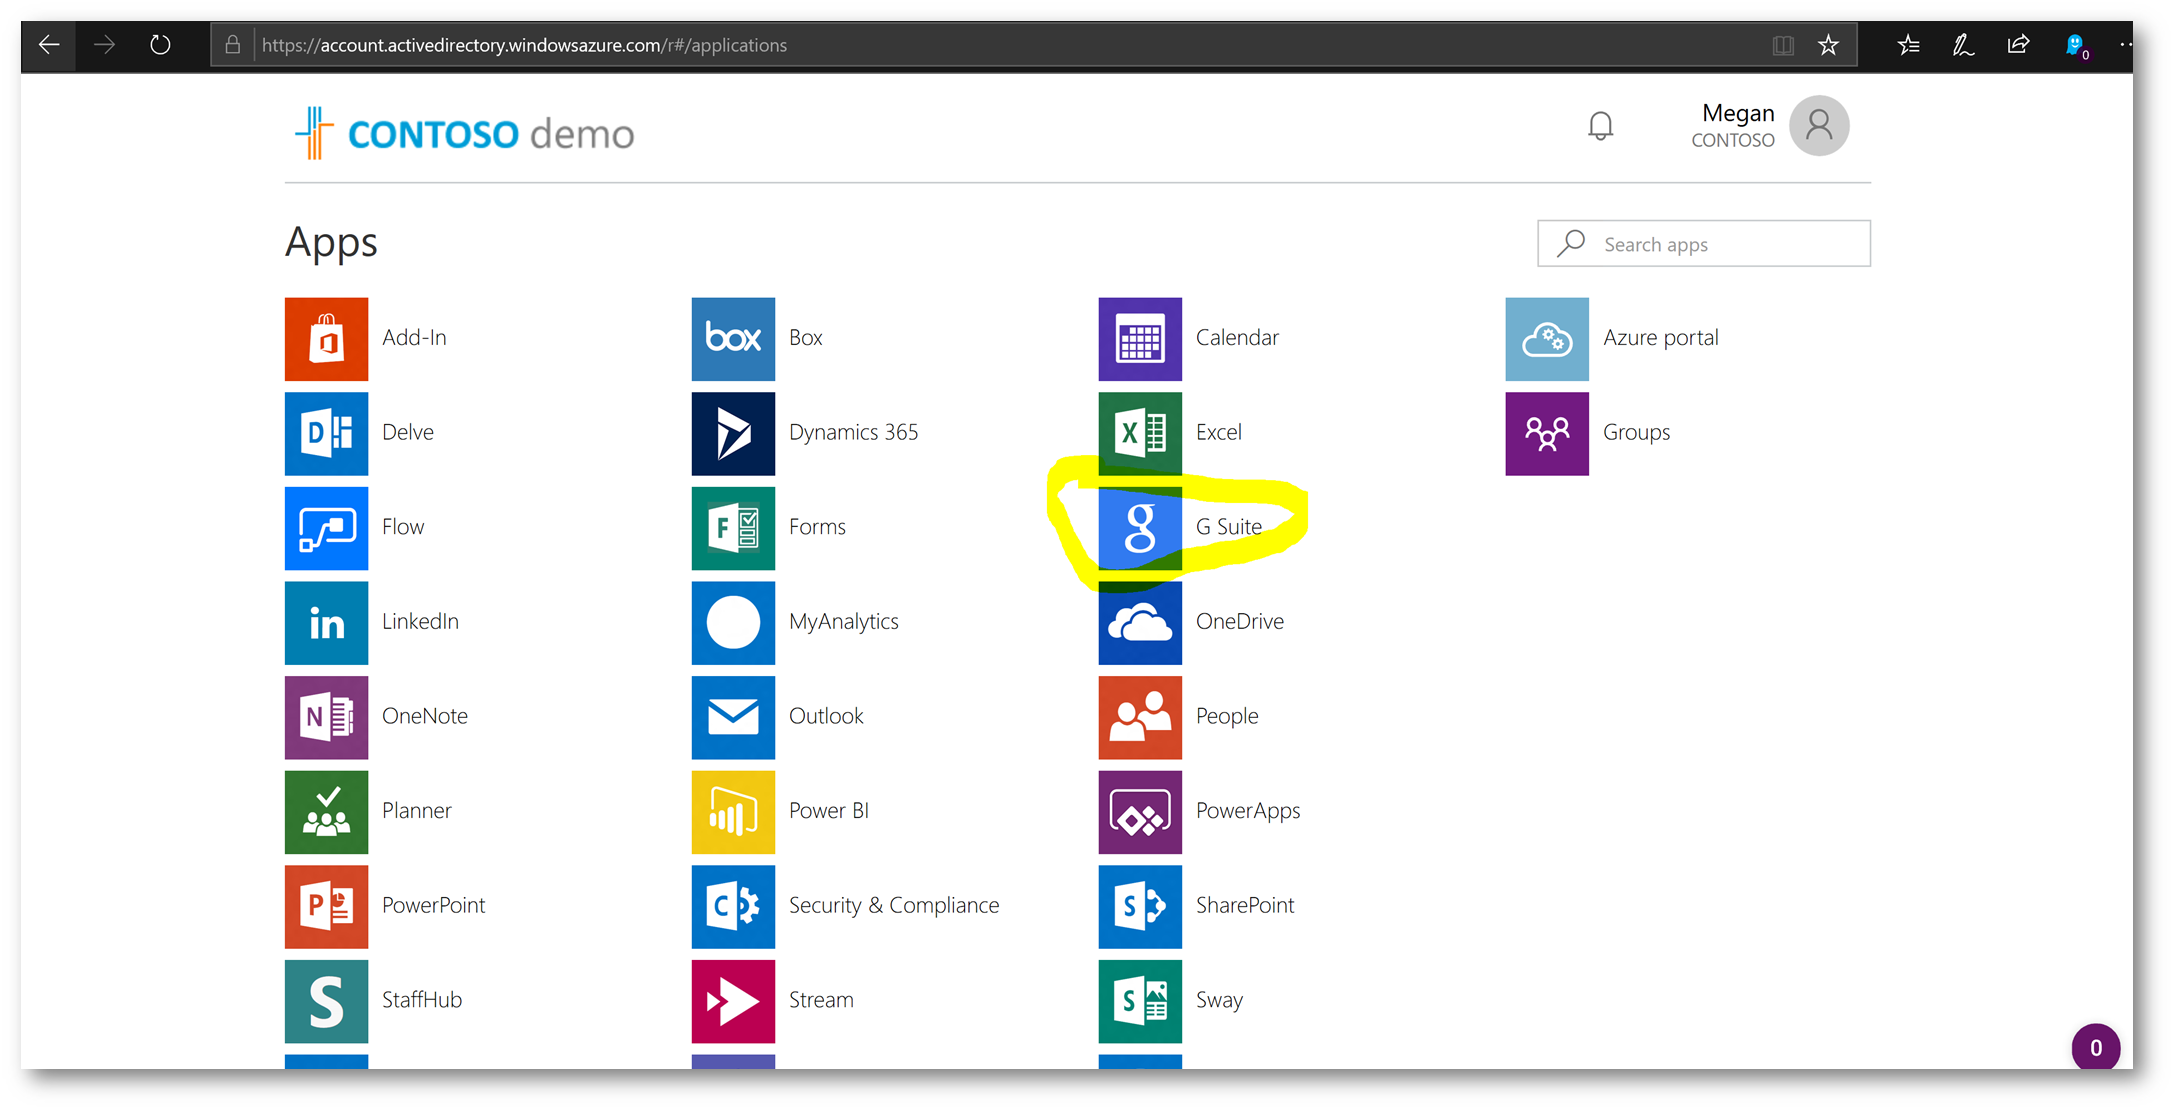
Browsing to myapps.microsoft.com – G-Suite is added to the launcher!
Conclusion:
As you can see, configuring Single Sign On for G-Suite using Azure Active Directory is a rather easy and simple process – and probably can be completed within 15 minutes or less. Once configured, don't forget using Azure AD Conditional Access to govern how G-Suite is accessed, such as requiring a managed device (mobile or PC), monitoring the credentials for being compromised (impossible travel, up for sale on dark web, coming from atypical locations,etc), requiring MFA, and more!