Playing with the recently released Office 365 REST APIs
Hi,
Over the last years I've written several postings in my TechNet blog in the area of SharePoint search technology. I recently shifted focus to APIs and extensibility for what the FAST team delivers (including SharePoint search, Exchange search, Delve and the Office Graph), so I thought it was time to start using my MSDN blog instead.
Office 365 REST APIs
Microsoft recently released Office 365 REST APIs (reference). They currently contain functionality to access
- messages, attachments and folders in a mailbox
- events, calendars and calendar groups
- contacts and contact folders
- OneDrive for Business files and folders.
In addition there is a discovery service to log in and find the actual endpoints.
The APIs can be used with REST directly, or through client-side libraries from .NET, JavaScript/TypeScript, iOS, Android or the cross-platform toolset Xamarin.
Sandbox test environment
The easiest (and safest) way to test is to go to the sandbox and run some of the sample code provided. This provides some mock data for you to play with, and you can test the APIs in practice. Here is what choosing the REST sample for getting messages looks like:
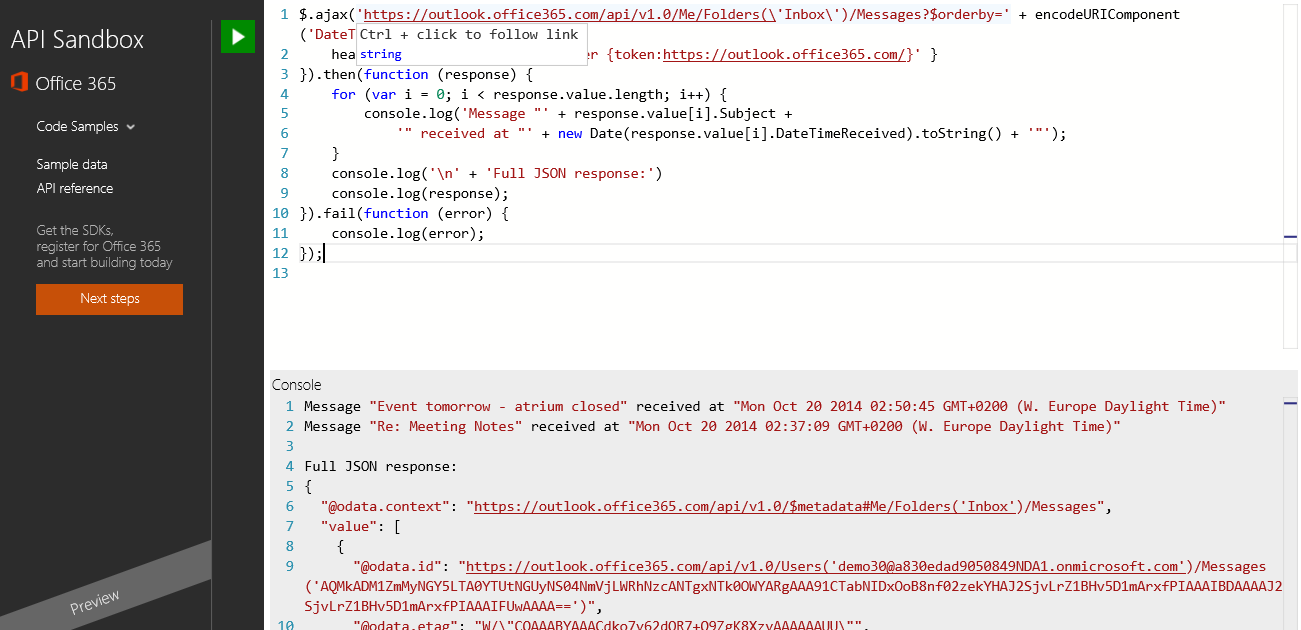
If you take this sample code and put into a real application you will need to add authentication code as well. However, we're going to run some RAW REST queries directly from our browser, which will save us that trouble.
REST in browser towards your Office 365 tenancy
We're going to send REST requests to Office 365 directly from a browser. This requires that you have an Office 365 tenant. I will use my developer installation based on my MSDN subscription, but you can also sign up for a free Office 365 account and try the same. Or just use the Office 365 account you use for your every day work if you are one of the millions of users that have such an account provided by your employer or university.
Test your account
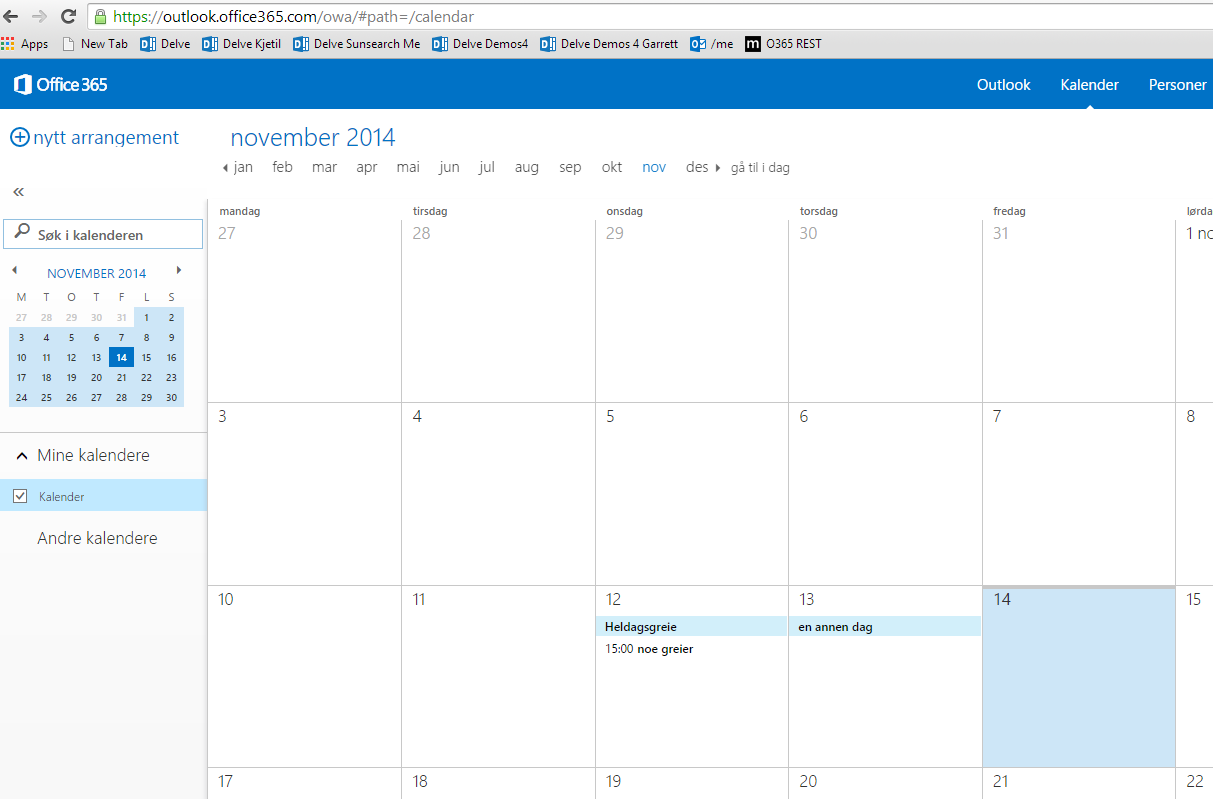
Just to be sure you have the necessary credentials, open your calendar in Office 365. This will also make sure you are logged in for our later REST testing.
Go to https://outlook.office365.com/owa/#path=/calendar and log in with your Office 365 account. I log in with helge@solheim.onmicrosoft.com. (Note, this is not the Microsoft Live account you use for your MSDN subscription)
You should see your calendar, displayed in your local language, e.g. like this:
Notice that the first part of the URL (outlook.office365.com) is the server. In some circumstances you may need to use a different server URL. To find that server URL you would need to use the discovery service, which is beyond the scope of this simple posting.
Issue a first REST call
Now that we know we have the login information correct, open the following URL in your browser: https://outlook.office365.com/api/v1.0/me
This will return JSON from the server. Depending on which browser you use, you may get data displayed directly in your browser or asked to open a .json file.
{"@odata.context":"https://outlook.office365.com/api/v1.0/$metadata#Me","@odata.id":"https://outlook.office365.com/api/v1.0/Users('helge@solheim.onmicrosoft.com')","Id":"helge@solheim.onmicrosoft.com","DisplayName":"Helge Solheim","Alias":"helge","MailboxGuid":"abcdefgh-aaaa-0000-0000-123456789012"}
The above JSON simply shows that you have reached your mailbox.
Install some useful tools
Now to something more practical.
- Install Chrome (I use IE for most of my stuff, but for this I really like Chrome.)
- Install the Chrome Advanced REST client
Start Chrome, click on the Apps button in the upper left-hand corner and click on the Advanced REST client to start it.
Test the REST API from the REST client
In the Chrome Advanced REST client, make a GET request with this URL: https://outlook.office365.com/api/v1.0/me/events
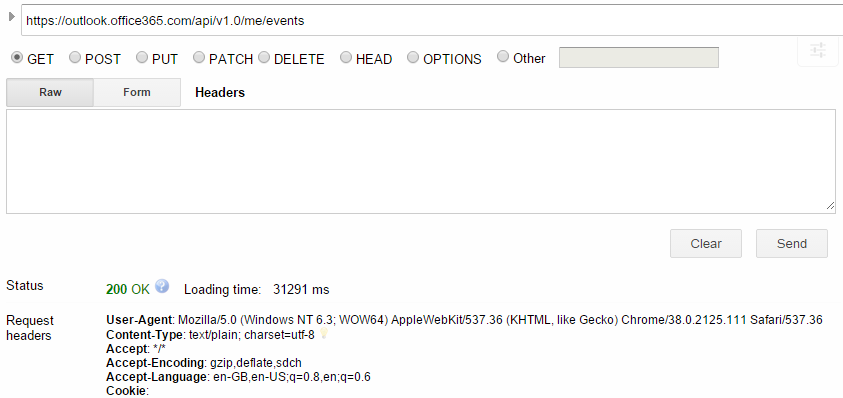
When you press the send button in the above UI, the REST client will fire off a GET request for you. (Yes, you could do that just by entering that URL in your browser, but this has some other nice features.)
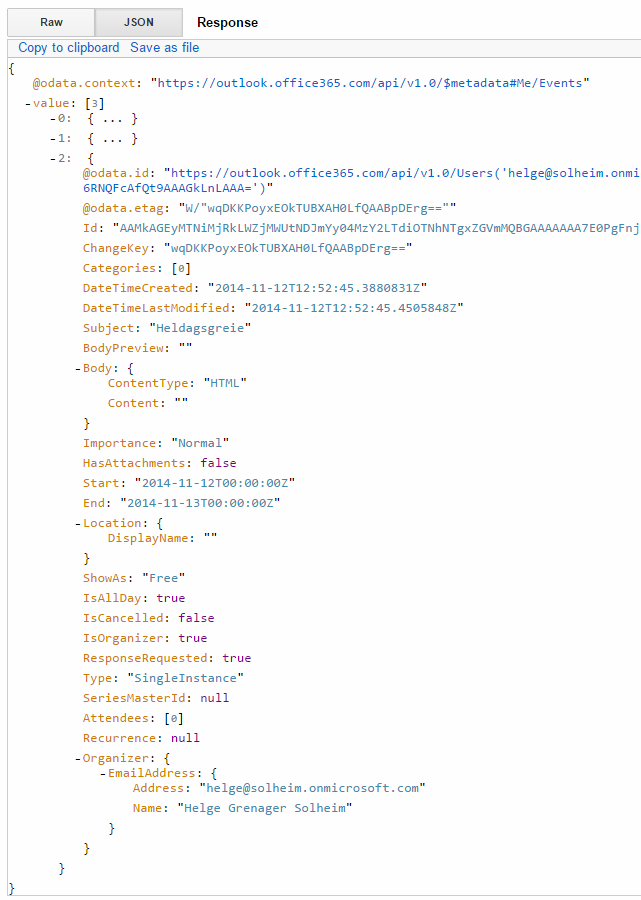
The request shows a JSON structure with all events (meetings) from your calendar. Scroll down in your browser to find something like this:
Creating a meeting
Now, lets create a meeting. This is done by posting something like this to the same URL we just asked for events:
{
"Subject": "Show my team the Calendar REST API",
"Body": {
"ContentType": "HTML",
"Content": "This API is really cool"
},
"Start": "2014-11-17T14:00:00Z",
"End": "2014-11-17T15:00:00Z",
"Attendees": [
{
"EmailAddress": {
"Address": "johndoe@example.com",
"Name": "John"
},
"Type": "Required"
}
]
}
Make sure to choose POST and change the content type to "application/json" before pressing the send button.
This will return a 201 created status. In addition, you get back a lot of useful information, including the id of the newly created event, in my case:
To change the newly created event, send a PATCH (not PUT) request to that URI with a similar, but changed event. I chose to alter the meeting to this, changing title, content and time:
{
"Subject": "O365: the Calendar REST API",
"Body": {
"ContentType": "HTML",
"Content": "O365 API: This API is really cool"
},
"Start": "2014-11-17T12:15:00Z",
"End": "2014-11-17T13:15:00Z",
"Attendees": [
{
"EmailAddress": {
"Address": "johndoe@example.com",
"Name": "John"
},
"Type": "Required"
}
]
}
Note: Be careful with adding attendees, as Office 365 automatically sends out invites to those people, just as would happen if you create the meeting in Outlook or OWA.
The event indeed shows up in my calendar for the 17th:
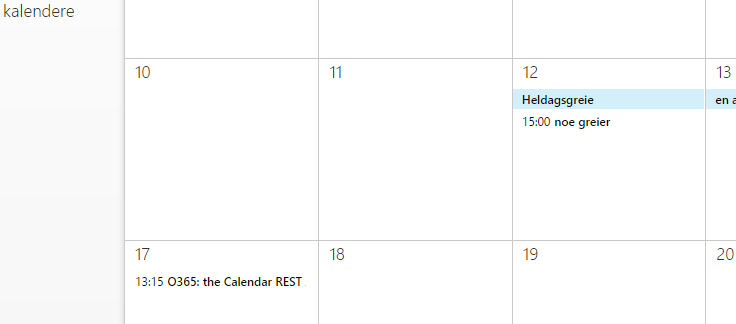
My team should fear getting lots of meetings in the upcoming weeks :-).
Best regards,
-Helge