Import a sample file for Bank Reconciliation in Dynamics NAV 2015 W1
Hi, eventually the day has come when I sit down to write my first blog on MSDN. This is the start for a new skill for me, and I hope to improve my blogging skills with time.
Disclaimer: The posts/opinions in this blog are my own and not of my employer.
The purpose of this specific blog post is to guide you in a step-by-step process to import a sample file in Dynamics NAV 2015 W1, for Bank Reconciliation. The sample .CSV file used by me to capture the NAV screens is attached to this blog post and is available for download.
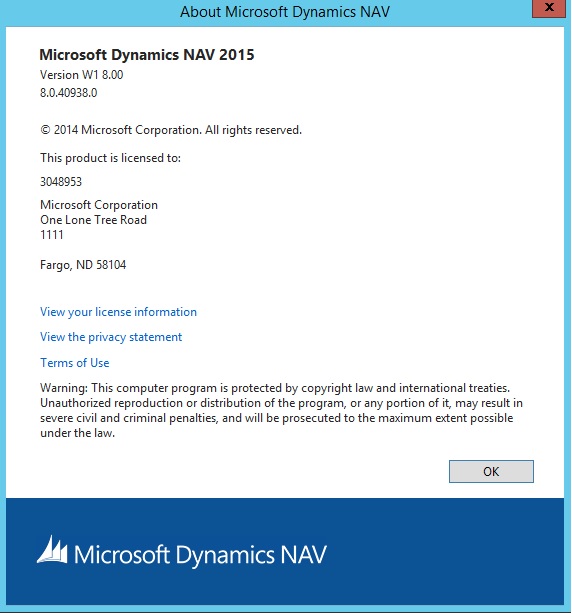
The Dynamics NAV 2015 W1 build used for this is (with the demo database) -
Step 1: Lets go to Posting Exchange Definition page. Here, we need to specify a data exchange setup that enables us to import a specific bank statement file or export a specific bank payment file.
Path: - Departments/Administration/Application Setup/General/Posting Exchange Definitions
Step 2: Click on 'New'

Step 3: The 'Posting Exchange Definition' page will open.
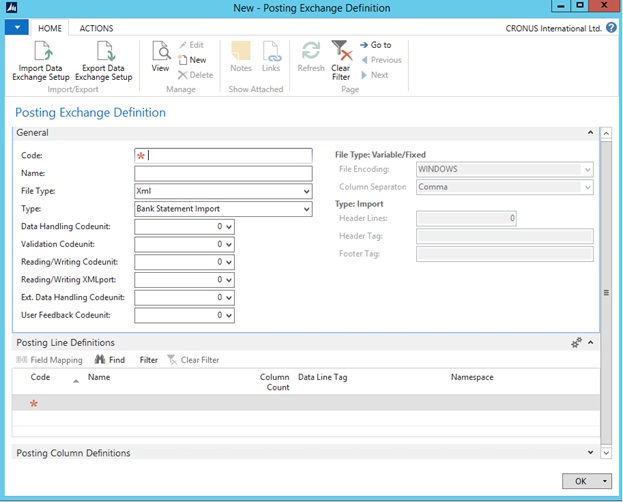
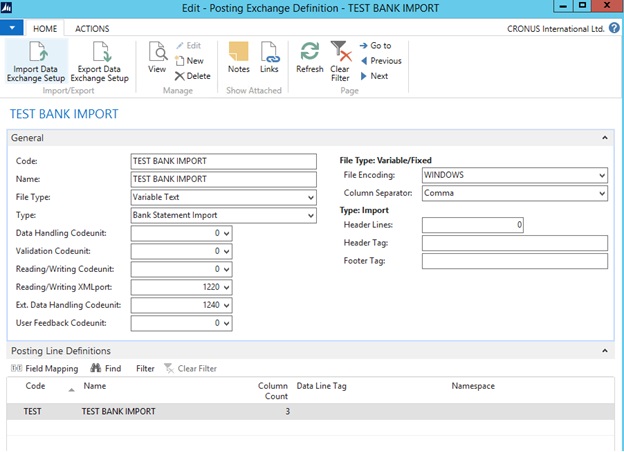
We enter the following details In the General Tab for our sample:-
- Code= TEST BANK IMPORT
- Name= TEST BANK IMPORT
- File Type= Variable Text
- Type= Bank Statement Import
- Reading/Writing Xml Port= 1220
- Ext Data Handling Codeunit= 1240
- File Encoding = WINDOWS
- Column Separator = Comma
And the following details in the Posting Line Definitions Tab:-
- Code = Test
- Name = TEST BANK IMPORT
- Column Count= 3
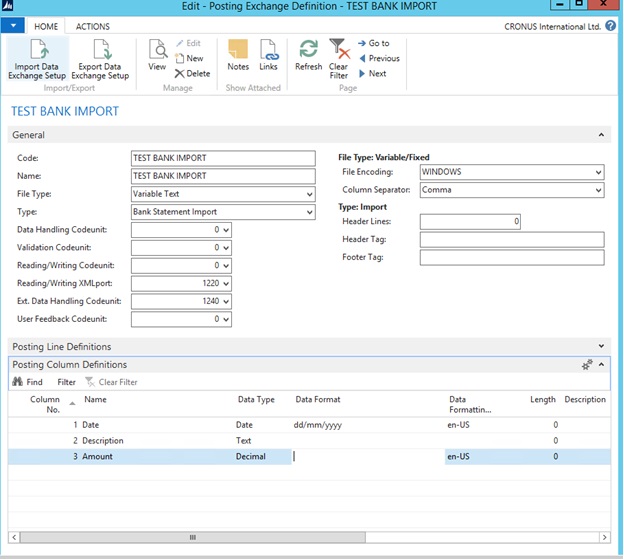
And the following details in the Posting Column Definitions Tab for the three three columns from the .CSV bank statement file, which we need to map in Dynamics NAV:-
- Column No= 1, Name= Date, Data Type=Date, Data Format= dd/MM/yyyy, Data Formatting Culture= en-US.
- Column No= 2, Name= Description, Data Type= Text
- Column No= 3, Name= Amount, Data Type= Decimal, Data Formatting Culture= en-US.
Step 4: Now we click on the 'Field Mapping' button in the'Posting Line Definition' tab:-

Step 5: Now the 'Posting Exchange Mapping' window will open, and we click on NEW:-
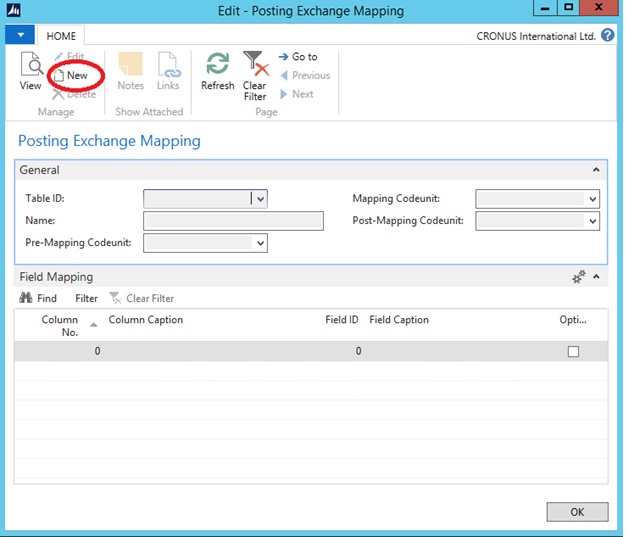
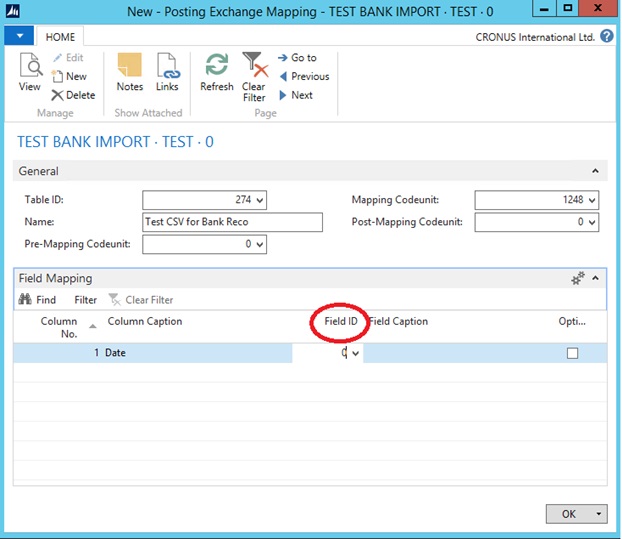
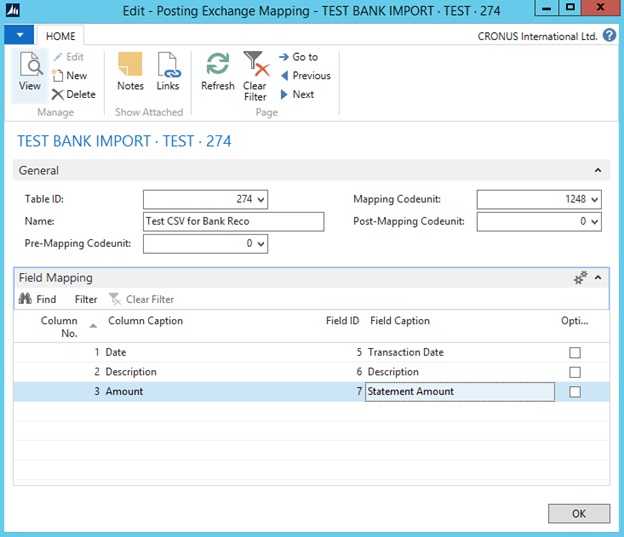
Now we need to enter the following details to map the posting exchange with the Bank Reconciliation Line Table, through which we will import the Bank Statement.
General Tab:-
Table= 274,
Name = Test CSV for Bank Reco
Mapping Codeunit = 1248.
Field Mapping Tab:-
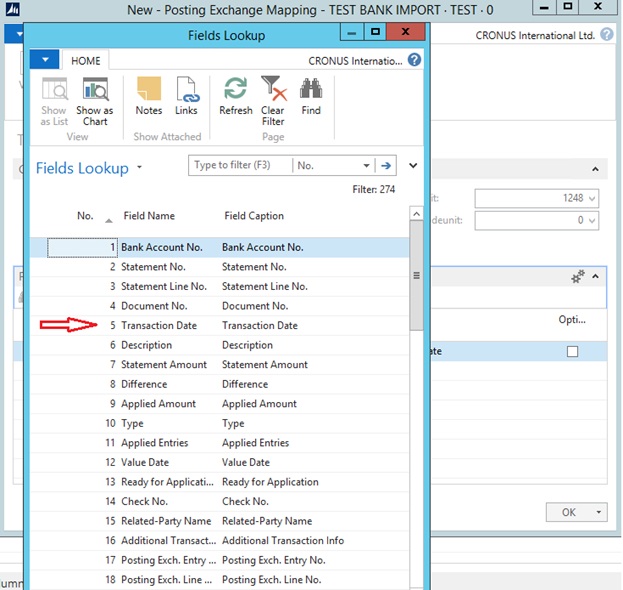
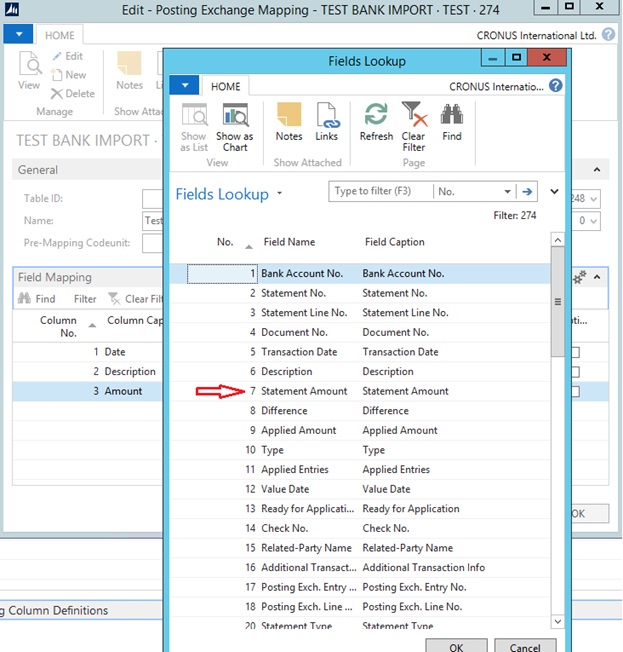
- In Column No. click on the drop down, then select the first line i.e. Date, it will point to the Posting column Definition from the posting exchange definition page. Then, we will go to Field Id column, click the drop down.
Fields Lookup will opens. Select the 'Transaction date' (Row No = 5), then click on 'OK'.
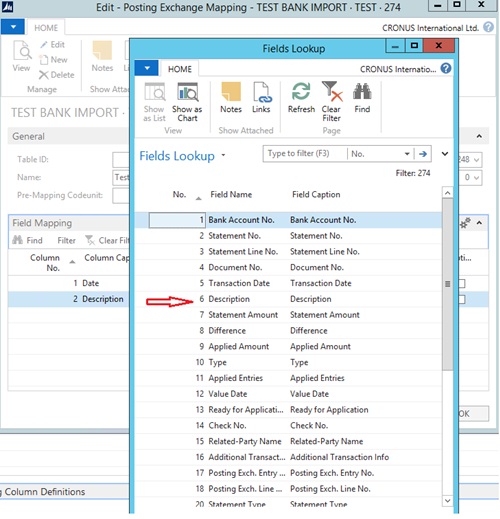
- For the second line, similar to what we did for the first line in the previous step, we click in Column No. on the drop down, then select the second line i.e. Description. Then, go to Field Id column, click the drop down Fields Lookup will open, Select the 'Description' (Row No = 6), then click on OK.
- For the third line, again in Column No. click on the drop down, then select the third line i.e. Amount. Then, we will go to Field Id column, click the drop down. Select the 'Statement Amount' (Row No = 7), then click on OK.
Now the Mapping Window will look something like this:-
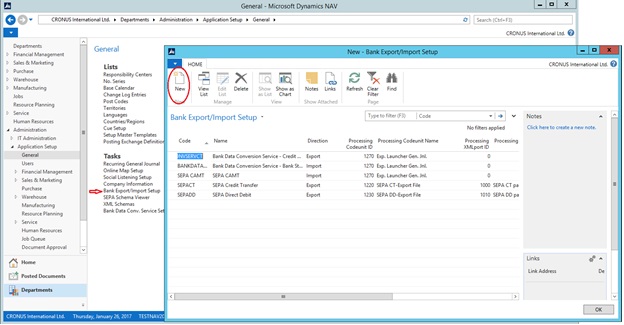
Step 6: Now we need to go to Bank Export-Import Setup:-
Path: - Departments/Administration/Application Setup/General/Task/Bank Export-Import Setup
Click on New.
For our sample, we enter the following details:-
Code = TEST BANK IMPORT
Name = Test for Bank Reco
Direction = Import
Processing Codeunit Id= 1270
Processing Codeunit Name= Exp. Launcher Gen. Jnl.
In the Posting exchange Definition Code, Click the drop down & Select = TEST BANK IMPORT
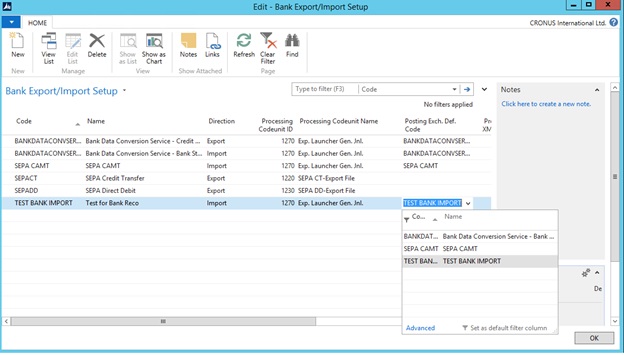
Click OK
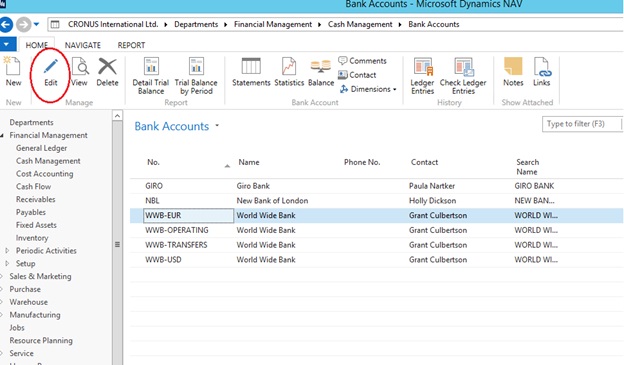
Step 7: Now, we go to the Bank Account Card:-
Path: - Departments/Financial Management/Cash Management/Bank Accounts
Select the Bank 'WWD-EUR' and click on 'Edit'
Step 8: In the Bank Account Card, In the Transfer Tab, Bank Statement Import Format, Click drop down and select 'TEST BANK IMPORT':-
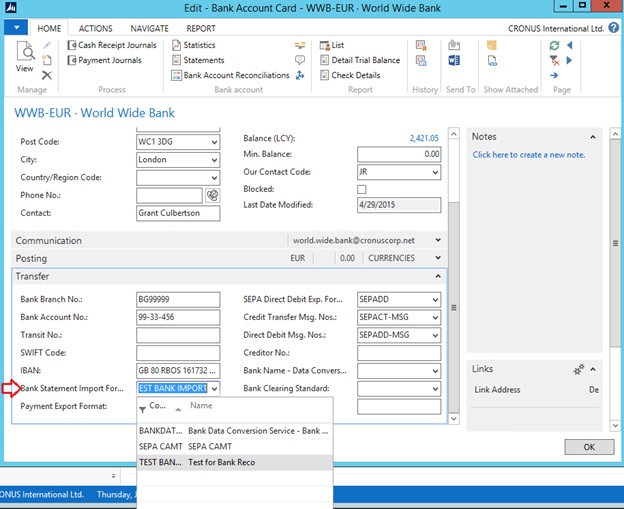
Click Ok.
Step 8: Now, we go to the Bank Account Reconciliation Page:-
Path: - Departments/Financial Management/Cash Management/List/Select- Bank Account Reconciliation
Click New.
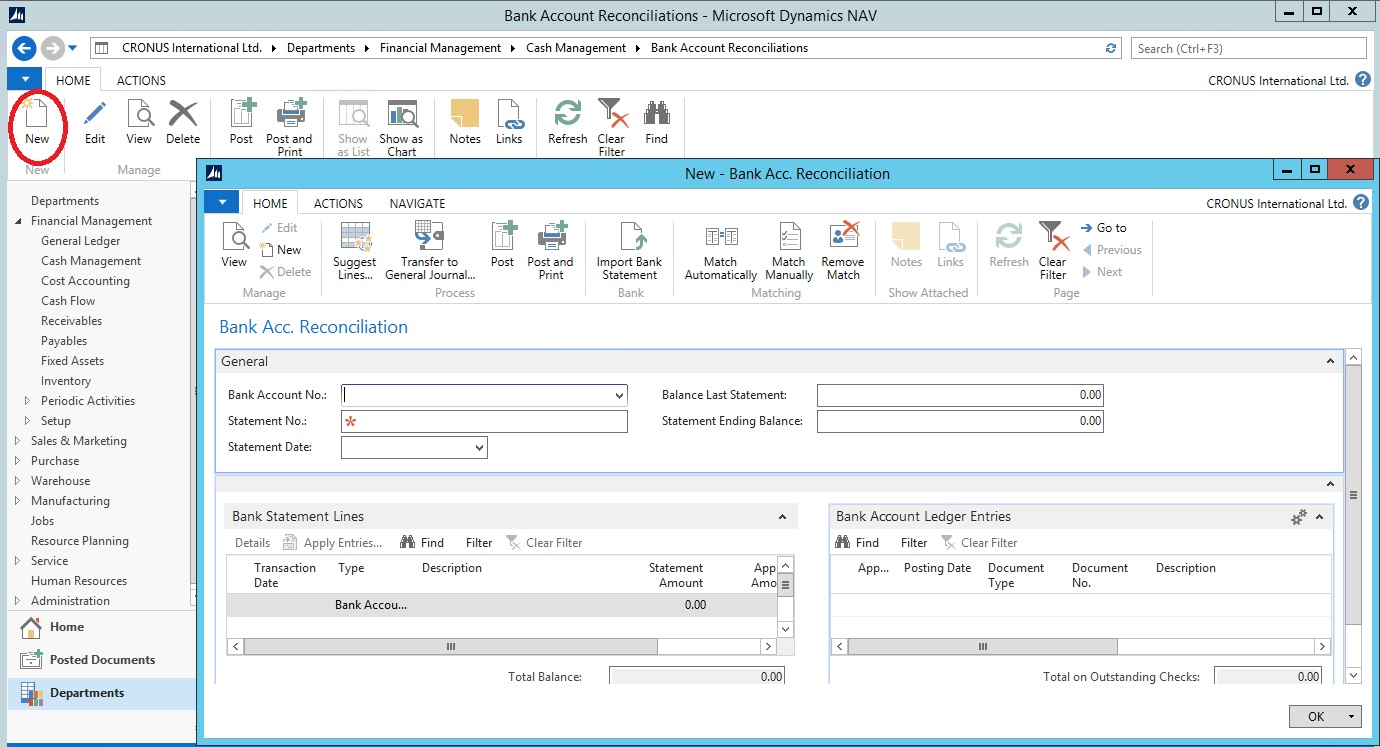
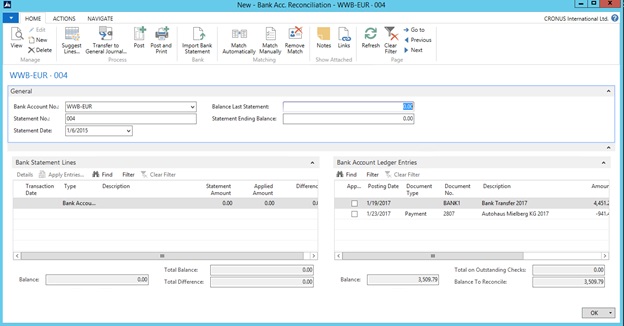
Step 9: The Bank Reconciliation page will open:-
In the Bank Account No field, click the drop down and select 'WWB-EUR'
Enter a Statement No, say '004'
Statement Date= (Current date)
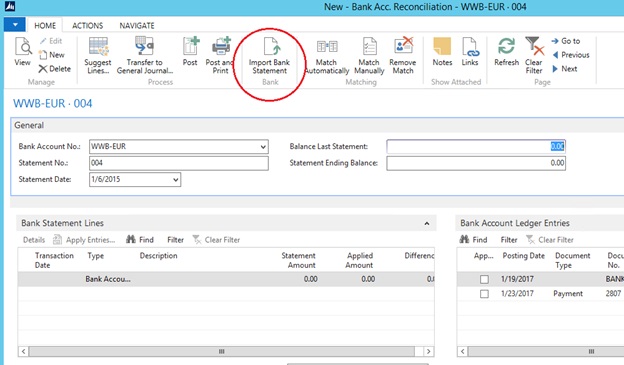
Step 10: Click on Import Bank Statement under Home tab:-
Step 11: Sometimes, you may need to edit the bank statement prior to importing, because, Dynamics NAV 2015 Bank Reconciliation requires a single ‘Amount’ column with -
- The positive amounts representing money coming in i.e. deposits from customers, etc. .... and the negative amounts for payments coming out of the bank, i.e. fee deductions & payments to Vendors, etc.
For some of the bank statement .CSV files received, the banks may use the opposite way to represent the transactions. so, the bank statement may show -
- “Debit” columns as money going out & “Credit” as money coming in.
Therefore, we may need to scrub the .CSV file and convert the two columns into a single ‘Amount’ Column. And for the amounts with a value in the ‘Debit’ column, we could multiply by minus one (-1), to ensure a negative number is used when the file is imported to Dynamics NAV 2015.
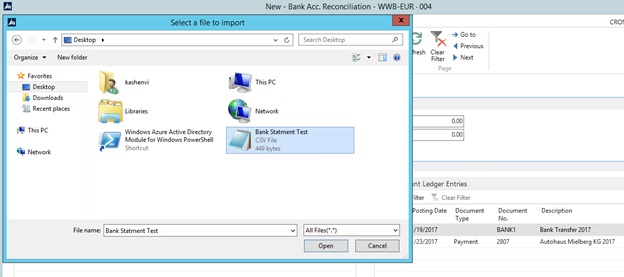
The sample file attached to this blog post needs to be unzipped and you may save the file in the desktop.
Select the .CSV File to be imported from the destination folder. And click open.
Step 12: The transaction will be imported as below -
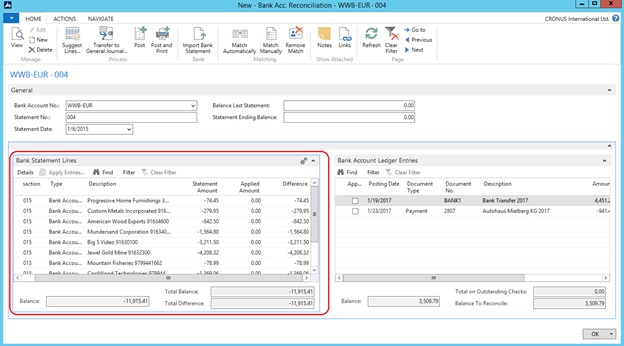
Thus, we could import a sample .CSV file in Dynamics NAV 2015 for the Bank Reconciliation purpose.
Hope this blog post is informative and of use for you :)