Packaging CQWP customizations to WSP as a Sandbox Solution for Deployment on Sharepoint Online
Content Query Web Part(CQWP) can be customized using the Style sheets available in Style Library. Customizations can be done easily from SharePoint Designer, however it does not provide any mechanism to package the the customizations made.
Packaging the CQWP Customizations into WSP is necessary when the customizations have to be developed in developer box and deployed onto SharePoint Online.
This post provides the steps to be followed to package the CQWP customizations to a Solution File(WSP) using Visual Studio.
Step 1: Creating an Empty SharePoint project in Visual Studio
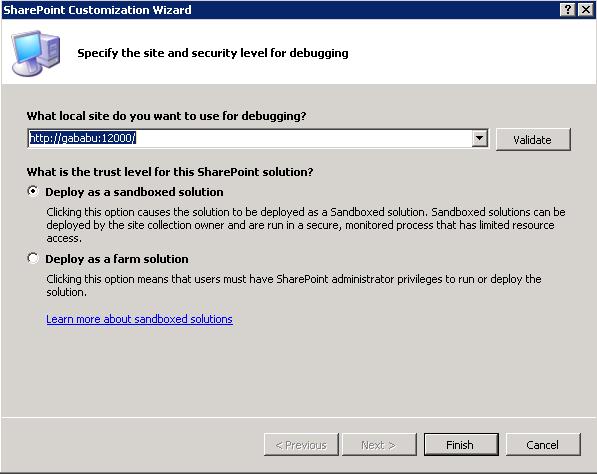
In order to package the customizations we will create an Empty SharePoint project as a sandbox solution so that it can easily deployed to SharePoint Online.
![]()
Open the Project Properties and set Include Assembly In Package to false as we don't need the dll to be copied.
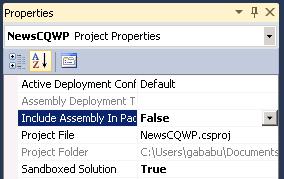
Also verify if the Sandbox Solution is set to true.
Step 2: Adding the customized xsl to solution
In this post I have considered customizing ItemStyle.xsl, however the same steps can be followed to customize other style sheets as well.
Editing the default ItemStyle.xsl will affect all the webparts referring to this style sheet, Instead it is a best practise to create a copy of this and work on it.
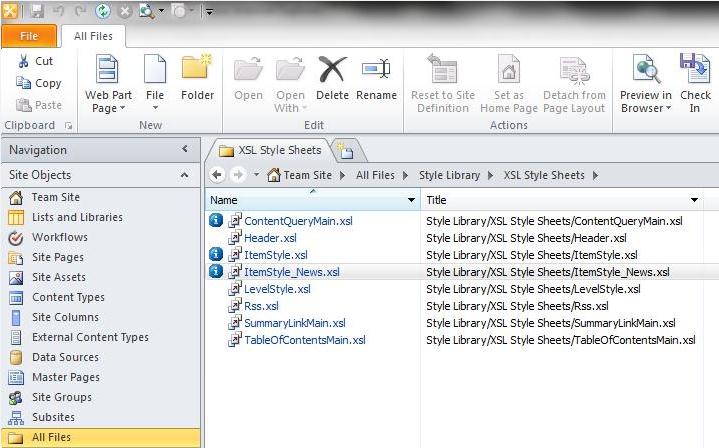
I have created a copy of ItemStyle.xsl and named it ItemStyle_News.xsl. I will be packaging this style sheet into the solution.
Custom Style name can be provided. To be more specific to the topic I am not providing the steps to customize the xsl in this post.
In the Empty SharePoint solution which we created in step 1 we have to add a style sheet.
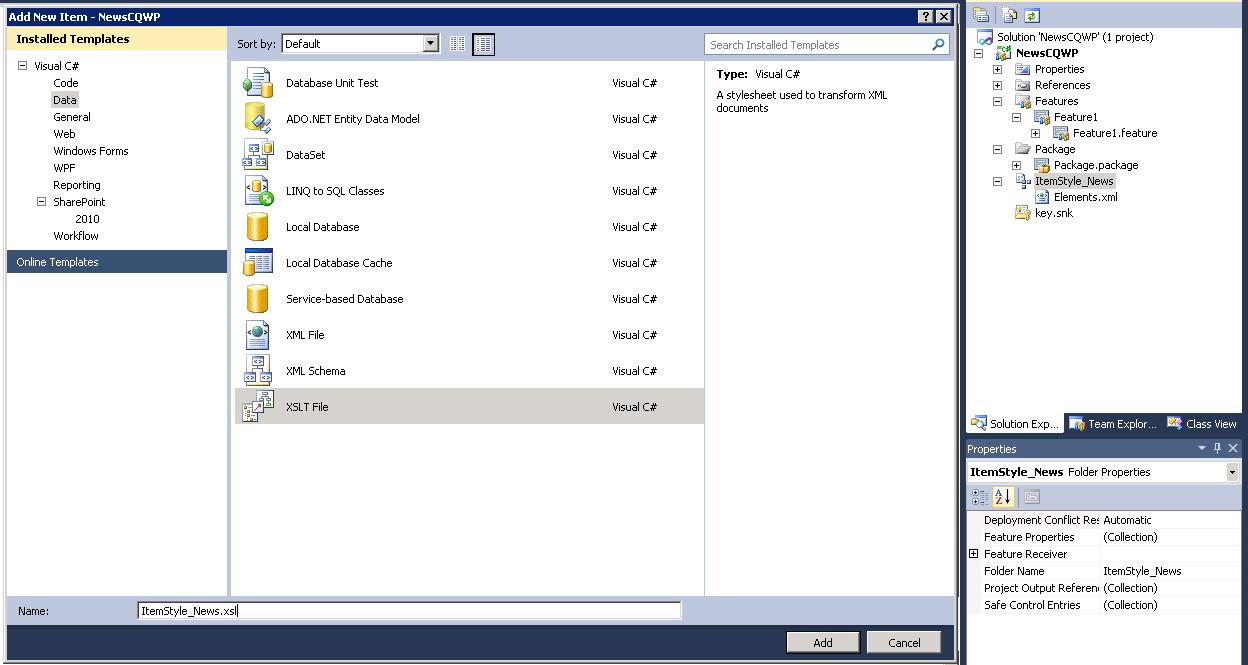
New Module Has to be created by Navigating to New Item -> SharePoint 2010 -> Module.
![]()
Stylesheet can be adding by Navigating to New item -> Data -> XSLT File. Change the Name to the same name which was given earlier for Custom ItemStyle, also provide the extension as .xsl instead of .xslt, in this example "ItemStyle_News.xsl".
Copy paste the File or content from Customized ItemStyle_News.xsl to Visual Studio ItemStyle_News.xsl.
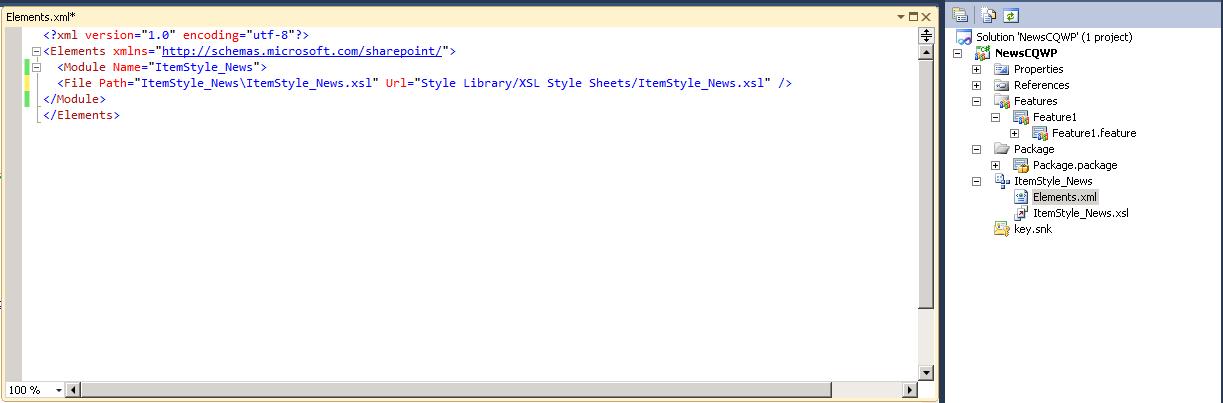
Once the xsl is ready we have to mention the destination of xsl file by opening elements.xml file. I have chosen Style Library/XSL Style Sheets/ItemStyle_News.xsl the same location where Default Styles are present.
Step 3: Including the CQWP webpart to the solution.
Once the CQWP is added to the site, export the webpart and make the necessary modifications like including the View Fields.
We have to mention the Custom Style sheets reference in .webpart file.
Open the .webpart file and modify the property ItemXslLink.
<property name="ItemXslLink" type="string" >/Style%20Library/XSL Style Sheets/ItemStyle_News.xsl</property>
You can also modify the Style you want to reference by modifying the property ItemStyle.
Build the solution and deploy to SharePoint site.
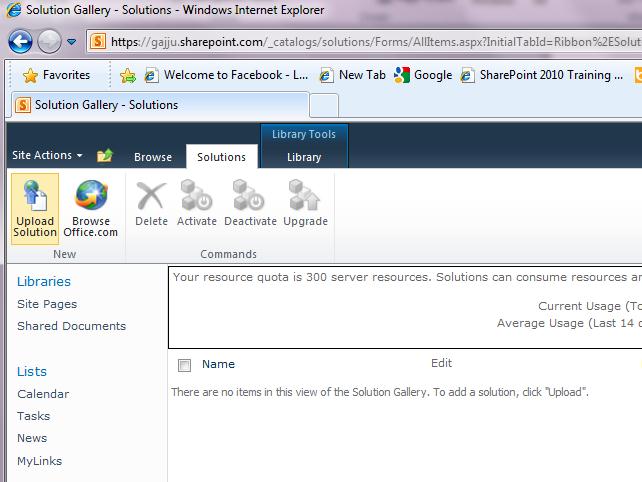
To deploy the solution Open Site settings of your SharePoint Online Site by navigating to Site settings -> solutions.

Upload and Activate the solution.
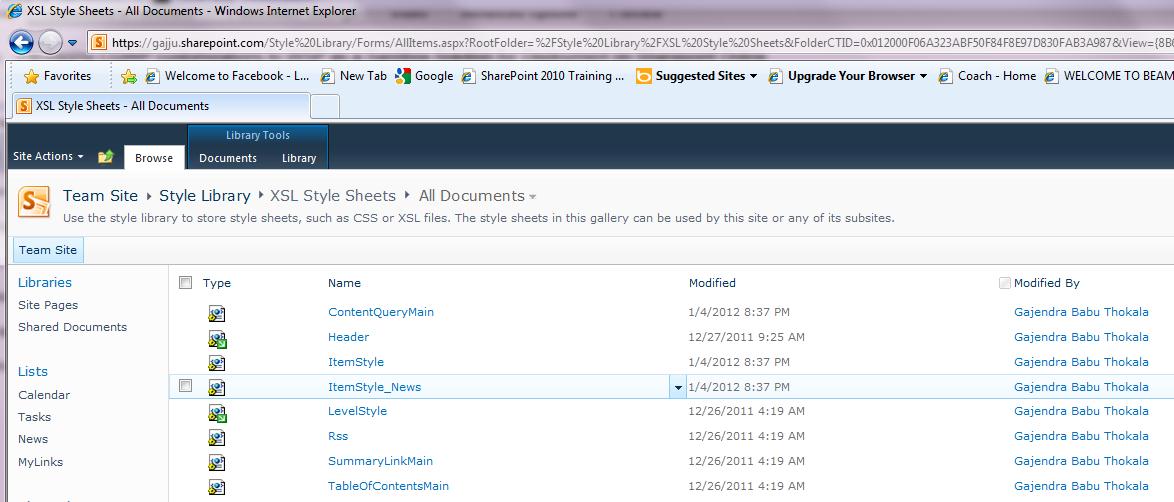
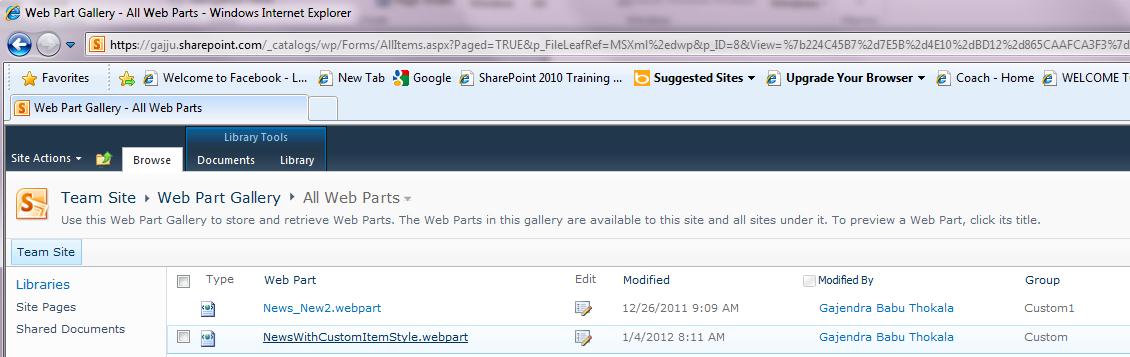
Once you activate the solution you should be able to the StyleSheet copied to XSL Style Sheets folder and CQWP webpart populated to Site Webpart Catalog.
Note: The steps provided also works for On Premise environment, however it is deployed as sanboxed solution not as farm based solution.
Hope this post helps in quickly packaging the customizations into solution files.