Pre-flight - Checking objects before an Exchange hybrid migration
Customers working with FastTrack Center for mail migration can use a tool called Integrated Preflight. It checks for basic migration pre-requisites, such as:
- Does the target object exist in Office 365?
- Does it have the required e-mail addresses?
- Are all the e-mail addresses valid?
- Does the admin account have the required permissions?
The Preflight tool does not check everything, but it is a good start and it saves a lot of later time. Here are some things the proposed pre-flight will not check:
- Is the user properly licensed?
- Are there corrupt items in the mailbox?
- Does the network have enough bandwidth?
The tool help customers identify potential errors early and fix them before attempting the mailbox migration. Imagine you tell you user “next week you will have a 100 GB mailbox” and that next week you find out that a missing e-mail address prevented the migration. That is what we want to prevent.
The Preflight tool, however, is only available to customers using our migration services. But that does not mean you cannot apply the same principles to achieve the same results by yourself: You can use PowerShell to connect to Exchange online and perform the same tests we do.
Performing the tests yourself
The first thing you need is a computer running an operating system supported by Office 365 (Windows 7 SP1 or superior) and PowerShell 3.0 or superior. And internet connectivity, of course.
Then you connect to Exchange Online (or create a remote PowerShell session in Exchange Online, if you will):
| $CloudCred = Get-Credential $CloudSession = New-PSSession -Credential $CloudCred -Authentication Basic -ConnectionUri https://ps.outlook.com/powershell -AllowRedirection -ConfigurationName Microsoft.Exchange Import-PSSession -Session $CloudSession -AllowClobber |
Now you need some information regarding your local infrastructure:
- A credential with the Recipient Management role assigned to it in Exchange 0n-premises
- The FQDN where the EWS service is published - mail.contoso.com in this example
- The primary e-mail address of mailbox you are testing - user@contoso.com in this example.
You can get the local credential the same way you did for the cloud credential, simply using a different variable:
| $LocalCred = Get-Credential |
Now you are good to go and can simulate the move request creation with a simple PowerShell command:
| New-MoveRequest -Remote -RemoteHostName "mail.contoso.com" -RemoteCredential $LocalCred -Identity "user@contoso.com" -TargetDeliveryDomain "contoso.mail.onmicrosoft.com" -WhatIf |
If the command above returns an error message, it will probably cast some light on what you should fix. If it simply returns a “what if” message, it means the mailbox is ok for migration.
A sample script
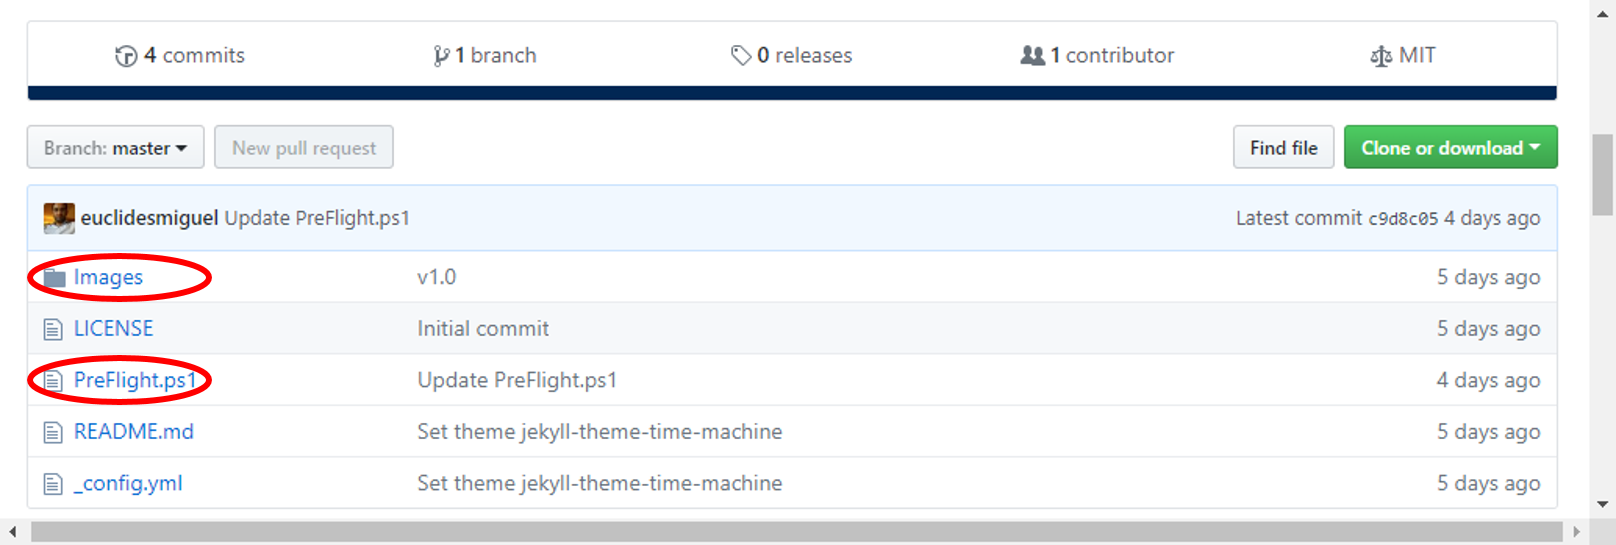
If you want something more elaborate, you can develop your own script. You can even make it a GUI app, such as the one in this example.
For the sample script to work, you must download the .ps1 file and the images folder.
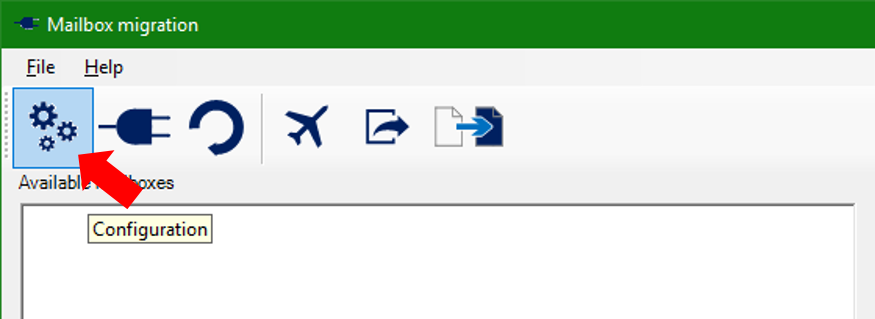
Then you run the script. It will open a graphical user interface. You should click on the first button to configure the connection to your environment and Office 365. The sample script will not save credentials or configuration data.
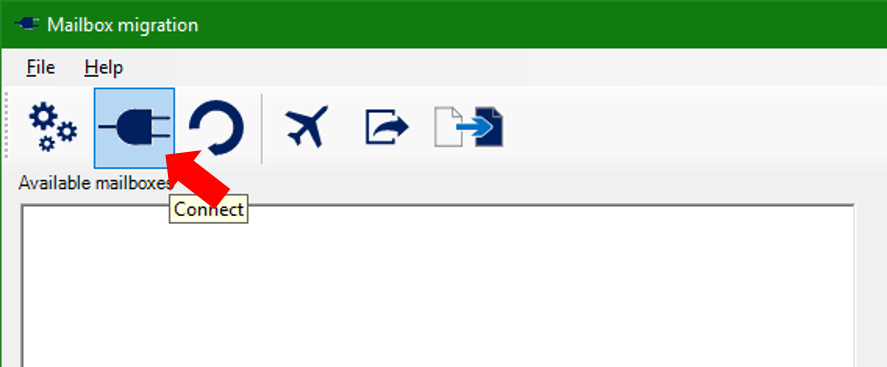
The you click on the Connect button. The sample script will connect to Exchange Online and load the list of mailboxes available for migration.
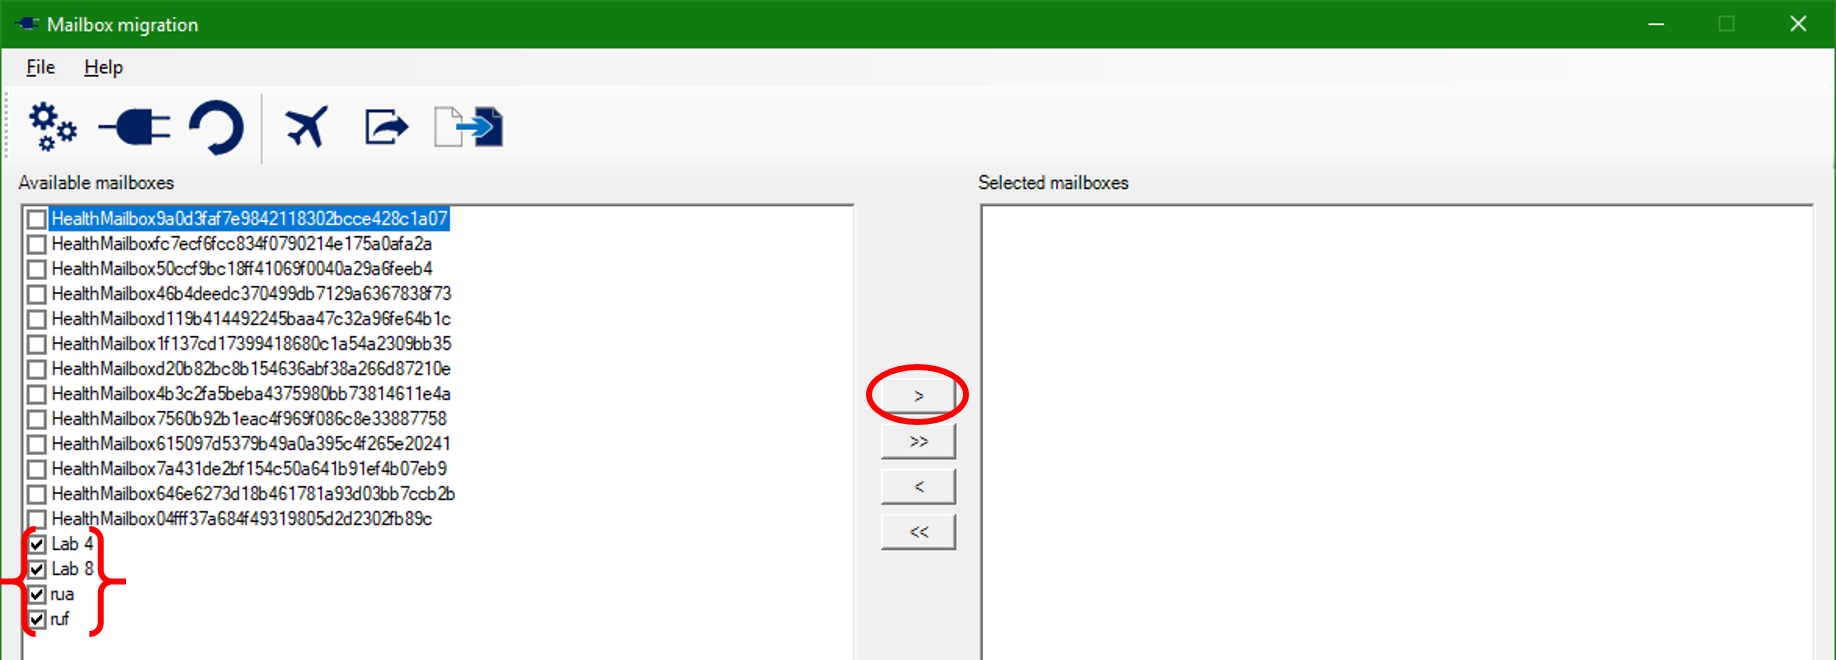
Select the mailboxes you want to check and click the add button (>).
Now you simply click the Run pre-flight and wait for it to finish. It can take some time to finish, but you will see a progress bar at the bottom-right corner.
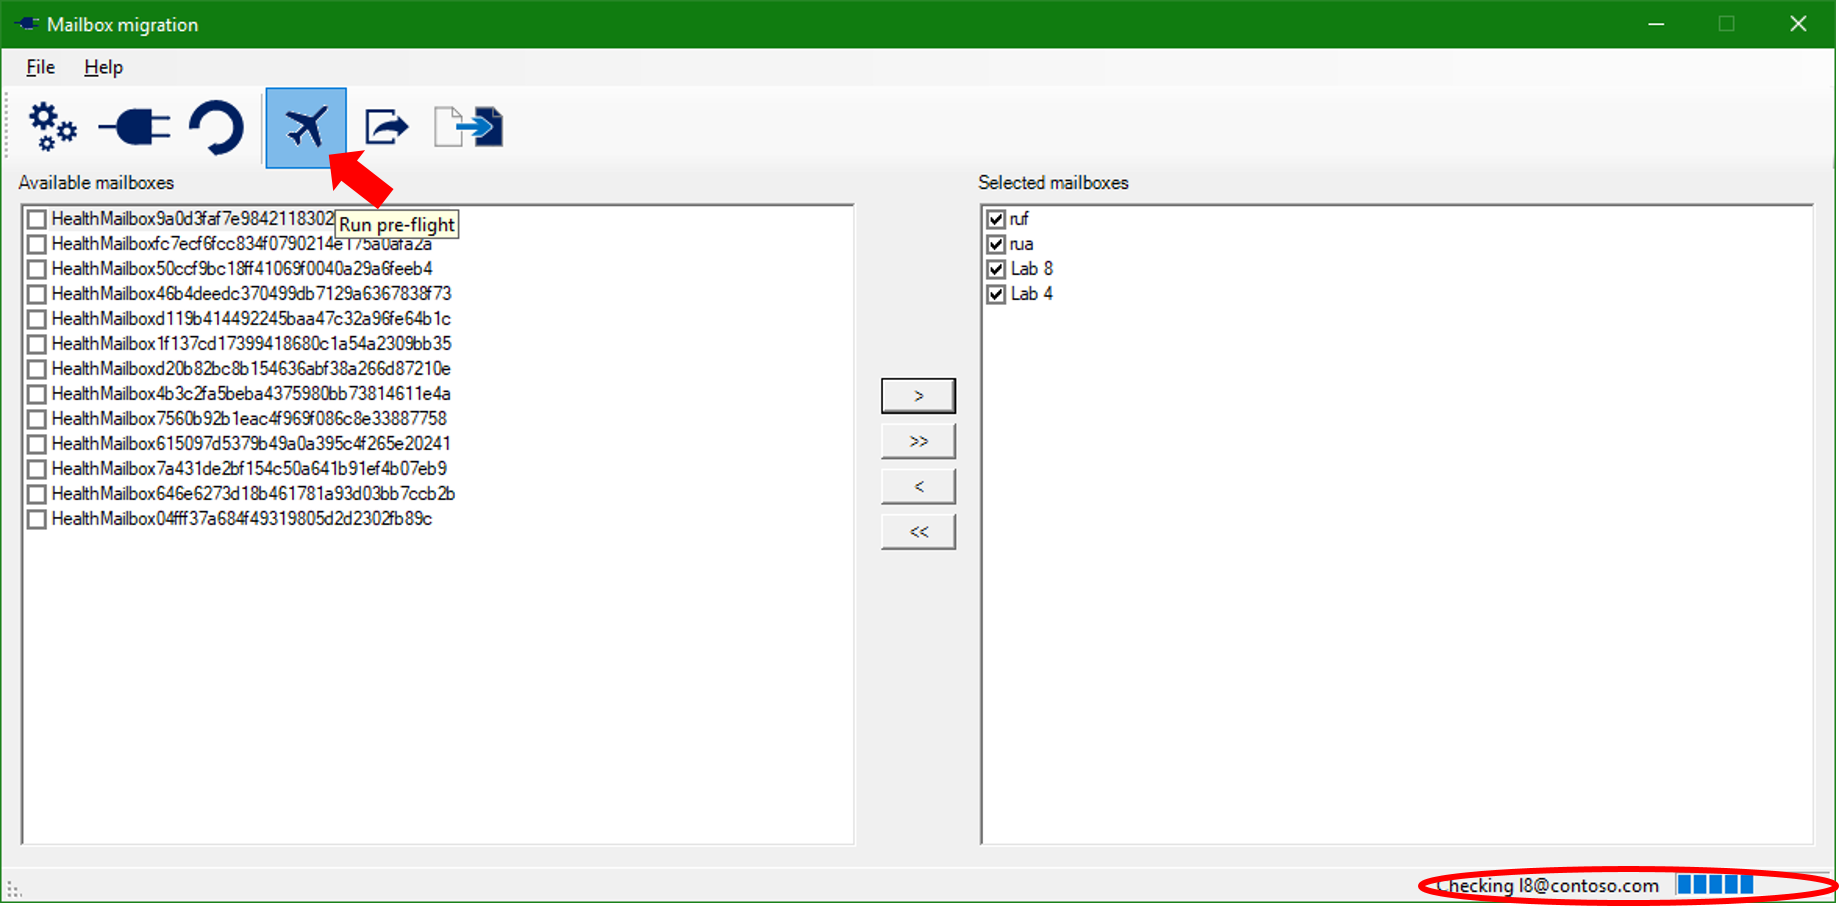
When the sample script finishes the pre-flight checks, it will save the results in the Reports folder, within the folder where the script is located.

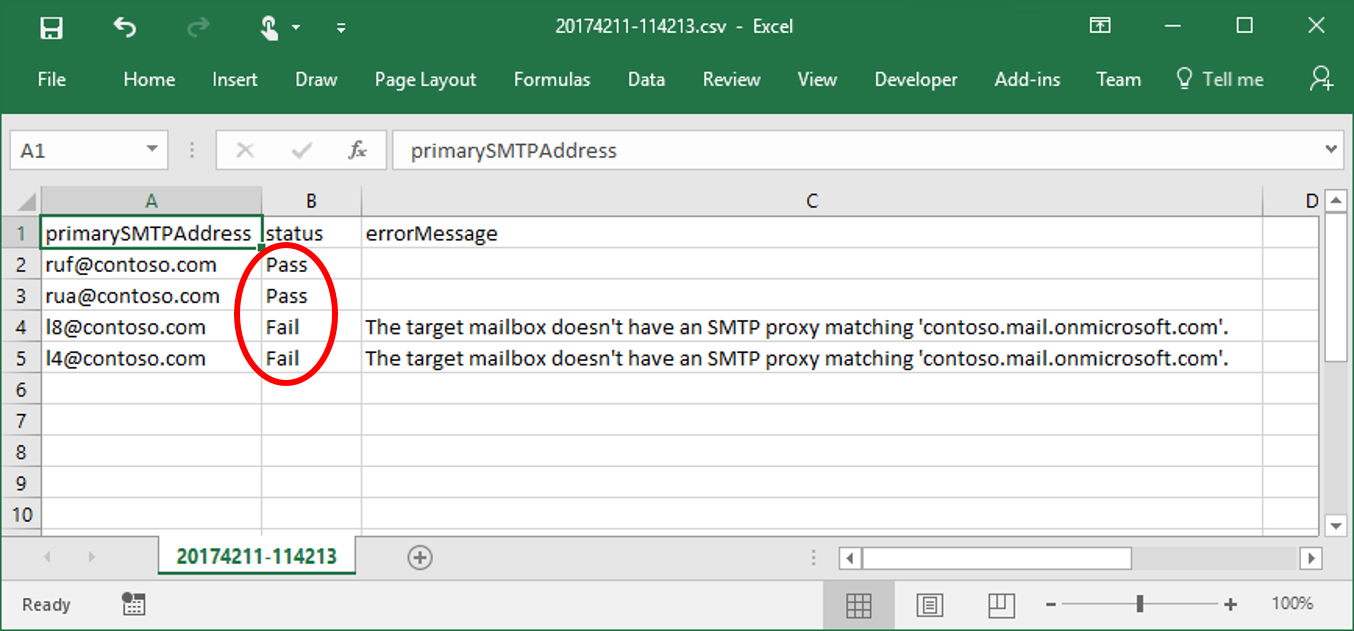
Every time you run a pre-flight, the sample script will generate a report file with the name convention YYYYYMMdd-hhmmss.csv (year, month, day, hour, minutes and seconds).
The report file will have a line for each mailbox tested. Each line has the mailbox’s primary SMTP address, the status (pass/fail) and an error message for the mailboxes that fail the pre-flight.
Now it’s in your hands to adapt the sample script for your specific needs and check the migration readiness. Enjoy it!