Hybrid Configuration Wizard
As the next part of the Hybrid Blog Series we are introducing a frequently asked for automation script. This script will configure On Premises SharePoint 2013 with Office 365 SharePoint Online to enable hybrid search query federation.
This script and blog article are for use in configuring an outbound search hybrid experience between SharePoint 2013 Server and SharePoint Online. In preliminary testing this also works with SharePoint 2016.
For any feedback, improvements, feature requests or bug fixes please place comments below.
Pre Requisites for completing the configuration process
- You need to log in to SharePoint Server with an account that has farm administrator and a local server admin privilege.
- The account should also be a local administrator across all SharePoint boxes in the farm.
- The script assumes that the Root Site Collection of the SharePoint Web Application either is a search center or has a search center web within it e.g. https://sharepoint.contoso.com/search . If this is not the case, then additional configuration of result sources and query rule will be required to retrieve search results from SharePoint online.
Executing the Configuration Wizard
- Extract hybridwizard.ps1 and the resources files from the downloaded zip archive to a folder named c:\scripts. This is a requirement for this version, however in a future release we will include a direct download capability for updated components.
- You can execute the script from the ISE or from the PowerShell command console
- Open Elevated PowerShell Session or elevated ISE session and execute hybridwizard.ps1.
4.Expect a short delay while SharePoint Snappin is loaded followed by the mainform loading. If executing the wizard in ISE the form may launch behind the ISE session. 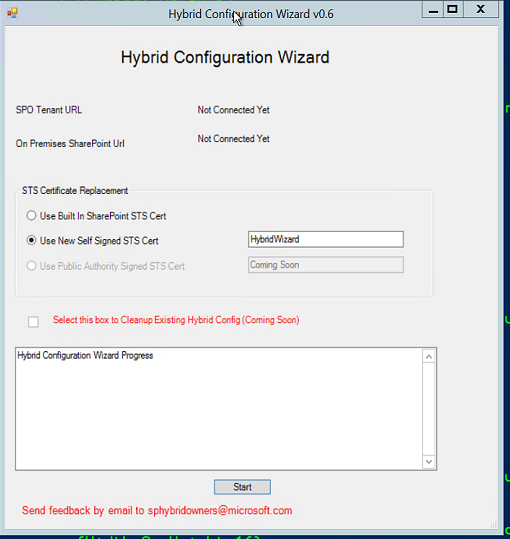
The main screen currently defaults to using a new self-signed certificate for configuring the STS trust. Optionally you can select the current default STS certificate.
The textbox next to the New Self Signed Certificate option will be used as the friendly name for the certificate and as the name for the result source and query rule.
Some options on the form are disabled and will be enabled in a future release of the wizard.
Account Privilege Validation
5. Click Start to proceed. If the logged on user account does not match the local admin criteria mentioned in the prerequisites section, the wizard will exit. First step it is to validate local admin privilege, click OK to proceed further. 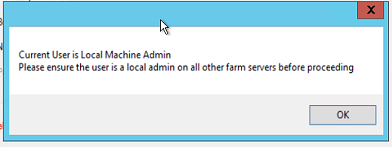
Service Application Validation
6. The wizard will validate that all the required service application and service instances have been deployed and enabled on the farm. If any required service is missing then the wizard will exit. Otherwise you will be presented with a success screen as below, click OK. 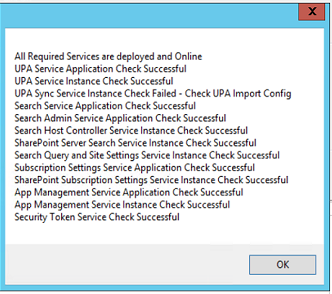
Installation Progress Status
7. Throughout the wizard execution, the progress screen will update with the status and reflect and warnings or information that the admin needs to be aware of. This wizard validates if Microsoft Online PowerShell and Microsoft Online Services Sign-In Assistant is installed in the machine else, these will be added automatically. 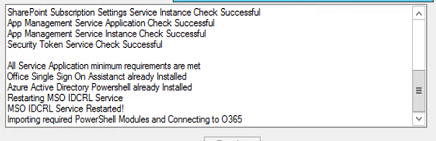
Authenticate to Azure AD
8. You will be prompted to supply credentials for your tenant once the baseline requirements are validated. Please ensure that you provide the global admin credentials. 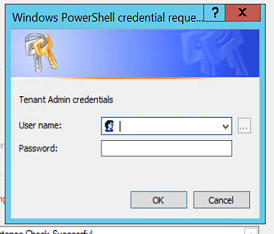
Self-Signed Certificate Generation
9. Next step is to provide the password for securing the certificate. This certificate is exported from the local certificate store for copying to other farm servers and for conversion and import to Azure ACS. If you executed the script in ISE this will be a popup dialog. If you executed it in a command window, it will be a request in the command window. 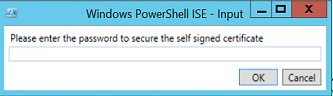

10. Accept the challenge to replace the signing certificate on the local farm. Again this will either be a popup or a command window prompt. 

11.Progress status updates with the STS trust configuration information. 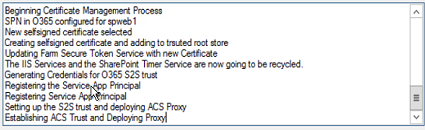
Hybrid Wizard Completion Confirmation
12. Hybrid Wizard completes, click Exit to leave the wizard 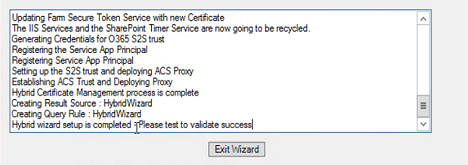
Hybrid Validation
13. By now the Result Source and Query Rule have been configured on the root site of the first web application on the farm. Navigate to site settings > site collection settings > manage result sources. You must perform the next steps as a site collection administrator. The user must also have been synchronized to O365 AAD and have access to the O365 tenant root SharePoint site. 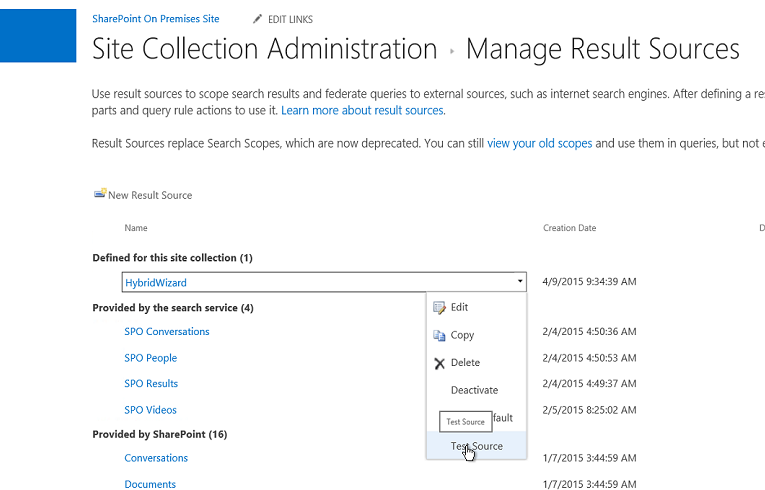
14. Click Test Source and you should get a succeeded if all is deployed correctly. If you get a timed out error message, just try again as this is an expected response on occasion from SPO. If you get an error, then please post a comment. 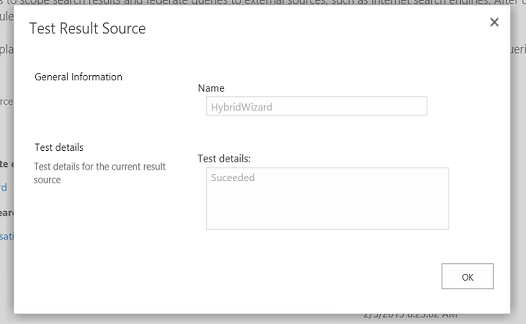
15. After testing the result source navigate to the Site Collection Settings > Manage Query Rules page. Select the HybridWizard result source from the first drop down followed by editing the HybridWizard Query Rule. 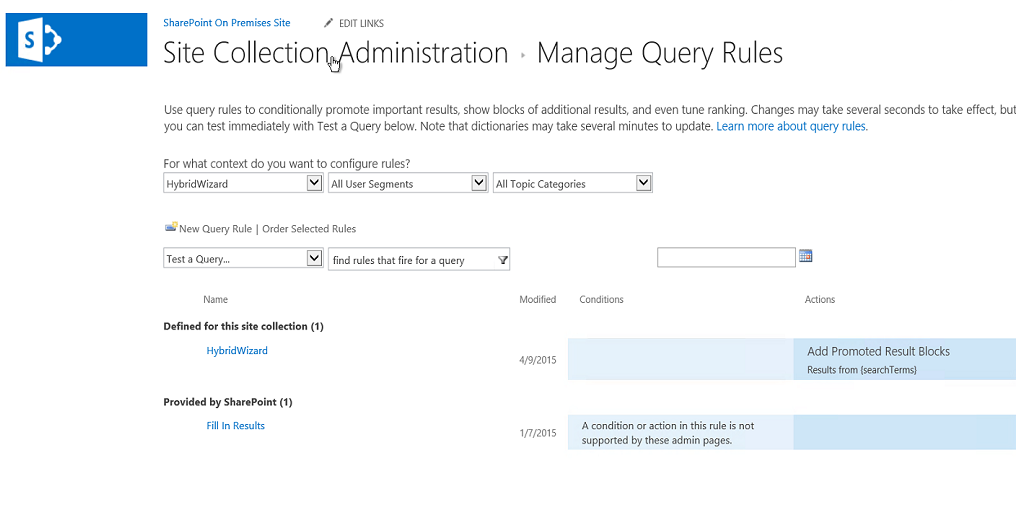
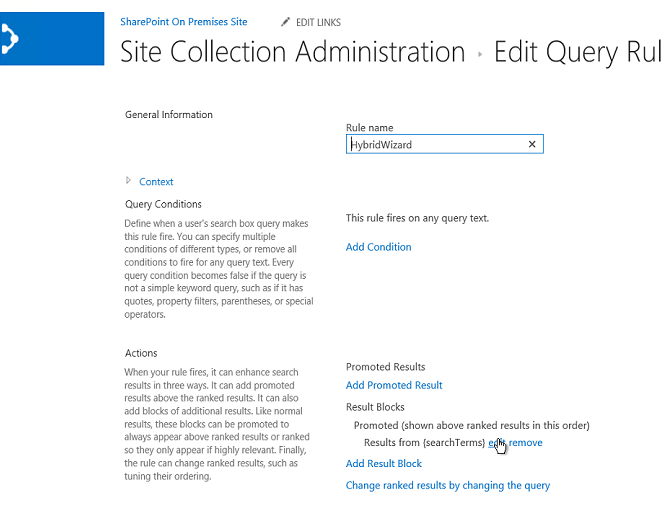
16. One the Edit Query Rule page click to edit the result block.
17.Within the Edit Result Block page choose Launch Query Builder.
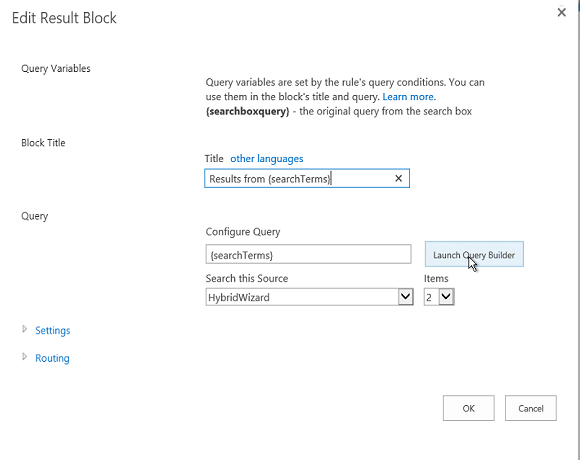
18.Execute a test query. Note the Asterisk next to the {queryTerms}. Add the * and click Test Query. If everything is working correctly, you should get results from the SPO search service. If you get an error then please post a comment. 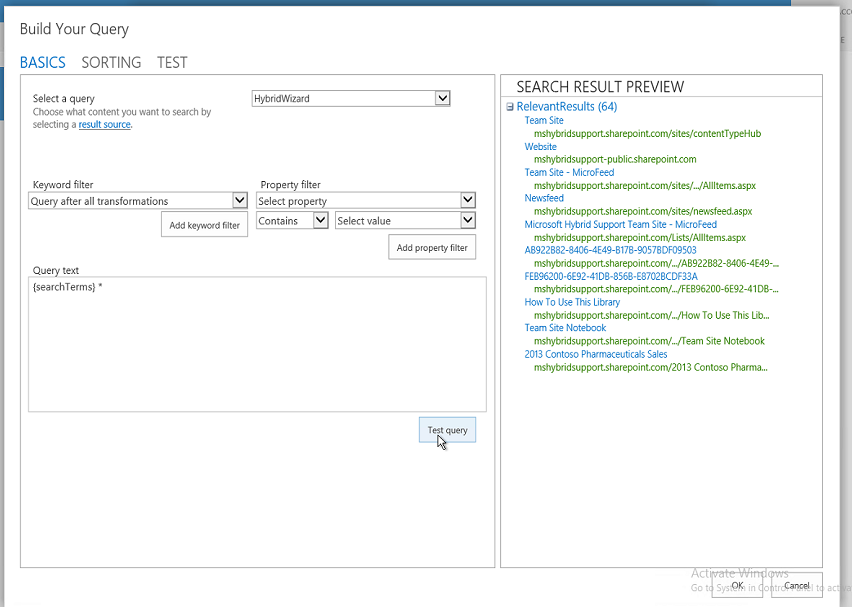
Finally navigate to your root site collection search center and issue a search query, perhaps try * to retrieve results for SPO and On-Premises.
We leave the final screenshot to your imagination.